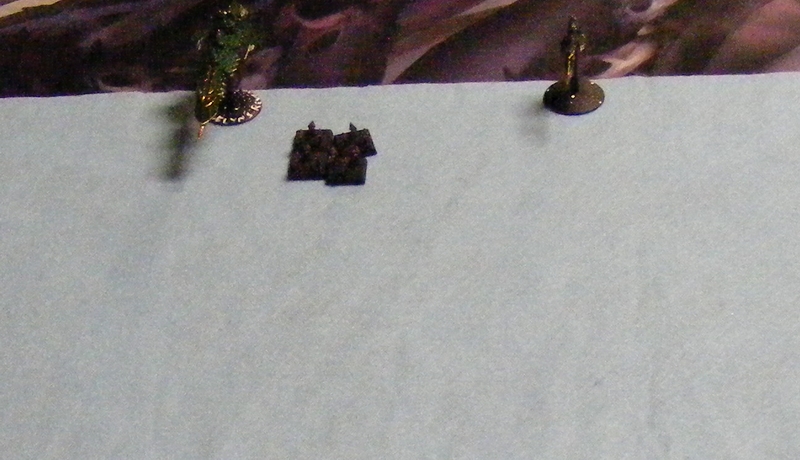
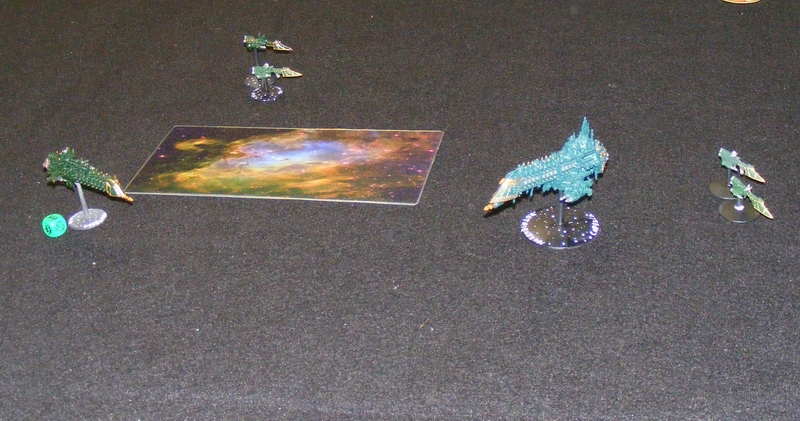
Tau Kor’or’vesh Kir’shashvre “Castellan” escorts


FINALLY. This squadron has been plaguing me for months. These Castellan escorts have almost as much detail as larger Forgeworld Tau capital ships in less than 1/4 the area. The three color scheme doesn’t make it easy. Finally, the Tau script on the bases took forever because even though there was only one word per ship, it was much harder than the big ships with multiple words. I had to do it OVER and OVER and I got sick of it.
I am not looking forward to the 8 Wardens, even though Kir’la is only a 5 letter word.
However, I am taking a break from the Tau. Coming up next is some battle reports from Highland in prep for this year’s Golden Rhino tournament. After that, BIG projects for the Azure Flames which are in various stages of development. This is an exciting time! Stay tuned!
Azure Flames vs. Imperial Navy – Escalating Engagement 1500pts
Stephen and I have played pretty much every mission, except Escalating Engagement. We dropped 1500 points. Who’s gonna come out on top?
———————————
Bozeman – Azure Flames Space Marines (Space Marine Crusade Fleet)
-Master of the Fleet Zeraf Antonius, Ld 10, 3 re-rolls (aboard the Honor)
-Strike Cruiser Honor, Extra Shield
-Strike Cruiser Vigilance, Extra Shield
-Strike Cruiser Courage, Extra Shield
-Strike Cruiser Sacrifice, Extra Shield
-Strike Cruiser Duty, Extra Shield
-Nova Frigate x5, Light Squadron
-Hunter Destroyer x4 Wrath Squadron
-Hunter Destroyer x4 Vengeance Squadron
———————————
Stephen – Imperial Navy Segmentum Obscurus Bastion Fleet
-Admiral, Ld 9, 1 re-roll (aboard one of the Gothic class cruisers)
-Lunar class cruiser, Nova Cannon
-Lunar class cruiser, Nova Cannon
-Gothic class cruiser
-Gothic class cruiser
-Gothic class cruiser
-Dauntless class light cruiser, lances
-Dauntless class light cruiser, torpedoes
-Firestorm x3
-Cobra x2 and Sword x1
———————————
Mission: Escalating Engagement
Battlezone: Flare Region
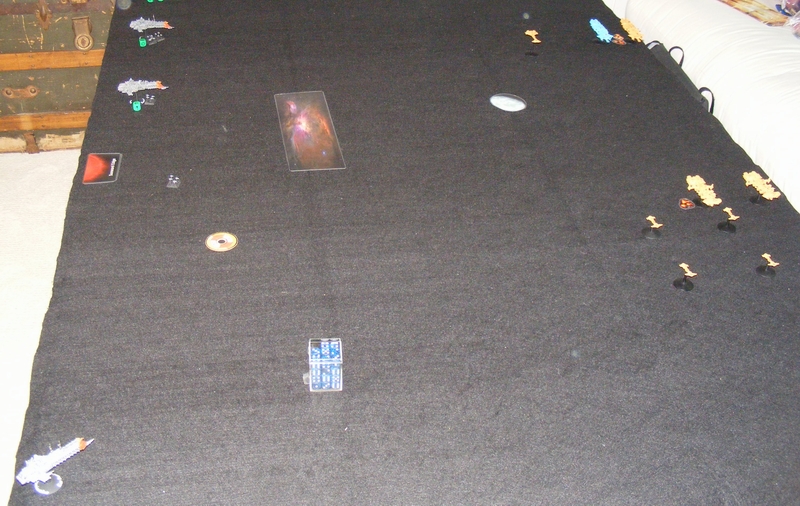
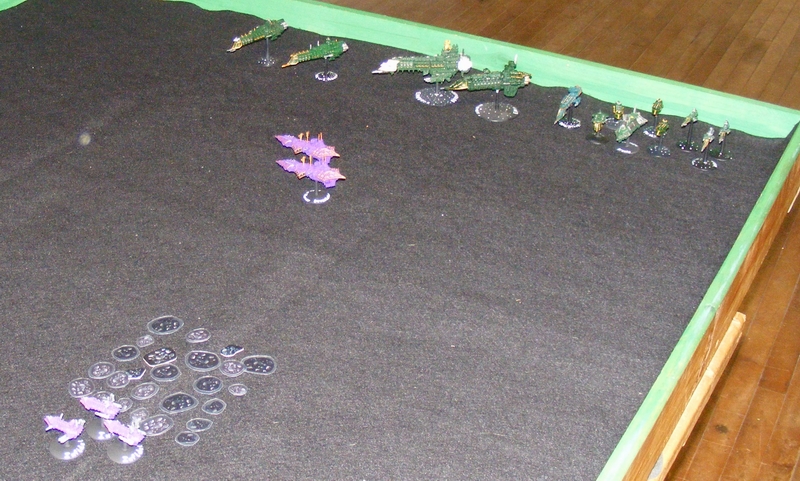
Setup:

We rolled 2 Solar Flares, so terrain was scarce on the board.
———————————
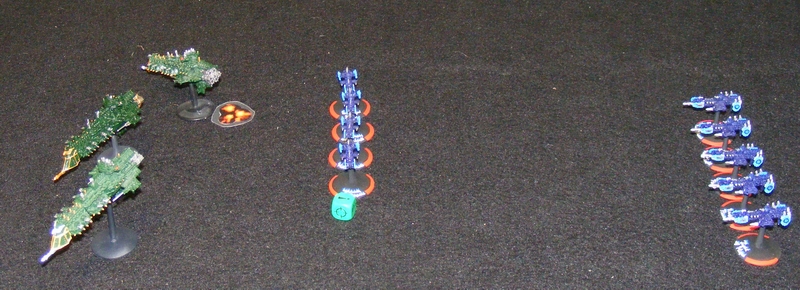
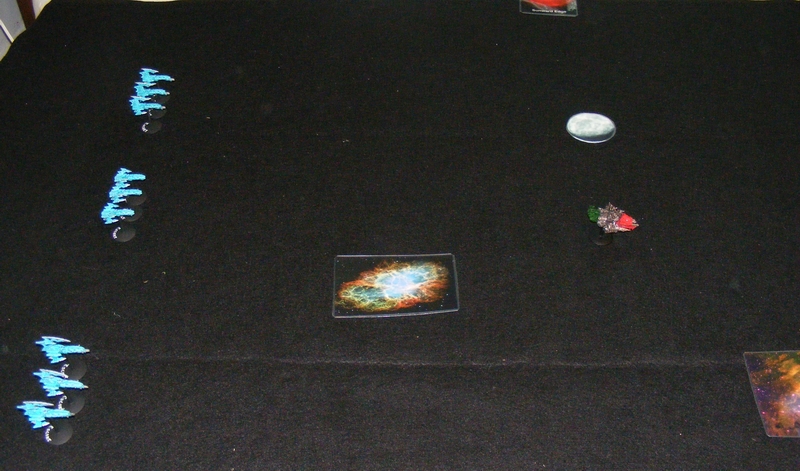
Turn 1 – Azure Flames
Wrath Squadron goes on Burn Retros in order to hide behind the asteroids.

Turn 1 – Imperial Navy
Squadron of 3 Gothic cruisers advances.

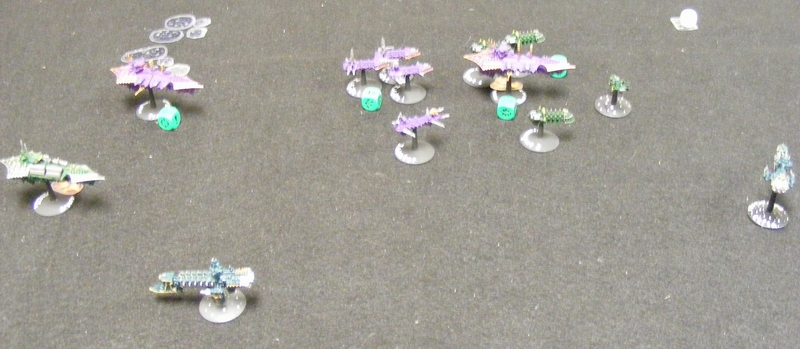
Turn 2 – Azure Flames
Light Squadron appears on the right board edge, but fails to go on All Ahead Full. Wrath Squadron, unable to Burn Retros again, pops out and fires batteries and torpedoes at the Gothic class ships. The Gothics Brace for Impact. Batteries take down one shield, but then the torpedoes die in the resulting blast marker! Note to self: cool it on the crappy batteries when the badass torpedoes are on the line.

Turn 2 – Imperial Navy
The Gothic ships come forward and fire, but the most incredibly awful rolls followed by the most incredible Brace Saves by Wrath Squadron keeps all of them alive!

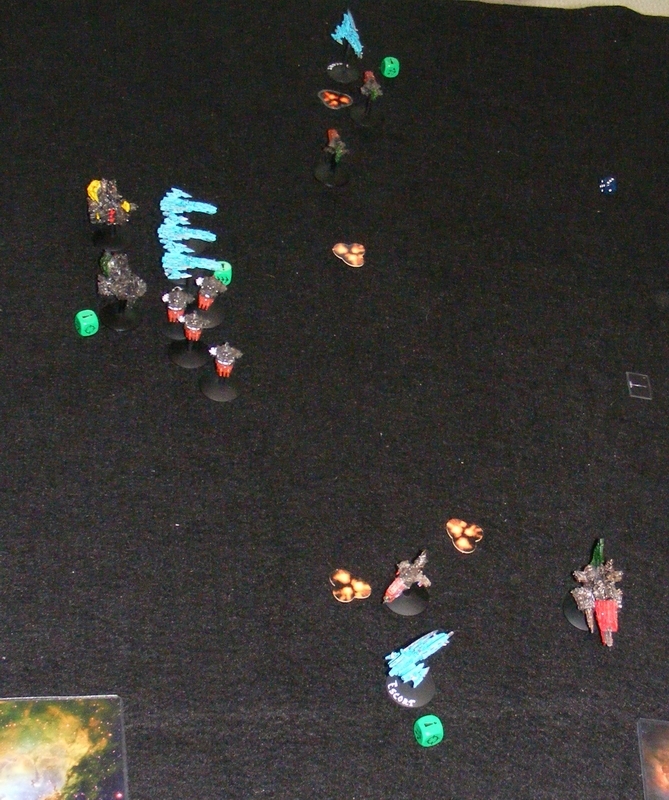
Turn 3 – Azure Flames
Wrath Sqaudron flies through the Gothics and takes down one of their shields. Light Squadron tries to go on All Ahead Full again and fails again.
Turn 3 – Imperial Navy
SOLAR FLARE OCCURS! Gothic ships go on Burn Retros because Blast Markers make Come to a New Heading useless. They barely stay in formation. A few lance shots take out one of Wrath Squadron. Turn not pictured.
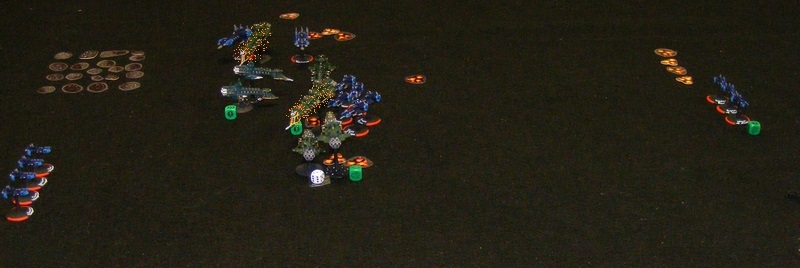
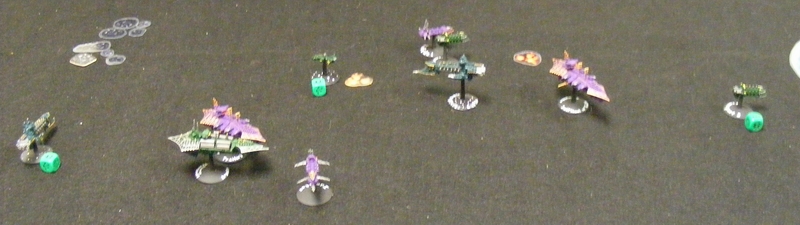
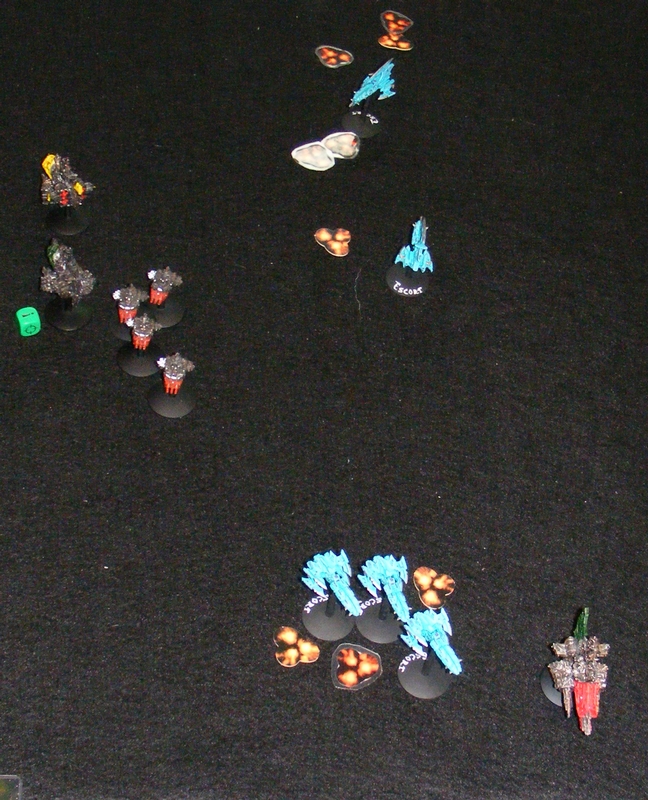
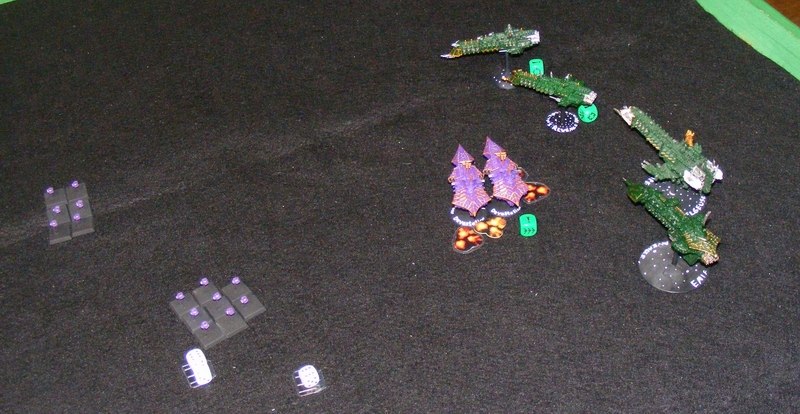
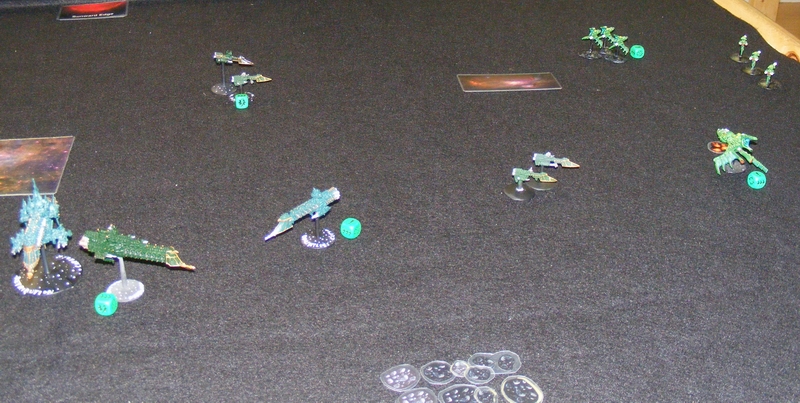
Turn 4 – Azure Flames
Squadron of Vigilance and Courage comes in from the far long edge, fires torpedoes and Thunderhawks, doing serious damage to one of the Gothics, and doing a bit to the other two. Light Squadron takes a big risk by flying into blast markers and blasting the Gothics, crippling one, thanks to Lock On.

Turn 4 – Imperial Navy
Squadron of 2 Dauntlesses arrives on the left board edge, goes on All Ahead Full. Squadron of 2 Lunars arrives and peppers the Strike Cruisers with Nova Cannons. Poor rolls take down one shield. The crippled Gothic tries to disengage, but fails.

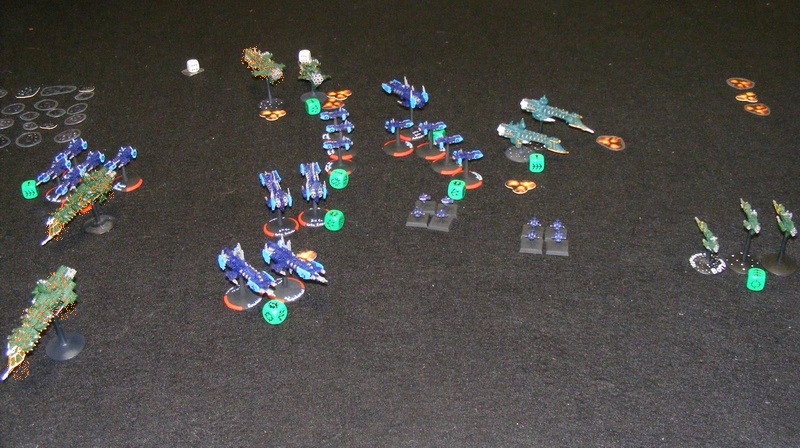
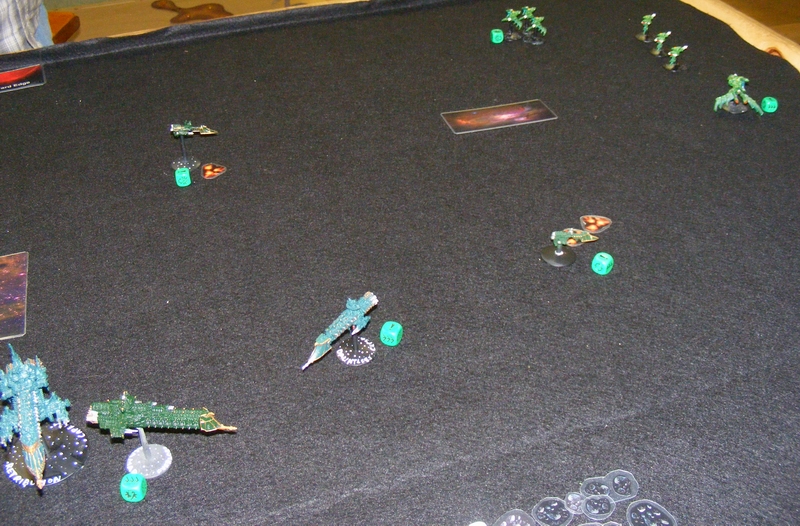
Turn 5 – Azure Flames
Vengeance Squadron arrives via the left board edge, and does some damage to the Lunars who fail to Brace. Light Squadron finishes off the lower Gothic, and the Strike Cruisers board the higher Gothic, turning both into Drifting Hulks! Wrath Squadron finally Reloads Ordnance after several turns of bracing.
Turn 5 – Imperial Navy
The fleet tries to regroup, but Brace orders and being a bit out of position do very little for the Imperials. Turn not pictured.
Turn 6 – Azure Flames
Squadron with Sacrifice and Duty arrives, fires torpedoes and Thunderhawks that cripple the last Gothic. Honor arrives as part of the same marker and goes on All Ahead Full to launch Thunderhawks to stifle the Dauntlesses. Vengeance, and the other Strike Cruisers POUR ON the torpedo damage, crippling one of the Lunars. Light Squadron, on Brace from last turn, fly around to regroup.

Turn 6 – Imperial Navy
The Lunars try to harm Light Squadron, but a gutsy decision to not Brace pays off as the crippled, braced ships can’t put out a lot of fire. Squadron of Firestorms arrives from the lower board edge. The Dauntlesses force a Brace on Wrath Squadron, and fire batteries at the Honor, but fails. The Gothic with the Admiral disengages.

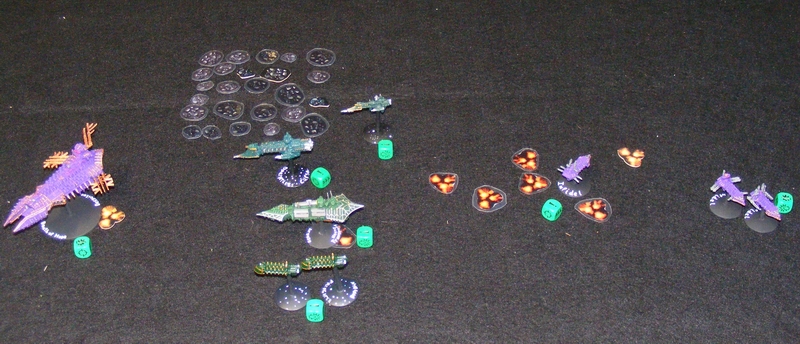
Turn 7 – Azure Flames
Vengeance Squadron reloads and torpedoes the Dauntlesses, crippling one. Torpedoes from the Sacrifice and the Duty turn one of the Lunars into a Blazing Hulk. Two flights of Thunderhawks wait till next turn.
Turn 7 – Imperial Navy
Cobra/Sword squadron arrives from the right board edge and fires on Light Squadron, causing a Brace but no casualties. Firestorms cause a brace on Vengeance Squadron. Dauntlesses try to come about. Lunar tries to disengage and fails. Ordnance causes the hulked Lunar to explode!


Turn 8 – Azure Flames
Despite Brace for Impact, Light Squadron destroys the Cobras and Sword. Thunderhawks do one last damage to the Lunar, destroying it. Torpedoes and Thunderhawks take out the Dauntlesses. Batteries and Bombardmant Cannons finish off the Firestorms. Tabled.
———————————
Final score:
Azure Flames: 1466
Imperial Navy: 0
———————————
OK, so the past few games have been a bit unbalanced. Let’s do an autopsy on this one. Why was the margin so huge? Here are some reasons why I think this happened.
Unbalanced Fleets: Being a Specialist Game, Battlefleet Gothic doesn’t really have overpowered fleets (I’ve changed my mind on the Necrons, they are actually a bit fragile thanks to their low HP count and no ordnance). Some fleets are better at some scenarios than others. Space Marines are fast and speed is key for Escalating Engagement. That said, the Imperials can make a decent showing with escorts and Dauntlesses. Sadly, Stephen only owns two Dauntlesses, and eschewed more escorts for the Gothics in order to punch though Space Marine armour. Oddly, this didn’t hurt him, as the capital ships came in before the escorts! Despite the initial unbalance, fleets didn’t cause this.
Tactics: Stephen’s ships bunched up in the center of the board. This made them prime targets for multiple torpedo waves. Stephen also had no fighters to protect against my torpedoes which did the lion’s share of the damage in this fight. Stephen also turned the Gothics different directions, limiting their effectiveness.
Luck: UGH. Stephen failed SO MANY TURRET ROLLS. Those torpedoes would have been way less effective with turrets doing their jobs. He also got several Brace saves that failed in key situations. Die rolls are always a big factor. Plus, Stephen’s escorts failed to come in on a 4+ for like three turns.
My final verdict, Stephen bunched up in the middle, couldn’t stop torpedoes, and had some really terrible rolls.
Next: some more action at Highland!
Convoy – Chaos vs. Imperials
Stephen and I finally got to play the Convoy mission we’ve wanted to for more than a month. Life kept getting in the way. Convoy is the weirdest mission, because it’s all random.
Convoy – Mercurial Zone
————————————————————–
Defender: Stephen – Imperial Navy
-Dauntless Light Cruiser (torpedoes)
-Dauntless Light Cruiser (lances)
-Firestorm x3
-Cobra x2
-Transport x2
-Transport x2
-Transport x2
-Heavy Transport
————————————————————–
Attacker: Bozeman – Chaos 13th Black Crusade (7 rolls on the Convoy Attacker Chart)
-Slaughter class Cruiser Swiftboat of Truth, Chaos Lord +1Ld
-Slaughter class Cruiser Traitor’s Blade, Chaos Lord +1Ld
-Infidel x3, Rampagers
-Idolater x3, Oathbreakers
-Idolater x2, Followers of Darkness
-Deadfall Torpedo or Attack Craft Cluster x2
-Deadfall Torpedo or Attack Craft Cluster x1
————————————————————–
Setup:

————————————————————–
Turn 1 – Imperial Navy
At the beginning of the turn, we rolled for Solar Flares and it went off! There were no ships on the board, so nothing happened. Stephen moved his entire fleet on. Contact Marker #7 revealed itself as a Deadfall Torpedo wave of 8! It was shot and destroyed before it could endanger the fleet.

Turn 1 – Chaos
Marker 1 is revealed as the Traitor’s Blade which promptly fails to go on All Ahead Full, and merely advances toward the enemy.

Turn 2 – Imperial Navy
All of the fleet except for the Cobras go on All Ahead Full. Contact markers near the fleet reveal as the Swiftboat of Truth and the Followers of Darkness. Cobras fire torpedoes as the Swiftboat of Truth, doing one damage.

Turn 2 – Chaos
Because the enemy was on special orders, two markers reveal as the Rampagers and Oathbreakers. The fleet closes in, and two Transports are destroyed. The Heavy Transport takes one damage from torpedoes from the Rampagers. A teleport attack from the Traitor’s Blade takes out the prow weapons of the Lance Dauntless.

Turn 3 – Imperial Navy
Torpedo Dauntless unloads on the Oathbreakers, and poor brace saves mixed with good torpedo rolls kill all three! Transports all fire on the Followers of Darkness, but miss. The Lance Dauntless repairs its prow.

Turn 3 – Chaos
Most of the fleet fire on the Heavy Transport, crippling it. The Traitor’s Blade causes a Brace on one of the Transport squadrons. Final marker is revealed as two waves of two bombers.


Turn 4 – Imperial Navy
Due to a blast marker, the Rampagers have no shields and so Brace when fired upon by the Firestorm, which saves them. The rest of the fleet move to protect the transports.

Turn 4 – Chaos
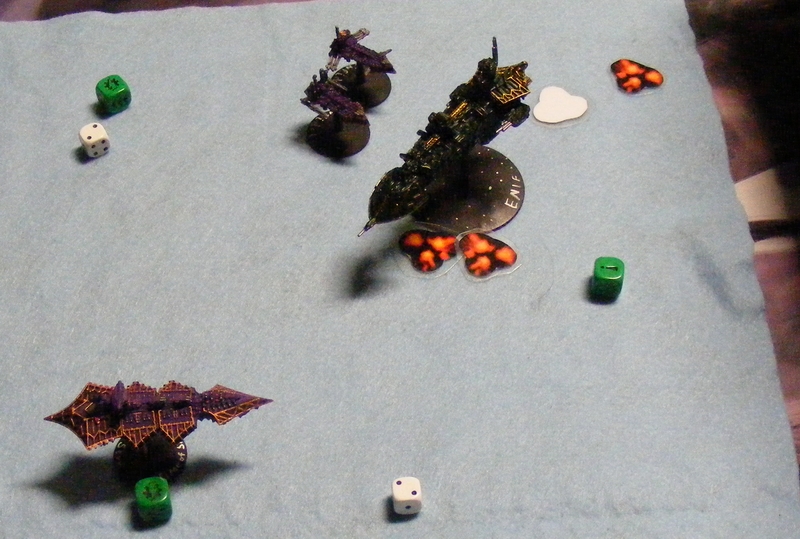
The Swiftboat of Truth moves through asteroids, fails a Leadership check, takes 2 damage and then suffers a Hull Breach, crippling it! Semi-effective fire does one more damage to the Heavy Transport. Bombers approach the Transports.

Turn 5 – Imperial Navy
One of the Cobras suicides into the bombers, taking out a wave! The other wave hits a transport and fails dismally. The rest of the fleet continues to cover the transports.

Turn 5 – Chaos
Rampagers Reload, fire on some transports, but amazing brace saves protect them. The crippled Swiftboat of Truth goes on Lock On, but even with that does no damage. Lucky shots from the surviving Followers of Darkness kill a transport.
Turn 6 – Imperial Navy
Heavy Transport goes on All Ahead Full. Torpedo Dauntless Reloads and fires on the Traitor’s Blade, doing one damage. Remaining Cobra Reloads and kills one of the Rampagers. Lance fire from the Lance Dauntless does one damage to the Swiftboat of Truth, starting a fire!

Turn 6 – Chaos
Traitor’s Blade boards the Heavy Transport, turning it into a drifting hulk. Each surviving Rampager boards one of the Transports. One wins, but gets a Critical Hit in return and dies. The other ties! Swiftboat of Truth can’t hurt the fleeing transport.
Turn 7 – Imperial Navy
Lance Dauntless causes a Brace on the Traitor’s Blade. Transport manages to kill the last of the Rampagers! Torpedo Dauntless fires on the Traitor’s Blade, doing no damage. One transport flees past the planet.
Turn 7 – Chaos
Remaining ships kill the second to last transport. Turn not pictured. Game ceded.
————————————————————–
Convoy is rarely a balanced matchup. However, it’s what you do in a mismatch that shows what kind of decisions you can make. Splitting up can help. However, when the attacker has as much as I did, there’s not much you can do.
Next: hopefully painting and Highland!
Xmas Gothic with John – Part 2 – Fleet Engagement
Time for the second battle report with John, this time a Fleet Engagement.
————————————————————–
Bozeman – Imperial Navy Segmentum Obscurus Gothic Fleet List
- Fleet Admiral (Ld8), two re-rolls
- Saratoga, Mars class battlecruiser, left shift, extra turret
- Forthright, Lunar class cruiser, Nova Cannon
- Kar Durniash, Dominator class cruiser
————————————————————–
John – Tau Kor’vattra Fleet
- Il’fannor (Merchant) class ship, Ke’lshan configuration, +2HP
- Il’fannor (Merchant) class ship, Ke’lshan configuration, +2HP
- Lar’shi (Hero) class ship, Tolku configuration
- Lar’shi (Hero) class ship, Tolku configuration
- Kass’l (Orca) gunship x4
- Skether’qan (Messenger) class starship
————————————————————–
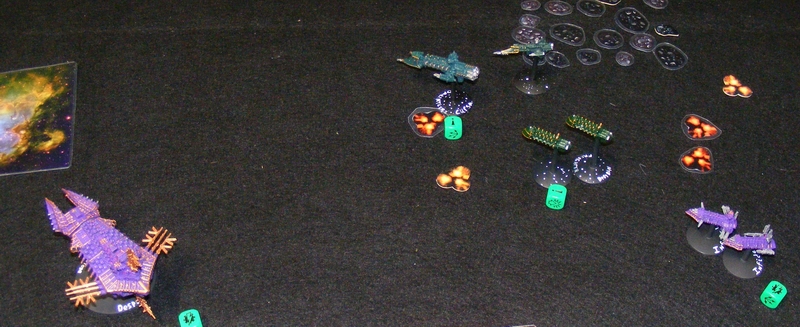
Setup: Map B
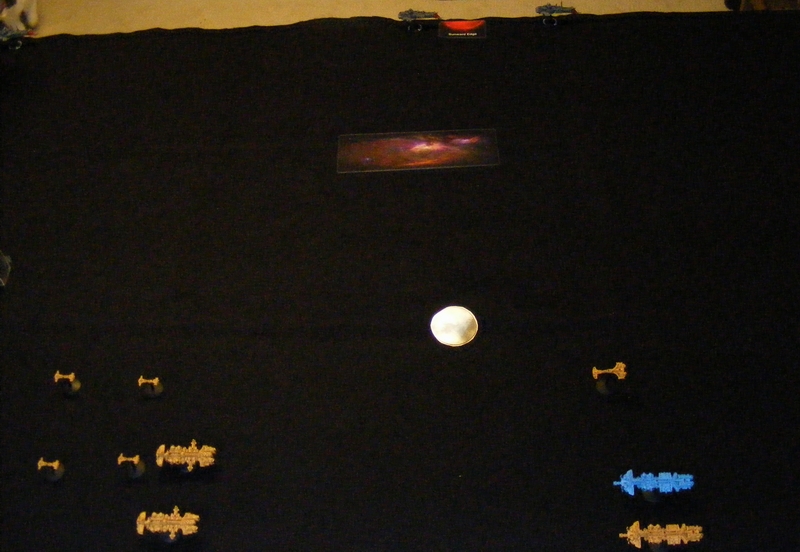
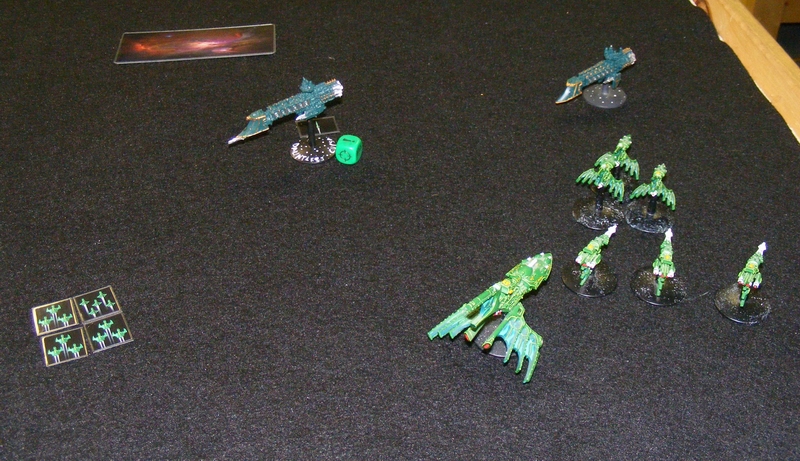
Turn 1 – Imperial Navy
The Saratoga and the Forthright go on Come to a New Heading. All three ships fire their Nova Cannons. One of the Hero class ships takes two damage, and one of the Merchants takes three, crippling it. The Saratoga fires four fighters that go on CAP for the fleet.
Turn 1 – Tau
The crippled Merchant disengages. The rest of the fleet comes about.

Turn 2 – Imperial Navy
Nova Cannons fire, one Hero loses a shield.

Turn 2 – Tau
Fleet advances.

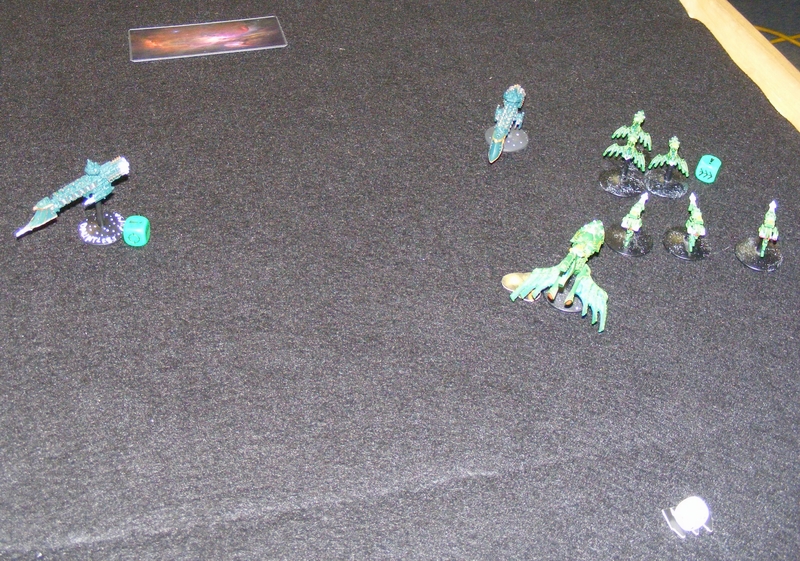
Turn 3 – Imperial Navy
All three Nova Cannons miss, but dorsal lances from the Saratoga destroy the Messenger.

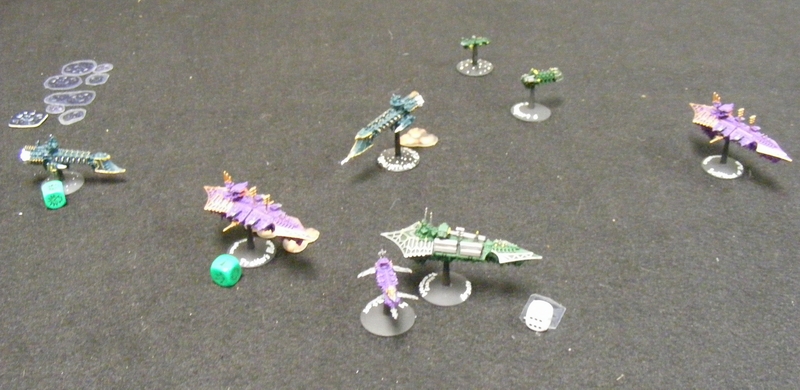
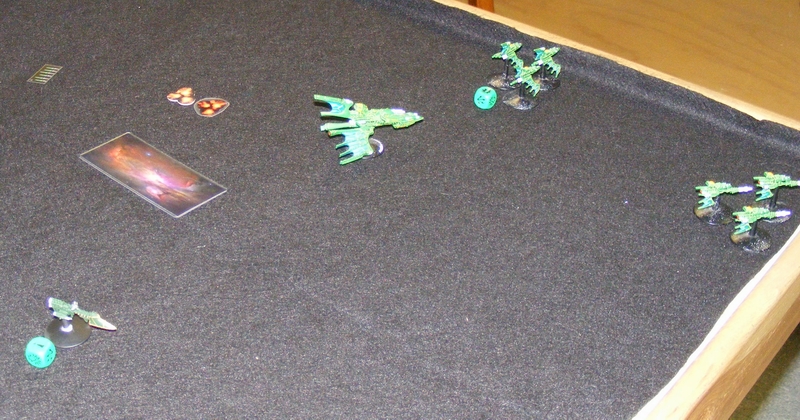
Turn 3 – Tau
Hero class ships launch missiles and bombers. Fire from the Orcas do one damage to the Kar Durniash.

Turn 4 – Imperial Navy
Nova Cannon does one damage to the blue Hero. Kar Durnish damages the other Merchant and its batteries kill an Orca.

Turn 4 – Tau
All ships fire, but no damage.

Turn 5 – Imperial Navy
Nova Cannons at short range cripple the yellow Hero and the remaining Merchant. Turn not pictured.
Turn 5 – Tau
All Tau ships disengage.
————————————————————–
Final Score:
Bozeman – 147.5
John – 0
————————————————————–
The Tau are slow as hell. I took a big risk taking a small fleet with a lot of Nova Cannons. John was also stubbornly against Bracing for Impact for some reason. The Tau Kor’vattra list is also crippled by needing to take Merchant class ships which suck. The Orcas make up for it just a little bit though. Also, another quirk of the Tau list is that you are not required to take an Admiral until your fleet is LARGER than 750 pts. The Tau need more missiles to flood the board. Perhaps dropping Orcas for torpedo boats.
Next: A visit to Highland!
Xmas Gothic game with John – Part 1 – The Bait
John came to visit me! After several beers, we decided to play two games of Battlefleet Gothic. Here’s the first game, where we played The Bait.
————————————————————————————-
Bozeman – Dark Eldar (pursuers)
- Razors of Virtue – Corsair Escort x3, Phantom Lances
- Red Teardrops – Corsair Escort x3, Phantom Lances
- Shadow’s Touch – Corsair Escort x3, Torpedoes
————————————————————————————-
John – Ork Clanz Fleet (pursued)
*note, John did not purchase the Clanz upgrades for allk of the ships following his warlord*
- Warlord, two re-rolls (aboard the Kill Kroozer)
- Kill Kroozer, Evil Sunz Clan, Soopa Boosters, Extra Turrets
- Lite Kroozer
- Lite Kroozer
- Brute Ram Ship x4
- Ravager x2
- Onslaught x3
————————————————————————————-
Setup:
After setup, my Mimic Engines gave me a free move. I stopped 30cm short of the Kill Kroozer.
 ————————————————————————————-
Turn 1 – Orks
All of the rest of the fleet in reserves comes on from the board edge on All Ahead Full. The Kill Kroozer goes a whopping 41 cm on All Ahead Full thanks to multiple upgrades and a good roll!

Turn 1 – Dark Eldar
Due to an inability to catch the Kill Kroozer, the fleet moves out.

Turn 2 – Orks
Fantastic torpedo rolls from the Lite Kroozers take out one of the Razors of Virtue. Ravagers fire torpedoes to harass the Red Teardrops.

Turn 2 – Dark Eldar
The Lite Kroozers Brace as the Shadow’s Touch fire Leech Torpedoes and cause only one Leech effect to the yellow ship, and then kill one of the Onslaughts. Red Teardrops kill one of the Ravagers.

Turn 3 – Orks
Red Teardrops and Razors of Virtue are reduced to one by enemy fire. Shadow’s Touch make an impressive amount of Brace saves as the Lite Kroozers open up.
Turn 3 – Dark Eldar
The remaining lance Corsairs take out the Onslaughts while Shadow’s Touch boards the last Ravager, destroying it.
Turn 4 – Orks
Despite a valiant effort, Ork fire in ineffective thanks to the best Brace saves I’ve ever rolled!

Turn 4 – Dark Eldar
Time to flee! If the Dark Eldar disengage, they win. Shadow’s Touch disengages. The last of the Red Teardrops disengages… and… the last of the Razors of Virtue fails to disengage! Uh oh!

Turn 5 – Orks
Batteries make short work of the last of the Razors of Virtue. Game over.
————————————————————————————-
Final Score
Dark Eldar: 195
Orks: 206
————————————————————————————-
Wow, close game! This is the third game I’ve lost for not being able to disengage a ship. It’s also the second loss for my Dark Eldar against John’s Orks. My Dark Eldar have never won a game. I need to get better with them. John also needed to take a 2nd Warlord, and change around his escorts as the minimum squadron size is 3.
Next: second battle report and a trip to Highland!
Planetary Assault 1500 pts – Return to Game Links!
Stephen and I planned a massive game a while ago that got derailed by life. Being an adult sucks. However, we finally got together back at good old Game Links in Fowlerville! This game was so long and massive, that I’m only going to show highlights (and lowlights) because otherwise it would be a novel of a battle report.
————————————————————————–
Mission: Planetary Assault (1500 pts)
Battlezone: Primary Biosphere (Medium planet)
————————————————————————–
Bozeman – Chaos 13th Black Crusade Fleet (Defender)
- Abbadon the Despoiler (aboard the Death of Hope)
- Despoiler class battleship Death of Hope, upgrade to prow torpedoes
- Styx class heavy cruiser Time of Sorrow
- Devastation class cruiser Pride of Heresy
- Devastation class cruiser Hateful
- Infidel Raiders x3, Rampagers
- Infidel Raiders x3, Lords of Sin
- Orbital Weapons Platform
- Orbital Torpedo Platform
- Defence Laser Silo
- Defence Laser Silo
- Defence Laser Silo
- Missile Silo
- Missile Silo
- Missile Silo
- Air Base
————————————————————————–
Stephen – Imperial Navy Segmentum Obscurus Bastion Fleet (Attacker)
- Admiral (Ld9), 2 re-rolls, aboard the Mars class cruiser
- Emperor class Battleship Betelgeuse
- Avenger class grand cruiser Enif
- Mars class battlecruiser
- Dictator class cruiser Haven’s Revenge
- Dauntless light cruiser Cursa, lances
- Firestorm Frigate x3
- Heavy Transport Argosy
- Transport x2
- Transport x2
————————————————————————–
Setup


I squadroned the Devastation class cruisers together and set them on patrol, but Stephen set them up right at the board edge, waiting to be picked off!

Luckily I got first turn. The Devastation class cruisers fired on the Mars and sent 8 assault boats after the Dictator, forcing braces and causing enough critical effects to turn the Dictator into a weaponless rowboat.
Stephen’s vengeance was swift, as the rest of his fleet fired and crippled the Pride of Heresy.

Meanwhile, the transports go up one side of the board, escorted by a few ships.

The Devastations provide a distraction as assault boats and boarding torpedoes from the Death of Hope plow into the Enif, causing 12 critical effects, and shutting off all the weapons, and damaging the engines to prevent turns.

Both Infidel squadrons harass the transports.

After the Pride of Heresy disengaged, the Hateful took the brunt of enemy fire. It tried to disengage, failed, and made for the board edge. Sadly, it died from battery fire from the Betelgeuse just before it got away!
Abbadon and the Death of Hope swing around to deal with the transports. The Rampagers take heavy damage from bombers, but one manages to hold on and disengage to prevent from being wiped out.

The Time of Sorrow fires on the Betelgeuse, slowing it down enough that it can’t make a turn! The Emperor class ship has a major flaw, being 15cm speed. Meanwhile, the Enif has been unable to repair ANY of its damage, despite rolling 8 dice for three turns!

Bombers from the Death of Hope attack the heavy transport Argosy, causing it to explode!
The Lords of Sin line up behind the transports, reload, and fire torpedoes until all the transports died. It took a while as they were constantly Braced for Impact.

The Enif finally gets its engines fixed, turns, and next turn goes on All Ahead Full to ram torpedoes out of the way of the Betelgeuse! This causes a Bridge Smashed critical, giving the Enif -3 leadership permanently!
In a daring move, the Haven’s Revenge goes on All Ahead Full and dives onto the low orbit table!
 Torpedoes from the Orbital Platform and fire from the Death of Hope destroy the Admiral’s Mars class battlecruiser, centimeters short of being able to go to the low orbit table!

Haven’s Revenge scores an assault point, as the remaining Firestorm goes on a SUICIDE DIVE to attack the ground defences! Haven’s Revenge is eventually killed by lance fire and bombers in later turns, but it scores a total of 3 assault points.

Bombers from the Death of Hope cripple the Enif.

In a last, desperate gambit reminiscent of Horus, Abbadon has the Death of Hope board the Betelgeuse, causing massive damage and crippling it!

The Enif makes it to the low orbit table! Can it score enough points?

The Betelgeuse finds itself unable to harm the Death of Hope, and Abbadon’s re-roll gets the Death of Hope to go on Burn Retros and perform ANOTHER boarding action, destroying the Betelgeuse!
The Enif, beleaguered, finally succumbs after scoring another assault point. Game over.
————————————————————————–
Final Score
Imperial Navy Assault Points earned on Low Orbit Table: 4
Imperial Navy victory points: 297.5, no additional Assault Points
Chaos victory points: 1500, -3 Assault Points
Final: 1 Assault Point, Defender win!
————————————————————————–
Planetary Assault is a hard one for the Imperials because they are so slow. A good selection of regular cruisers would have been better than the Emperor and the Avenger that got stuck up early on. Stephen also got really unlucky with the damage repairs on the Avenger, not repairing with a single “6” in three turns of 8 dice! Finally, the all-ordnance Chaos fleet ABSOLUTELY needs Abbadon’s re-rolls. I failed several tests, and chose not to re-roll 2 of them (on ground defences), but all that I re-rolled passed. Had this not been, I would not have been pumping out attack craft and torpedoes all over the place. Plus, Abbadon is a NIGHTMARE in boarding.
Next, some painting, I hope!
Eldar Debut: Blockade Run 1000 pts
I’ve played against John and his Eldar, with few successes. Now that I have an Eldar fleet, can I have the same result? Let’s find out!
Mission: Blockade Run
Battlezone: Deep Space
——————————————————————-
Bozeman – Attacker – Corsair Eldar Late Gothic War Fleet (500 points)
- Eclipse Class Cruiser Argent Nebula
- Nightshade Class Destroyer x3 Chisels of Vaul
- Hemlock Class Destroyer x3 The Rememberers
——————————————————————-
Stephen – Defender – Segmentum Obscurus Gothic Sector Fleet (1000 points)
- Fleet Admiral (Ld 8, aboard the Torpedo Dauntless)
- Retribution Class Battleship
- Overlord Class Battlecruiser
- Dauntless Class Light Cruiser (Lances)
- Dauntless Class Light Cruiser (Torpedoes)
- Sword Class Frigate x2
- Sword Class Frigate x2
——————————————————————-
Setup:


The Overlord and two Swords deployed to my left, the Retribution and two Swords to the center, and both Dauntlesses to my right. I set up behind an asteroid field to shield me in case I did not get first turn. Luckily I did get the first turn.
——————————————————————-
Turn 1 – Corsair Eldar
My fleet moved up. Most guns were out of range, but torpedoes fired from the Chisels of Vaul do two damage to the lance Dauntless and cause a Brace. The Argent Nebula launches 3 bombers and a fighter.
The fleet makes for the weakest flank, tring to punch through.
Turn 1 – Imperial Navy
Battery fire from the Torpedo Dauntless forces a brace on the Chisels of Vaul. The same ship fires torpedoes at the Argent Nebula and a terrible Holofield roll causes two damage! The Overlord battleship goes on All Ahead Full to try to get into the fight.
Fantastic attack from the Admiral’s personal ship!
 I’m a comin’!
Turn 2 – Corsair Eldar
The Chisels of Vaul, unable to reload, tack and move up. The Rememberers and the Argent Nebula combine firepower and destroy the Torpedo Dauntless, leaving it a drifting hulk!
 Pulsar Lances are absolutely terrifying on a good turn.
Turn 2 – Imperial Navy
The drifting hulk moves through a blast marker, takes a damage on a 6, rolls on the Catastrophic Damage chart, and suffers a WARP DRIVE IMPLOSION! The Argent Nebula braces for impact and barely avoids damage! Two Swords move up, and damage the Argent Shroud, crippling it and shredding the mainsail, leaving it unable to move in the ordnance phase.
 Batteries: don’t leave home without them.
Turn 3 – Corsair Eldar
In a stunning display of hit-and-run, the Rememberers fire on one of the Sword squadrons, killing one. The Chisels of Vaul fire on the other, killing one. The Argent Nebula makes for the safety of the board edge.
 Eldar escorts pack a wallop!
Turn 3 – Imperial Navy
The remaining Swords move up to desperately keep pressure on the Eldar as the rest of the fleet wheels. The Argent Nebula takes two more damage and fails to Brace, causing a Mast Severed result that limits it to 90 degree turns. Crippled lance Dauntless disengages.

The Argent Nebula is taking a beating.
Turn 4 – Corsair Eldar
The Chisels of Vaul reload and fire torpedoes at a Sword! They never make it, as the Argent Nebula gets in a good Pulsar Lance volley and kills it before the torpedoes arrive. The Rememberers fire at the other Sword and whiff, then turn and run.
Pulsar Lances are absolutely worthless on a bad turn.
Turn 4 – Imperial Navy
Overlord goes on All Ahead Full as the Sword tries a suicidal dash toward the Argent Nebula. Lucky brace saves prevent destruction.

Last Sword just can’t do one last damage.
Turn 5 – Corsair Eldar
The Chisels of Vaul fire batteries at the last Sword, killing it, and then the entire fleet flees off the board edge. Turn not pictured. Game ends.
——————————————————————-
Final Score
Bozeman – Corsair Eldar: 582.5
Stephen – Imperial Navy: 62.5
——————————————————————-
Blockade Run is a tough one for the Imperials, with their short ranges and being so slow. If Stephen had put the Retribution along one of the edges, facing the center, it could have fired on close enemies, or gone on All Ahead Full to get across the board fast. Leave the fast, maneuverable escorts and Dauntlesses in the center, ready to go any direction. Anchor the other side with the Overlord.
Next: hopefully painting!
On the subject of cases.
Recently, I bought an Eldar fleet off of Ebay, and it has been gathering dust. After all, I can’t play it because I can’t take it anywhere. So, I made a case. Here’s some pictures:
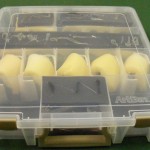
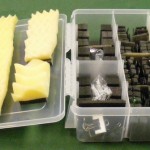
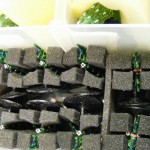
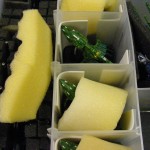

This is an art supply case, augmented with used pluck foam (thankfully saved!) mattress foam, foam sheets, and hot glue. You can see the results above. While I was making this, I thought about cases in general. After all, every model gamer needs to solve this problem. So, here’s my take on how to tackle this problem.
1.Capacity
In order to be effective, a case has to hold all the minis you need to transport. This can either be in one case (see my Space Marine case that I posted several years ago) or in many easy to carry cases.
You should also be mindful of how your collection will grow. If your case holds all your current minis, that’s perfect until you buy one more. Above, you will see my Eldar case has several areas that are unused, for when I can get lucky enough to find more Craftworld Eldar on ebay. If you want your collection to grow, you’ll need a case bigger than what you need right now.
2. Protection and Durability
Cases are useless unless they get your minis from point A to point B intact. One of my previous Space Marine cases was a large blue storage tub, outfitted with foam and cardboard tiers. I didn’t really design it to hold up the tiers, and so it rested on the minis directly. As a result, several antennae, flags, bolters, and other extended appendages or items got broken on a regular basis. The Battlefoam case I got later protects minis much better, and breakage rarely occurs.
3. Cost
Even though I love my Battlefoam case, it was expensive as hell, even with a Gen Con discount. Frugal gamers have several options, based on what kind of minis you need to transport. Battlefleet Gothic lends itself to art cases or toolboxes that can hold ships well. For Epic minis, a fishing tackle box holds lots of small stands and has room for larger minis. 40K or other similarly scaled games such as Warmachine can use a variety of cases. My friend Andy used to use foam filled pistol and rifle cases, which worked great but was inadvisable to take into a secure area…
4. Aesthetics
This to me is the least important, but still worth considering. My Battlefoam case looks great. The case shown above for my Eldar looks like garbage. However, both work just fine. You need to decide which is most important. For example, my 40K Orks are partially stored in an old, rusty metal toolbox. It’s impractical, dirty looking, heavy, and makes loud noises when you open it. In short: it’s perfect! I plan on spray painting part of it white, and then using a stencil to paint black checkmarks, then hand painting a few glyphs.
There’s a lot of options. Think about it and make the case that’s right for your collection.
Next: a battle report with Stephen and the debut of my Eldar fleet! Stay tuned!
Battlefleet Gothic batrep: Surprise Attack 1000 pts: Space Marines vs. Imperial Navy
Stephen and I finally got our work schedules to sync up, and we got some long-awaited Gothic action at AFK Games in Holt!
——————————————————————————-
Mission: Surprise Attack (1000 pts)
Region: Inner Biosphere
——————————————————————————-
Attacker: Stephen – Imperial Navy Segmentum Obscurus Bastion Fleet
- Solar Admiral (Ld 10), 2 additional re-rolls (aboard the Enif)
- Avenger class Grand Cruiser Enif
- Dauntless class Light Cruiser Cursa (Lances)
- Dauntless class Light Cruiser Stevo (Torpedoes)
- Squadron of 4 Firestorm class Frigates
- Squadron of 3 Sword class Frigates
- Squadron of 2 Cobra class Destroyers
——————————————————————————-
Defender: Bozeman – Azure Flames Space Marine Dominion Fleet
- Master of the Fleet Ranidan Piers (Ld 10), 2 re-rolls (aboard His Hammer II)
- Battle Barge His Hammer II
- Strike Cruiser Vigilance, Extra Shield
- Strike Cruiser Courage, Extra Shield
- Wrath Squadron, 5x Hunter class Destroyers
- Minefield
- Minefield
- Orbital Mine
- Orbital Mine
——————————————————————————-
Setup

Shown above, the two Strike Cruisers are squadroned together. Battle Barge His Hammer II is on standby; all other ships are on full alert.
——————————————————————————-
Turn 1 – Imperial Navy
The entire fleet arrives via the sunward edge (far edge in pictures below). The Stevo, the Cursa, and the Firestorm squadron arrive to the left and go after the Strike Cruisers. The Enif, the Cobra squadron and the Sword squadron come in nearer the center.

The Stevo fires torpedoes to limit the Strike Cruiser’s options, as the rest of the fleet advances.

The rest of the fleet menaces the center.
Turn 1 – Space Marines
Wrath Squadron goes around the large minefield. The large minefield rolls two 6s to launch 2 mines at the Swords. His Hammer II uses the gravity well of the planet to turn twice and fires normal torpedoes and Thunderhawk Gunships at the Enif. The Strike Cruiser squadron fires torpedoes and Thunderhawks at the Cursa, which fails to brace for impact and is crippled. Bombardment Cannons fire on the Firestorms and destroy one.

Wrath Squadron outflanks the enemy.

Thunderhawk flights away.

Bad torpedo roll is augmented by the Cursa failing to brace for impact. A Thunderhawk causes an Engine Room effect, leaving two damage remaining.
Turn 2 – Imperial Navy
The left side of the fleet closes in, and fires on the Strike Cruisers, doing one damage to the Courage. Torpedoes from the Cobras are stymied by resilient Thunderhawks. The torpedoes and Thunderhawks hit the Enif, which takes two damage. An orbital mine kills one of the Swords.

The only actual damage was caused by a torpedo fired by the Stevo.

Ordnance hits home, doing serious damage to the Enif.
Turn 2 – Space Marines
A daring double-boarding action by the Strike Cruisers yields mixed results. The Space Marines win both actions. The Cursa is reduced to a drifting hulk. The Stevo takes one damage, but in return causes a critical effect to the Courage, causing a hull breach and doing 3 damage, crippling it! His Hammer II reloads, and launches more ordnance. Wrath Squadron also fires, with boarding torpedoes. All of this ordnance does four more damage to the Enif, crippling it and causing a Fire.

Boarding actions are where Space Marines shine, but they are always a gamble!

Space Marines can really pump out a lot of high quality ordnance.
Turn 3 – Imperial Navy
Enif disengages. The Firestorms and Swords go after His Hammer II, but do no damage. The Stevo fires on the Vigilance.

The escorts pour it on to His Hammer II, but they don’t have enough gun.

Dauntless Light Cruisers can’t put out a lot of firepower in their side arcs.
Turn 3 – Space Marines
Abysmal leadership rolls by His Hammer II fails an Ld 10 check, TWICE! Courage disengages. Vigilance does two damage to the Stevo. The rest of the fleet kills one more Sword, but the last one barely survives with some fantastic Brace rolls.

It’s become a one-on-one duel between the Vigilance and the Stevo.

Lucky Sword manages to hold on, preventing the destruction of the squadron!
Turn 4 – Imperial Navy
Stevo disengages. Sword disengages. Firestorms, however, fail to disengage even on a modified Ld 10! They advance and kill one Hunter.

Stevo gets out of here.

Desperate and unable to flee, the Firestorms put the hurt on the Hunters!
Turn 4 – Space Marines
The Vigilance goes on Come to a New Heading to go after the last Firestorms. The rest of the fleet pour it on, but one Firestorm survives.

Once again, one survives to save the squadron.
Turn 5 – Imperial Navy
Last Firestorm disengages. Game ends.
——————————————————————————-
Final Score
Azure Flames: 329.75
Imperial Navy: 50
——————————————————————————-
Final Thoughts: After the game, I convinced Stephen to re-make his Avenger class Grand Cruiser into a Vengeance class because the Avenger has been completely useless for him. The Vengeance has much longer range and a good variety of guns, as opposed to the Avenger which is all short range batteries. Hopefully it does better for him in the future.
Next: Blood Bowl and 40K in Highland!
The Bait rematch – Tau Shan’al Shi’ur vs. Imperial Navy
Stephen and I wanted to get together to play another game of Gothic. However, due to mutual delays, we couldn’t get started until 9pm. Stephen suggested a rematch of The Bait, which he played against my Dark Eldar. This time, however, I was the pursued as my Tau Kor’or’vesh fleet!
——————————————————————————
Mission: The Bait
Setting: Outer Reaches
——————————————————————————
Bozeman – Tau Kor’or’vesh Shan’al Shi’ur
-Lar’shi’vre “Protector” class cruiser, T’au Lar’shi’vre Aloh Sho’ka, T’olku configuration (pursued ship)
-Il’porrui “Emmisary” class light cruiser, T’au Il’porrui M’yen Lar’shi, Bor’kan configuration (squadroned with two other ships below)
—–Il’porrui “Emmisary” class light cruiser, T’au Il’porrui Lynu Kar’tyr, Bor’kan configuration
—–Il’porrui “Emmisary” class light cruiser, T’au Il’porrui Sh’ve Mont’re, Sa’cea configuration
–Vral Squadron: 4 Kir’la “Warden” escorts and 1 Kir’shash’vre “Castellan” escort
——————————————————————————
Stephen – Imperial Navy
-Avenger class grand cruiser
-Dauntless light cruiser (torpedo configuration)
-Dauntless light cruiser (lance configuration)
-Squadron of 2 Cobra destoryers
——————————————————————————
Setup:


——————————————————————————
Turn 1 – Tau Shan’al Shi’ur
The Aloh Sho’ka fails to go on Come to a New Heading, and so simply moves and launches missiles and a fighter for a CAP.

Turn 1 – Imperial Navy
A bad roll prevents the fleet from going on special orders. The whole fleet advances.

Turn 2 – Tau Shan’al Shi’ur
Aloh Sho’ka Reloads Ordnance and turns.

Turn 2 – Imperial Navy
Cobras and the torpedo Dauntless get All Ahead Full, but the other ships don’t. Small torpedo wave from a cobra stops the CAP around the Aloh Sho’ka, and the Dauntless fires torpedoes. It fails to brace. One damage causes an Engine Room Damaged result!

Turn 3 – Tau Shan’al Shi’ur
Aloh Sho’ka re-launches a CAP and fires at the Cobras, taking down a shield. The squadron of 3 Emissary light cruisers arrives, and fire 8 missiles at the lance Dauntless. One missile is shot down by turrets and the rest… MISS! 8 misses on a roll of 5+! Things are looking down for the Tau…


Turn 3 – Imperial Navy
Fleet moves up, but fire is ineffective. The other Cobra fires torpedoes at the Aloh Sho’ka and removes the fighters on CAP.

Turn 4 – Tau Shan’al Shi’ur
Aloh Sho’ka goes on All Ahead Full to get around the Warp Rift. The Emissaries Reload Ordnance and fire on the Dauntless again, doing minor damage. The missiles remove a Cobra.

Turn 4 – Imperial Navy
The lance Dauntless fires on the Emissaries, but do no damage. The torpedo Dauntless fails to reload, so it chases the Aloh Sho’ka.

Turn 5 – Tau Shan’al Shi’ur
The Emissaries Reload Ordnance, and combined fire reduces the lance Dauntless to a Blazing Hulk! Vral Squadron comes in from the board edge, destroys the other Cobra, and lowers a shield on the torpedo Dauntless! The Dauntless Braces for Impact.

Turn 5 – Imperial Navy
The blazing Dauntless suffers a Plasma Drive Overload, exploding and firing 4 lances at one of the Emissaries, lowering one shield and doing no damage. The Avenger grand cruiser puts the Emissaries in its sight, but a poor roll does no damage. Torpedo Dauntless on Brace fires ineffectually at Vral Squadron.

Turn 6 – Tau Shan’al Shi’ur
Emmisaries Come to a New Heading to get a shot on the Avenger, but the order reduces their weapons and has little effect. The Aloh Sho’ka Reloads Ordnance and fires missiles and a Manta Bomber. Vral Squadron cripples the Dauntless.

Turn 6 – Imperial Navy
Dauntless disengages. The Avenger fires on the Emissaries causing a Brace.

Turn 7 – Tau Shan’al Shi’ur
Emissaries fire on the Avenger, taking down only 2 shields. Missiles and the Manta prove ineffective.

Turn 7 – Imperial Navy
Avenger disengages. Turn not pictured.
——————————————————————————
Final score:
Bozeman: 219.5
Stephen: 0
——————————————————————————
Stephen really loves that Avenger. Honestly, I can’t understand why. It’s up-gunned, but only up close. It has no dorsal or prow armaments to lend it some versatility. It seems to be good only against the Imperial Navy, who also has to get close, or perhaps Tyranids. I’m not a fan. I’d rather have the Vengeance which can scare the pants off of Eldar, or the Exorcist for some fighter craft fun. The Avenger lost him this game, even though it didn’t get hurt. It was so SLOW, and short range that it didn’t get to do much. More Dauntlesses, escorts, or Nova Cannons would have been nice. A Dominator could have ended the Aloh Sho’ka in two or three turns with luck, or forced it to brace in fear the whole game.
Next: more Gothic? Projects? Perhaps some fun times at Highland?