Xmas Gothic with John – Part 2 – Fleet Engagement
Time for the second battle report with John, this time a Fleet Engagement.
————————————————————–
Bozeman – Imperial Navy Segmentum Obscurus Gothic Fleet List
- Fleet Admiral (Ld8), two re-rolls
- Saratoga, Mars class battlecruiser, left shift, extra turret
- Forthright, Lunar class cruiser, Nova Cannon
- Kar Durniash, Dominator class cruiser
————————————————————–
John – Tau Kor’vattra Fleet
- Il’fannor (Merchant) class ship, Ke’lshan configuration, +2HP
- Il’fannor (Merchant) class ship, Ke’lshan configuration, +2HP
- Lar’shi (Hero) class ship, Tolku configuration
- Lar’shi (Hero) class ship, Tolku configuration
- Kass’l (Orca) gunship x4
- Skether’qan (Messenger) class starship
————————————————————–
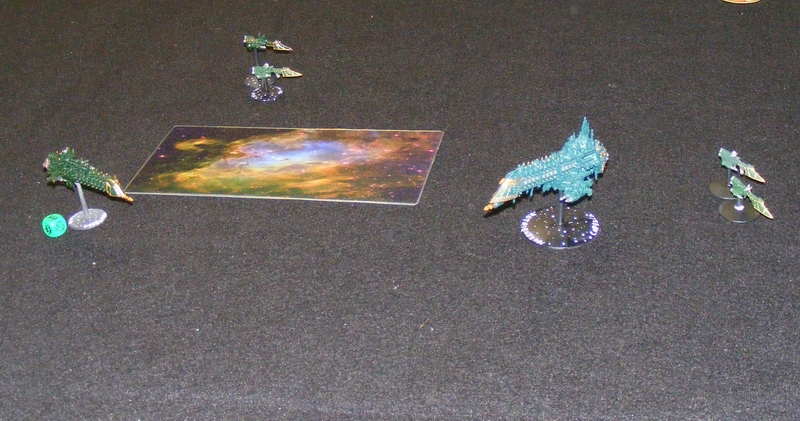
Setup: Map B
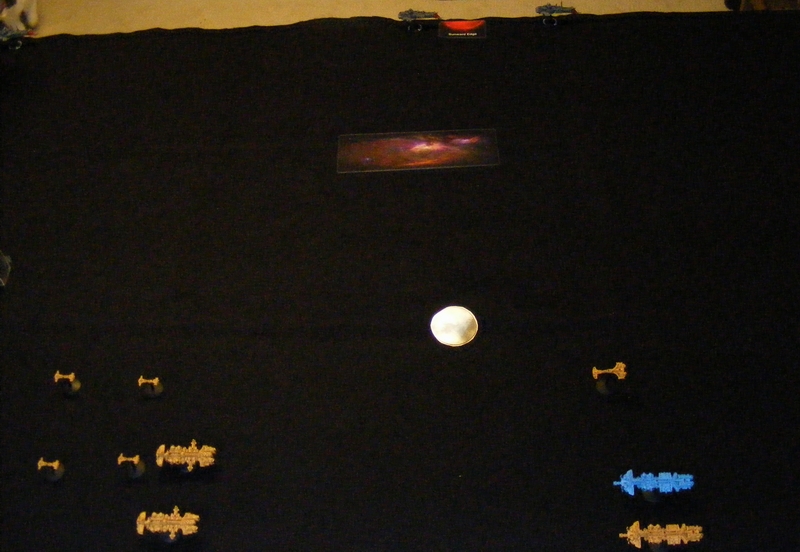
Turn 1 – Imperial Navy
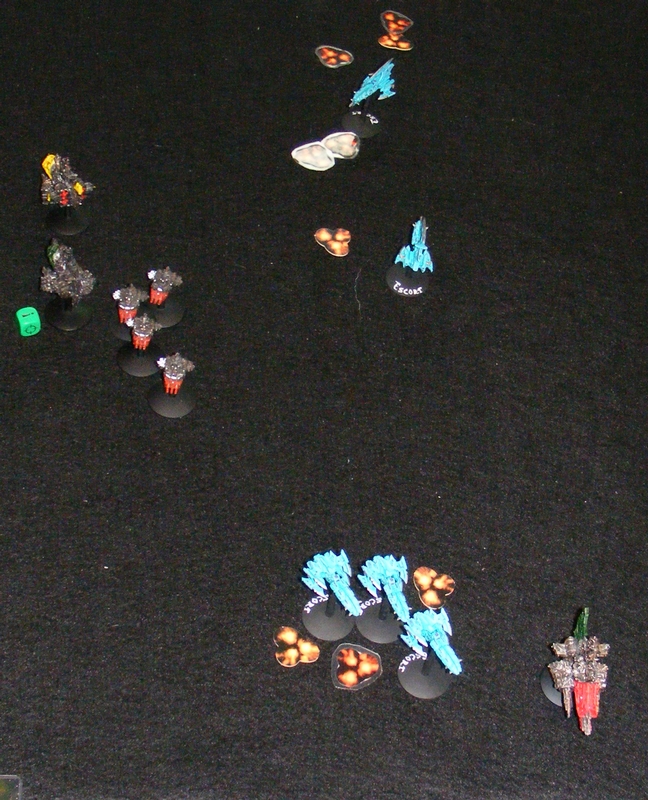
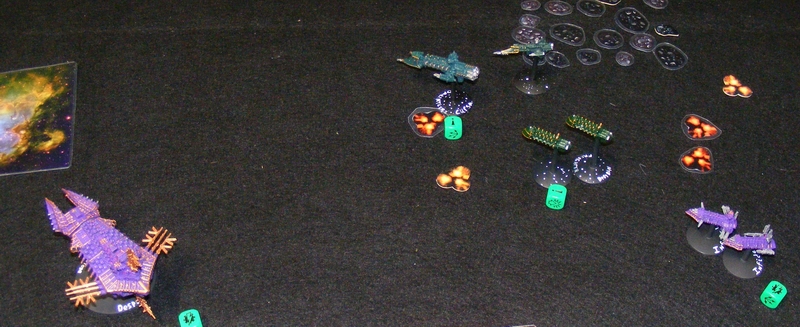
The Saratoga and the Forthright go on Come to a New Heading. All three ships fire their Nova Cannons. One of the Hero class ships takes two damage, and one of the Merchants takes three, crippling it. The Saratoga fires four fighters that go on CAP for the fleet.
Turn 1 – Tau
The crippled Merchant disengages. The rest of the fleet comes about.

Turn 2 – Imperial Navy
Nova Cannons fire, one Hero loses a shield.

Turn 2 – Tau
Fleet advances.

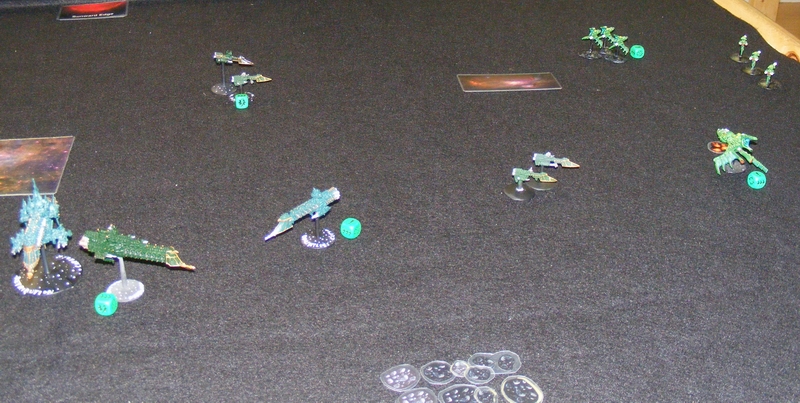
Turn 3 – Imperial Navy
All three Nova Cannons miss, but dorsal lances from the Saratoga destroy the Messenger.

Turn 3 – Tau
Hero class ships launch missiles and bombers. Fire from the Orcas do one damage to the Kar Durniash.

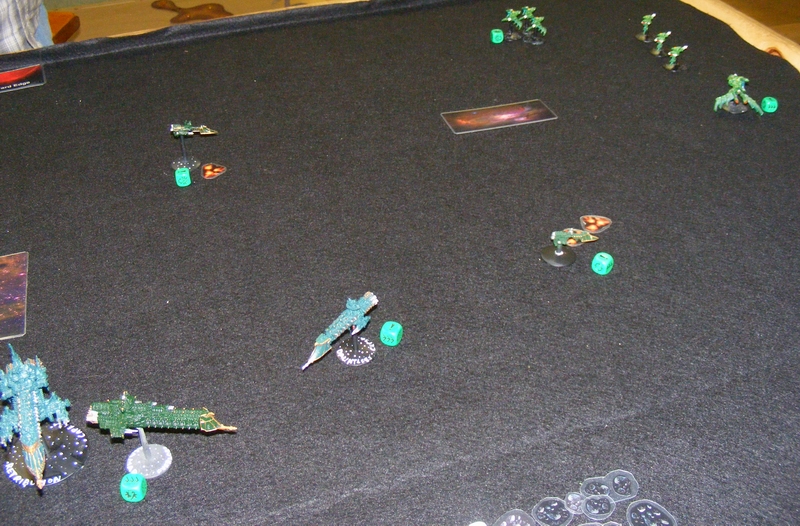
Turn 4 – Imperial Navy
Nova Cannon does one damage to the blue Hero. Kar Durnish damages the other Merchant and its batteries kill an Orca.

Turn 4 – Tau
All ships fire, but no damage.

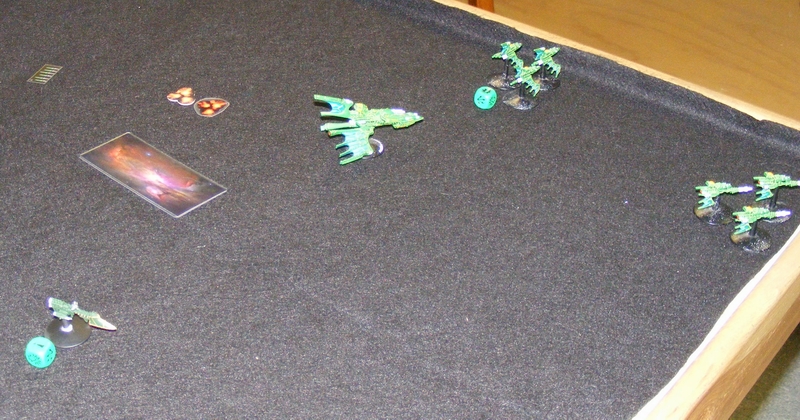
Turn 5 – Imperial Navy
Nova Cannons at short range cripple the yellow Hero and the remaining Merchant. Turn not pictured.
Turn 5 – Tau
All Tau ships disengage.
————————————————————–
Final Score:
Bozeman – 147.5
John – 0
————————————————————–
The Tau are slow as hell. I took a big risk taking a small fleet with a lot of Nova Cannons. John was also stubbornly against Bracing for Impact for some reason. The Tau Kor’vattra list is also crippled by needing to take Merchant class ships which suck. The Orcas make up for it just a little bit though. Also, another quirk of the Tau list is that you are not required to take an Admiral until your fleet is LARGER than 750 pts. The Tau need more missiles to flood the board. Perhaps dropping Orcas for torpedo boats.
Next: A visit to Highland!
Xmas Gothic game with John – Part 1 – The Bait
John came to visit me! After several beers, we decided to play two games of Battlefleet Gothic. Here’s the first game, where we played The Bait.
————————————————————————————-
Bozeman – Dark Eldar (pursuers)
- Razors of Virtue – Corsair Escort x3, Phantom Lances
- Red Teardrops – Corsair Escort x3, Phantom Lances
- Shadow’s Touch – Corsair Escort x3, Torpedoes
————————————————————————————-
John – Ork Clanz Fleet (pursued)
*note, John did not purchase the Clanz upgrades for allk of the ships following his warlord*
- Warlord, two re-rolls (aboard the Kill Kroozer)
- Kill Kroozer, Evil Sunz Clan, Soopa Boosters, Extra Turrets
- Lite Kroozer
- Lite Kroozer
- Brute Ram Ship x4
- Ravager x2
- Onslaught x3
————————————————————————————-
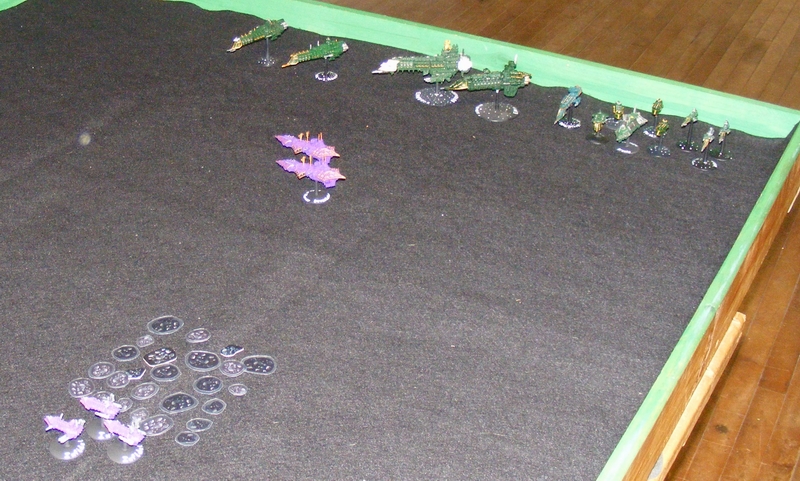
Setup:
After setup, my Mimic Engines gave me a free move. I stopped 30cm short of the Kill Kroozer.
 ————————————————————————————-
Turn 1 – Orks
All of the rest of the fleet in reserves comes on from the board edge on All Ahead Full. The Kill Kroozer goes a whopping 41 cm on All Ahead Full thanks to multiple upgrades and a good roll!

Turn 1 – Dark Eldar
Due to an inability to catch the Kill Kroozer, the fleet moves out.

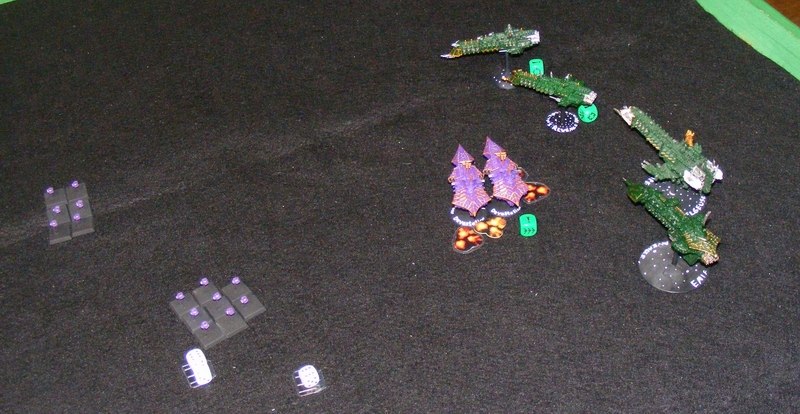
Turn 2 – Orks
Fantastic torpedo rolls from the Lite Kroozers take out one of the Razors of Virtue. Ravagers fire torpedoes to harass the Red Teardrops.

Turn 2 – Dark Eldar
The Lite Kroozers Brace as the Shadow’s Touch fire Leech Torpedoes and cause only one Leech effect to the yellow ship, and then kill one of the Onslaughts. Red Teardrops kill one of the Ravagers.

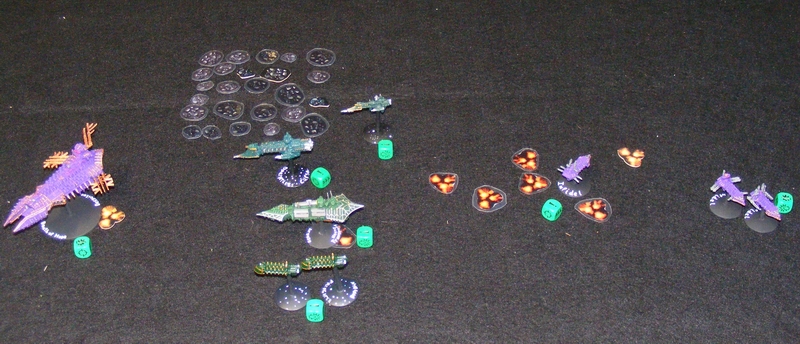
Turn 3 – Orks
Red Teardrops and Razors of Virtue are reduced to one by enemy fire. Shadow’s Touch make an impressive amount of Brace saves as the Lite Kroozers open up.
Turn 3 – Dark Eldar
The remaining lance Corsairs take out the Onslaughts while Shadow’s Touch boards the last Ravager, destroying it.
Turn 4 – Orks
Despite a valiant effort, Ork fire in ineffective thanks to the best Brace saves I’ve ever rolled!

Turn 4 – Dark Eldar
Time to flee! If the Dark Eldar disengage, they win. Shadow’s Touch disengages. The last of the Red Teardrops disengages… and… the last of the Razors of Virtue fails to disengage! Uh oh!

Turn 5 – Orks
Batteries make short work of the last of the Razors of Virtue. Game over.
————————————————————————————-
Final Score
Dark Eldar: 195
Orks: 206
————————————————————————————-
Wow, close game! This is the third game I’ve lost for not being able to disengage a ship. It’s also the second loss for my Dark Eldar against John’s Orks. My Dark Eldar have never won a game. I need to get better with them. John also needed to take a 2nd Warlord, and change around his escorts as the minimum squadron size is 3.
Next: second battle report and a trip to Highland!
Planetary Assault 1500 pts – Return to Game Links!
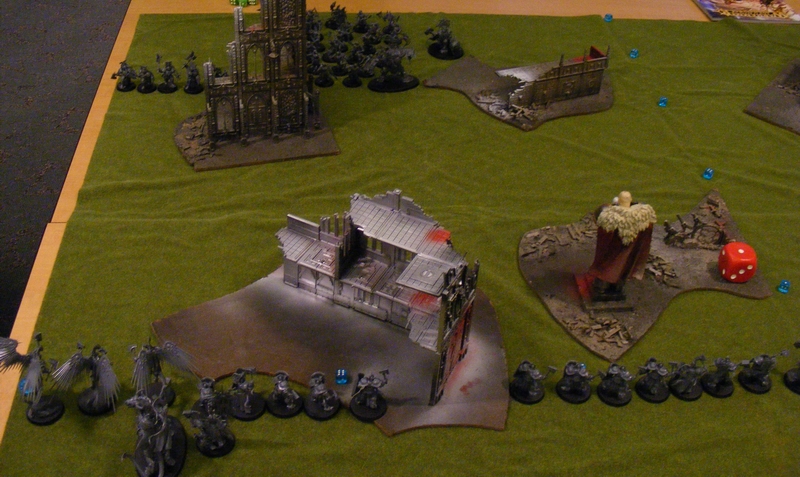
Stephen and I planned a massive game a while ago that got derailed by life. Being an adult sucks. However, we finally got together back at good old Game Links in Fowlerville! This game was so long and massive, that I’m only going to show highlights (and lowlights) because otherwise it would be a novel of a battle report.
————————————————————————–
Mission: Planetary Assault (1500 pts)
Battlezone: Primary Biosphere (Medium planet)
————————————————————————–
Bozeman – Chaos 13th Black Crusade Fleet (Defender)
- Abbadon the Despoiler (aboard the Death of Hope)
- Despoiler class battleship Death of Hope, upgrade to prow torpedoes
- Styx class heavy cruiser Time of Sorrow
- Devastation class cruiser Pride of Heresy
- Devastation class cruiser Hateful
- Infidel Raiders x3, Rampagers
- Infidel Raiders x3, Lords of Sin
- Orbital Weapons Platform
- Orbital Torpedo Platform
- Defence Laser Silo
- Defence Laser Silo
- Defence Laser Silo
- Missile Silo
- Missile Silo
- Missile Silo
- Air Base
————————————————————————–
Stephen – Imperial Navy Segmentum Obscurus Bastion Fleet (Attacker)
- Admiral (Ld9), 2 re-rolls, aboard the Mars class cruiser
- Emperor class Battleship Betelgeuse
- Avenger class grand cruiser Enif
- Mars class battlecruiser
- Dictator class cruiser Haven’s Revenge
- Dauntless light cruiser Cursa, lances
- Firestorm Frigate x3
- Heavy Transport Argosy
- Transport x2
- Transport x2
————————————————————————–
Setup


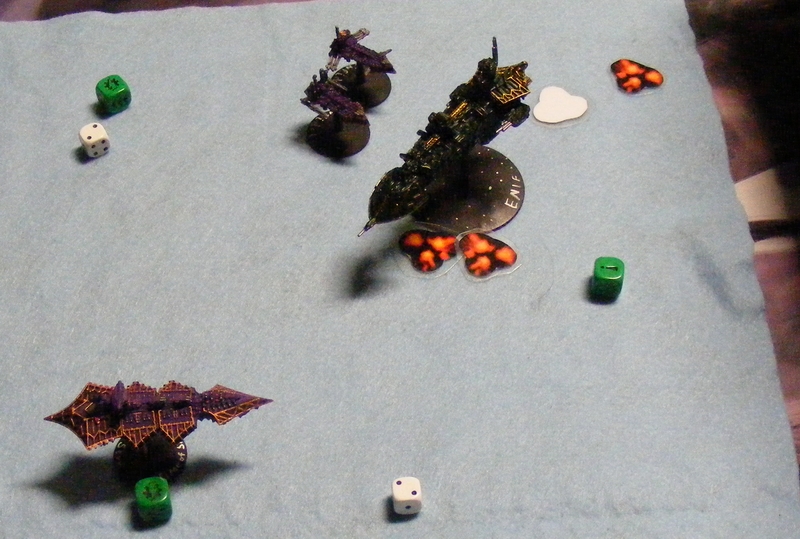
I squadroned the Devastation class cruisers together and set them on patrol, but Stephen set them up right at the board edge, waiting to be picked off!

Luckily I got first turn. The Devastation class cruisers fired on the Mars and sent 8 assault boats after the Dictator, forcing braces and causing enough critical effects to turn the Dictator into a weaponless rowboat.
Stephen’s vengeance was swift, as the rest of his fleet fired and crippled the Pride of Heresy.

Meanwhile, the transports go up one side of the board, escorted by a few ships.

The Devastations provide a distraction as assault boats and boarding torpedoes from the Death of Hope plow into the Enif, causing 12 critical effects, and shutting off all the weapons, and damaging the engines to prevent turns.

Both Infidel squadrons harass the transports.

After the Pride of Heresy disengaged, the Hateful took the brunt of enemy fire. It tried to disengage, failed, and made for the board edge. Sadly, it died from battery fire from the Betelgeuse just before it got away!
Abbadon and the Death of Hope swing around to deal with the transports. The Rampagers take heavy damage from bombers, but one manages to hold on and disengage to prevent from being wiped out.

The Time of Sorrow fires on the Betelgeuse, slowing it down enough that it can’t make a turn! The Emperor class ship has a major flaw, being 15cm speed. Meanwhile, the Enif has been unable to repair ANY of its damage, despite rolling 8 dice for three turns!

Bombers from the Death of Hope attack the heavy transport Argosy, causing it to explode!
The Lords of Sin line up behind the transports, reload, and fire torpedoes until all the transports died. It took a while as they were constantly Braced for Impact.

The Enif finally gets its engines fixed, turns, and next turn goes on All Ahead Full to ram torpedoes out of the way of the Betelgeuse! This causes a Bridge Smashed critical, giving the Enif -3 leadership permanently!
In a daring move, the Haven’s Revenge goes on All Ahead Full and dives onto the low orbit table!
 Torpedoes from the Orbital Platform and fire from the Death of Hope destroy the Admiral’s Mars class battlecruiser, centimeters short of being able to go to the low orbit table!

Haven’s Revenge scores an assault point, as the remaining Firestorm goes on a SUICIDE DIVE to attack the ground defences! Haven’s Revenge is eventually killed by lance fire and bombers in later turns, but it scores a total of 3 assault points.

Bombers from the Death of Hope cripple the Enif.

In a last, desperate gambit reminiscent of Horus, Abbadon has the Death of Hope board the Betelgeuse, causing massive damage and crippling it!

The Enif makes it to the low orbit table! Can it score enough points?

The Betelgeuse finds itself unable to harm the Death of Hope, and Abbadon’s re-roll gets the Death of Hope to go on Burn Retros and perform ANOTHER boarding action, destroying the Betelgeuse!
The Enif, beleaguered, finally succumbs after scoring another assault point. Game over.
————————————————————————–
Final Score
Imperial Navy Assault Points earned on Low Orbit Table: 4
Imperial Navy victory points: 297.5, no additional Assault Points
Chaos victory points: 1500, -3 Assault Points
Final: 1 Assault Point, Defender win!
————————————————————————–
Planetary Assault is a hard one for the Imperials because they are so slow. A good selection of regular cruisers would have been better than the Emperor and the Avenger that got stuck up early on. Stephen also got really unlucky with the damage repairs on the Avenger, not repairing with a single “6” in three turns of 8 dice! Finally, the all-ordnance Chaos fleet ABSOLUTELY needs Abbadon’s re-rolls. I failed several tests, and chose not to re-roll 2 of them (on ground defences), but all that I re-rolled passed. Had this not been, I would not have been pumping out attack craft and torpedoes all over the place. Plus, Abbadon is a NIGHTMARE in boarding.
Next, some painting, I hope!
Age of Sigmar demo: Beer and Pretzels minus math equals…?
Ian, a regular at the Highland Library 40K club recently landed a sweet job as a Manager of the brand new Games Workshop store in Ann Arbor. (GW, if you’re reading this, BRING BACK THE NOVI STORE YOU BASTARDS) As part of his getting paid to come to club, he demoed the new successor to Warhammer Fantasy. That’s right, the oft maligned Age of Sigmar.
So, I tried it.
It was fun, let’s see what happened!
I was playing the Stormcast (foreground), versus Paul who had a horde of Khornate warriors (rear).

I pulled off to my right to deny the flank.

Paul advances.

My Stormcasts charge a Khorne monster. However, their charge brings them to within 3″ of the Marauders, who get to pile in! In AoS, combats can swarm and engulf units not associated with the original charge. All hits and wounds from a unit are always the same rolls in AoS, so my Stormcasts manage to do some damage to the monster. However, great saves prevent a lot of this damage.

More charges end the Stormcasts, however the fight spills over into my other squad, who smash a Bloodstoker because his whip got within 3″ of them!

Meanwhile, another Stormcast squad charges some Khorne warriors. In AoS, combat is resolved one unit at a time, so because my other Stormcasts were fighting for their lives, they went first. The Khorne Warriors got to swing first at these Stormcasts, and did some serious damage! Order of combat is a really important tactical decision in AoS.

The rest of my army charges. My lord riding a dragon-horse-thing does a ton of damage.

In the end, my forces smashed through the Khorne forces.
————————————————————————–
Final Thoughts:
AoS is easy and streamlined. To hit and wound is easy, and toughness is now all about saves and number of wounds. However, it still remains a game without a balance system. You have to figure that out for yourself. Is it fair? Well, you decide what’s fair. Is that a cop out? Yeah. Is it fun? Also yeah. Try a demo of AoS for yourself. If you like it, play it.
Tanksgiving at White Lake, and a defense of Maelstrom, in battle report form.
Happy Tanksgiving everyone! Here is an obscene amount of vehicles beating the tar out of one another!


Andrew and Kyle threw down with their entire vehicle collections. The pile of dead tanks was literally more than a foot high, not even carefully stacked.
After this, I wanted to play a game with Paul. I mentioned my distaste for Maelstrom of War missions. Paul and Ian (the new manager of GW Ann Arbor!) defended Maelstrom as a legitimate method of play. Their argument? Maelstrom discourages small armies with invincible death stars, and rewards fast tactical armies with lots of options. It was a pretty good argument, so much so that Paul and I played a Maelstrom mission! Will we regret it? Let’s find out!
———————————————————————————–
Bozeman – Azure Flames (Salamanders Space Marines) 1850 ps
- Demi Legion Formation
- Chaplain, Jump Pack
- Tactical Squad x 10, Veteran Sergeant, Power Fist, Bolter-Melta, Meltagun, Multi-Melta
- Drop Pod
- Tactical Squad x 10, Veteran Sergeant, Power Fist, Bolter-Melta, Meltagun, Multi-Melta
- Drop Pod
- Tactical Squad x 10, Veteran Sergeant, Power Fist, Flamer, Lascannon
- Razorback, Twin Linked Lascannon
- Assault Squad x 10, Veteran Sergeant, Power Fist, 2x Flamer
- Devastator Squad x 10, Veteran Sergeant, 4x Plasma Cannon
- Razorback, Twin Linked Lascannon
- Whirlwind Suppression Force
- Land Speeders x3, 3x Mulit-Melta
- Whirlwind x2
———————————————————————————–
Paul – Dark Angels Daemon Summoning with Grey Knights Battery (Unbound) 1850 ps
- Dark Angel Chaplain, Bike, Mace of the Unforgiven, Plasma Pistol
- Dark Angel Librarian, Level 2, Bike, Conversion Field
- Dark Angel Librarian, Level 2, Bike, Conversion Field
- Ravenwing Command Squad x6, 4x Plasma Talon, 2x Grenade Launcher, Ravenwing Banner
- Dark Angels Drop Pod
- Dark Angels Drop Pod
- Grey Knights Librarian, Lv 2
- Torquemada Coteaz
- Grey Knight Purifiers x5, 4x Daemon Hammer, 1x Nemesis Force Halberd
- Grey Knight Purifiers x10, 9x Nemesis Falchion, 1x Nemesis Force Halberd
- Grey Knight Terminators x6, 2x Daemon Hammer, 3x Nemesis Fachion, 1x Nemesis Force Halberd
———————————————————————————–
Mission: Maelstrom of War #6 – Deadlock
Setup:


Night Fight occurred on turn 1
———————————————————————————–
Dark Angels / Grey Knights – Turn 1
After a scout move, the Ravenwing bikes with all bike characters attached fire on the Assault combat squad with the Chaplain. The Chaplain’s Rozarius saves the day, preventing the squad from being wiped out! One of the Librarians summons some Khorne Bloodletters into the building by objective 2, and loses a wound to Perils. The 5-man Purifier squad with Coteaz and the GK Librarian drop pods next to the Land Speeders, and force a Jink. Paul scores 2 points for Harnessing the Warp.

The first of many Daemons arrives to… help? The Dark Angels and Grey Knights? Ok…

Summoning Daemons is perilous work, as this librarian can attest! Plasma Talon fire kills a lot of the Assault Squad, but the Chaplain bravely stands in front of the worst of it. Meanwhile, the Purifiers blast the Land Speeders.
Azure Flames – Turn 1
Whirlwinds blast a bunch of the Bloodletters, and the Chaplain and one Assault Marine charge, declaring a challenge for a point. One of the Tactical Squads drop pods in, combat squads, and takes objective 2 and blasts the Terminators, killing three! Combat squad in the Razorback takes objective 1. Razorback blows up Drop Pod for First Blood, while the Plasma Cannon Devastators kill everyone but one Grey Knights Librarian who goes to ground! ACHIEVEMENT UNLOCKED: I scored all 6 of my objectives for 7 points!

Brave Chaplain challenges the lead Bloodletter. Combat squad takes the objective.

Thanks to Tactical Doctrine, the melta squad kills THREE Terminators! NOICE.

Plasma Cannons are efficient at removing tightly bunched squads.
Dark Angels / Grey Knights – Turn 2
The Bloodletters finish off the Chaplain for Slay the Warlord. Ravenwing Command blows away the squad in the middle, and a Librarian suffers a wound from Perils, but summons a squad of Pink Horrors! 10-man Purifier squad drop pods in, combat squads, and a Nova kills half the Devastators, one Whirlwind, and one Razorback! Worse, the Devs break! Remaining 3 Terminators charge the melta tacticals, and lose one but kill three. Paul scores 4 points for a total of 6 so far.
You need more than faith when you’re this outnumbered…

Nothing can stop the Ravenwing Command Squad, except perhaps the Perils! Even so, more daemons arrive to “help.”
The Purifiers drop like a bomb, blowing up half my backfield!
Azure Flames – Turn 2
5-man Bolter squad charges the Bloodletters for a point, lose two, and wipe them out due to Daemonic Instability! Remaining Terminators keep fighting, whiff, and lose one guy, but stay. Surviving Whirlwind kills 7/10 of the Pink Horrors. Land Speeders waste the Grey Knight Librarian. Plasma Cannon Devs destroy one 5-man Purifier squad, while the Assault Marines jump back across the board and kill the 2nd squad down to 2 guys. I score 2 more points for a total of 9.

Gutsy charge pays off! Bloodletters are eliminated!

This fight has gone poorly for the Grey Knight Terminators.

The Pink Horrors feel horror from the Whirlwind, while the Grey Knight Librarian is melted by Melta.

Thanks to Assault Doctrine, the Assault Marines actually stood a chance against the Grey Knights!
Dark Angels / Grey Knights – Turn 3
The Assault Marines finish off the Purifiers. Due to horrible rolling, the Ravenwing Command AND the 3-man Pink Horrors BOTH fail a “One Eye Open” test, and can’t do anything! Terminator kills one Tactical marine.

These Assault Marines accomplished more that they should have! Good job, guys!

“Hey guys, I know we, like, summoned you, but screw you.” “Well, screw you too!”

This fight continues…
Azure Flames – Turn 3
Land Speeders move Flat Out to gain objective 6. Combined bolters from various sources wipe out the Pink Horrors. Razorback tries to get objective 1, but is immobilized! Lascannon from same Razorback, one thrown Krak Grenade from a Tactical marine, and assault from the 2-man Assault Squad kills the Drop Pod in close combat, fulfilling 2 different objectives! Power fist sergeant luckily kills the last Terminator!

Zoom for an objective!

An unlikely convergence of rolls kills the Drop Pod! This gives me a vehicle kill for a point, and a kill in close combat for a point!

Who would have thought that a 5-man Tactical squad would have wiped out 6 Terminators?
Dark Angels / Grey Knights – Turn 4
Librarians and Chaplain split off from the Ravenwing Command. The Ravenwing annihilate the Land Speeders, who fail ALL their jink saves! One Librarian summons 10 more Pink Horrors on Objective 3, perils, but gets a 6 and is a SUPER BEAST, killing the Razorback in a charge! The other Librarian perils and drains all remining Warp Charges, but lives. Due to all objectives being identified, Paul scores 2 points.
Not shown: 3 dead Land Speeders.

*throws 10 Pink Horrors into building* Whatever. They’re in there.
Azure Flames – Turn 4
Second Tatsquad FINALLY arrives! A bad Whirlwind scatter kills some Horrors, but also two Bolter marines! The rest of their combat squad breaks and flees! Melta squad tries to shoot the Chaplain, to no avail. Assault Squad charges the remaining Horrors, killing the squad down to 2.

3-man Bolter squad flees from friendly fire, as a huge amount of firepower bounces off the invincible Chaplain. 3+ re-rollable jink? Ugh…
Dark Angels / Grey Knights – Turn 5
Librarian summons 10 Plaguebearers, but Perils himself to death! Other Librarian summons 10 Bloodletters, but also Perils to death! Chaplain engages the Devastators. Ravenwing shoot a Drop Pod to death and menace the sergeant. Assault Squad finishes the Pink Horrors and beat feet towards the center.

Plaguebearers arrive, at the cost of a Librarian. Chaplain gets up in the Dev’s faces.
Rawr.

Oh, hey guys… Nice bikes…

The Assault Marines prepare for a mad dash toward the center to get one last point on my turn.
Azure Flames – Turn 5
Assault Marines get objective 1 for a point. Whirlwind and tatsquad blow up some Plaguebearers. Sergeant foolishly charges the bikes and dies to overwatch. Thanks to Objective Secured, the 3-man Tatsquad holds objective 2 for a point, despite a bunch of angry Bloodletters! Game ends.

Plaguebearers go boom as the Chaplain mops up the Devs.
Someone give these guys a medal!

Objecive secured allows these Marines to give the Bloodletters the finger.
———————————————————————————–
Final Score
Azure Flames 14 + First Blood = 15
Dark Angels / Grey Knights: 8 + Slay the Warlord and Linebreaker = 10
———————————————————————————–
OK, I am beginning to warm to Maelstrom a bit. Consider a stand-up game with a kill the enemy objective. I would have done jack and squat to the Ravenwing, who could have destroyed anything they touched. With Maelstrom, I had things I could go do, even though I could not hurt this invincible nightmare squad. Maelstrom punishes death stars because they are expensive and small.
That said, summoning daemons is GREAT. I only did as well as I did because of my all-star Whirlwinds, who accounted for at least 30 daemons killed! The two Assault Marines also saved the day multiple times and scored 3 points BY THEMSELVES.
Next: a seperate post from the same day, where I demo Warhammer: Age of Sigmar. Is it as bad as people on BOLS forums complain it is? Or, is it the next step in model gaming? Stay tuned!
Lexington teaches me Infinity!
Lexington has a problem. He can’t quit getting me into model games. Warmachine. Epic. Gothic. Necromunda. He always does this. He plays a little demo game with me and then I can’t stop.
He does this on purpose.
Because gaming is AWESOME.
Anyway, he’s been bugging me to get into Infinity for a while. Infinity is a futuristic heavily detailed skirmish game, where factions from Earth’s future battle for dominance.
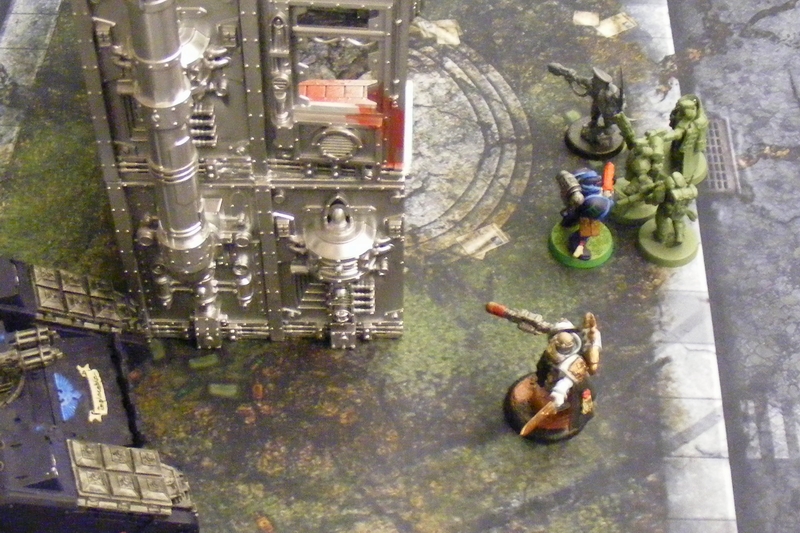
In this demo game, we didn’t have enough terrain, so books stood in for buildings. Brian had three Metros from the Ariadna faction, while I had three Alguaciles from the Nomads.
Here, my Alguaciles take cover behind some low structures, possibly depositories for… something…

Lexington’s Metros set up in a similar situation across the board.
Turn 1 – Ariadna
Because Lexington had three Metros, he generated three orders. His first order was to have the Metro near the bottom move up twice. Orders can have two parts. Enemies that see you take orders can react. I got a lucky reaction shot, and the first Metro takes a hit! The Metro has an armor save of 14, so Lexington has to roll a 15 or higher, but fails! The Metro goes down!

Lexington’s second order is for the central Metro to shoot one of my Alguaciles. He got three shots and I got one. We all missed. In Infinity, you can spend orders on any of your troops, even ones that get to shoot! He shot at me again and I dodged this time. I failed to dodge, but he failed to hit again.
Hitting is hard from range. To hit, you must roll a D20 equal to or under your Ballistic Skill. If you roll EXACTLY, you get a critical hit! If an enemy is in cover, you get a -3 to your BS, and long ranges can give you a further -3. Lexington’s BS was 10, so with a -3 and another -3, he needed a 4 or less on a D20 to hit. Unlucky that he didn’t get it with six dice.
Turn 1 – Nomads
Because the enemy can react, I order one of my Alguaciles to wait for the first half of her turn, and Lexington shoots at me. Because all parts of an order are resolved simultaneously, I take the second 1/2 of my order to fire a three round burst. My BS is 11, so with a -3 for range, and -3 for cover, I need a 5. I roll a 1, which hits! The Metro goes down!

I take another order on the same Alguacile to fire on the last Metro, and one of my dice comes up 5, which is a critical hit! Enemies don’t get an armor save against criticals, so Lexington’s entire force is wiped out on turn 1!
———————————————————————————-
Wow. Lexington has never seen a turn 1 wipe like this, and he’s done a lot of demos. He has a huge group in the Twin Cities devoted to Infinity, and it’s easy to see why. Infinity is a complicated system, but it has a lot of flexibility and strategy involved.
Next: Age of Sigmar demo at White Lake!
Eldar Debut: Blockade Run 1000 pts
I’ve played against John and his Eldar, with few successes. Now that I have an Eldar fleet, can I have the same result? Let’s find out!
Mission: Blockade Run
Battlezone: Deep Space
——————————————————————-
Bozeman – Attacker – Corsair Eldar Late Gothic War Fleet (500 points)
- Eclipse Class Cruiser Argent Nebula
- Nightshade Class Destroyer x3 Chisels of Vaul
- Hemlock Class Destroyer x3 The Rememberers
——————————————————————-
Stephen – Defender – Segmentum Obscurus Gothic Sector Fleet (1000 points)
- Fleet Admiral (Ld 8, aboard the Torpedo Dauntless)
- Retribution Class Battleship
- Overlord Class Battlecruiser
- Dauntless Class Light Cruiser (Lances)
- Dauntless Class Light Cruiser (Torpedoes)
- Sword Class Frigate x2
- Sword Class Frigate x2
——————————————————————-
Setup:


The Overlord and two Swords deployed to my left, the Retribution and two Swords to the center, and both Dauntlesses to my right. I set up behind an asteroid field to shield me in case I did not get first turn. Luckily I did get the first turn.
——————————————————————-
Turn 1 – Corsair Eldar
My fleet moved up. Most guns were out of range, but torpedoes fired from the Chisels of Vaul do two damage to the lance Dauntless and cause a Brace. The Argent Nebula launches 3 bombers and a fighter.
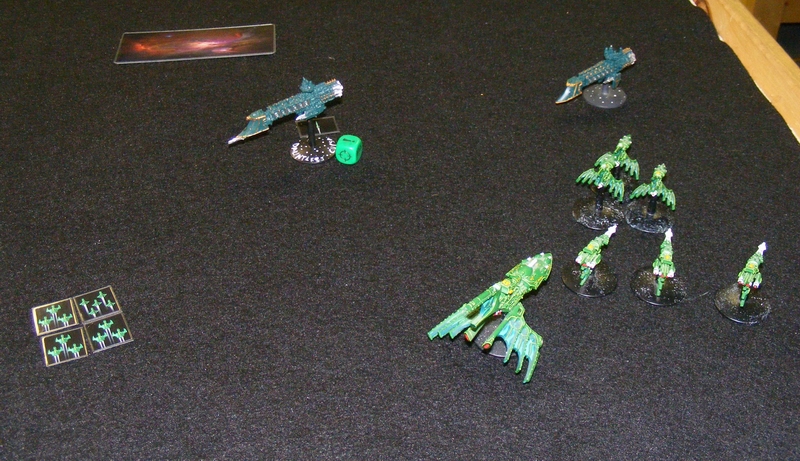
The fleet makes for the weakest flank, tring to punch through.
Turn 1 – Imperial Navy
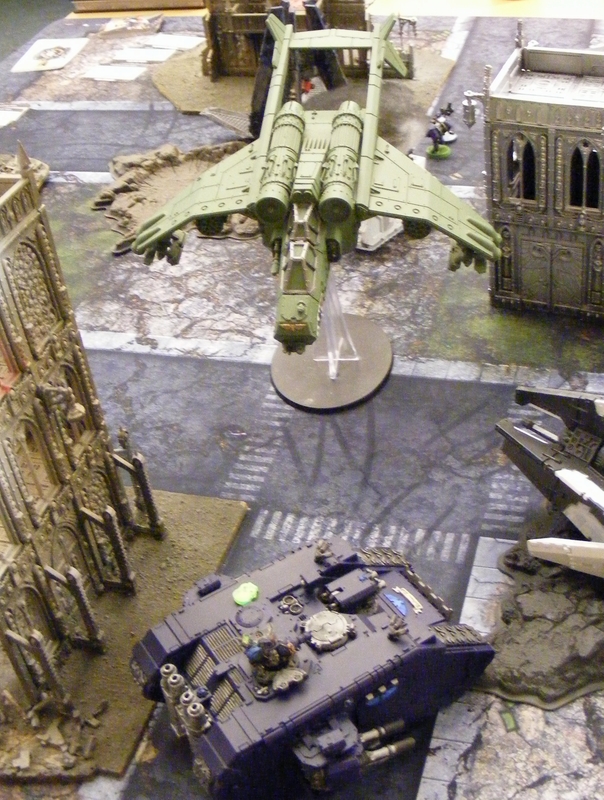
Battery fire from the Torpedo Dauntless forces a brace on the Chisels of Vaul. The same ship fires torpedoes at the Argent Nebula and a terrible Holofield roll causes two damage! The Overlord battleship goes on All Ahead Full to try to get into the fight.
Fantastic attack from the Admiral’s personal ship!
 I’m a comin’!
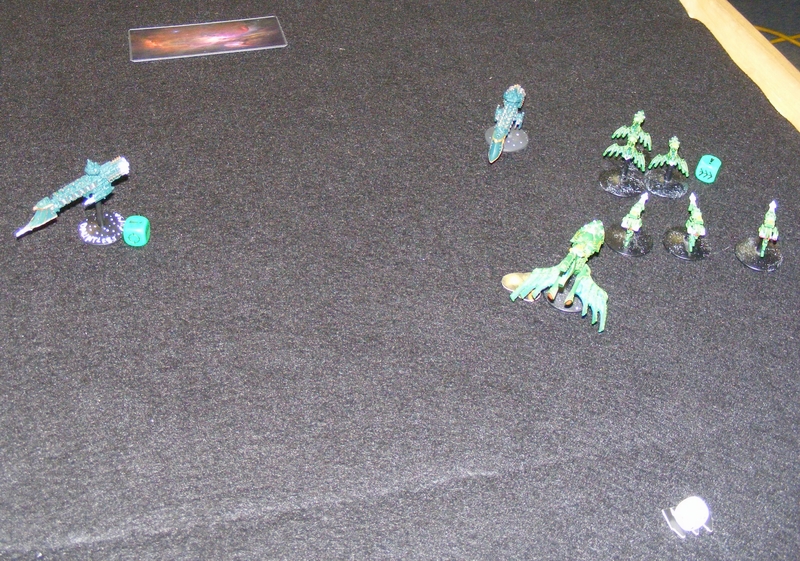
Turn 2 – Corsair Eldar
The Chisels of Vaul, unable to reload, tack and move up. The Rememberers and the Argent Nebula combine firepower and destroy the Torpedo Dauntless, leaving it a drifting hulk!
 Pulsar Lances are absolutely terrifying on a good turn.
Turn 2 – Imperial Navy
The drifting hulk moves through a blast marker, takes a damage on a 6, rolls on the Catastrophic Damage chart, and suffers a WARP DRIVE IMPLOSION! The Argent Nebula braces for impact and barely avoids damage! Two Swords move up, and damage the Argent Shroud, crippling it and shredding the mainsail, leaving it unable to move in the ordnance phase.
 Batteries: don’t leave home without them.
Turn 3 – Corsair Eldar
In a stunning display of hit-and-run, the Rememberers fire on one of the Sword squadrons, killing one. The Chisels of Vaul fire on the other, killing one. The Argent Nebula makes for the safety of the board edge.
 Eldar escorts pack a wallop!
Turn 3 – Imperial Navy
The remaining Swords move up to desperately keep pressure on the Eldar as the rest of the fleet wheels. The Argent Nebula takes two more damage and fails to Brace, causing a Mast Severed result that limits it to 90 degree turns. Crippled lance Dauntless disengages.

The Argent Nebula is taking a beating.
Turn 4 – Corsair Eldar
The Chisels of Vaul reload and fire torpedoes at a Sword! They never make it, as the Argent Nebula gets in a good Pulsar Lance volley and kills it before the torpedoes arrive. The Rememberers fire at the other Sword and whiff, then turn and run.
Pulsar Lances are absolutely worthless on a bad turn.
Turn 4 – Imperial Navy
Overlord goes on All Ahead Full as the Sword tries a suicidal dash toward the Argent Nebula. Lucky brace saves prevent destruction.

Last Sword just can’t do one last damage.
Turn 5 – Corsair Eldar
The Chisels of Vaul fire batteries at the last Sword, killing it, and then the entire fleet flees off the board edge. Turn not pictured. Game ends.
——————————————————————-
Final Score
Bozeman – Corsair Eldar: 582.5
Stephen – Imperial Navy: 62.5
——————————————————————-
Blockade Run is a tough one for the Imperials, with their short ranges and being so slow. If Stephen had put the Retribution along one of the edges, facing the center, it could have fired on close enemies, or gone on All Ahead Full to get across the board fast. Leave the fast, maneuverable escorts and Dauntlesses in the center, ready to go any direction. Anchor the other side with the Overlord.
Next: hopefully painting!
On the subject of cases.
Recently, I bought an Eldar fleet off of Ebay, and it has been gathering dust. After all, I can’t play it because I can’t take it anywhere. So, I made a case. Here’s some pictures:
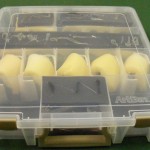

This is an art supply case, augmented with used pluck foam (thankfully saved!) mattress foam, foam sheets, and hot glue. You can see the results above. While I was making this, I thought about cases in general. After all, every model gamer needs to solve this problem. So, here’s my take on how to tackle this problem.
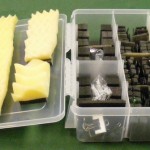
1.Capacity
In order to be effective, a case has to hold all the minis you need to transport. This can either be in one case (see my Space Marine case that I posted several years ago) or in many easy to carry cases.
You should also be mindful of how your collection will grow. If your case holds all your current minis, that’s perfect until you buy one more. Above, you will see my Eldar case has several areas that are unused, for when I can get lucky enough to find more Craftworld Eldar on ebay. If you want your collection to grow, you’ll need a case bigger than what you need right now.
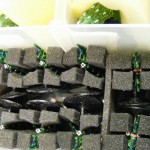
2. Protection and Durability
Cases are useless unless they get your minis from point A to point B intact. One of my previous Space Marine cases was a large blue storage tub, outfitted with foam and cardboard tiers. I didn’t really design it to hold up the tiers, and so it rested on the minis directly. As a result, several antennae, flags, bolters, and other extended appendages or items got broken on a regular basis. The Battlefoam case I got later protects minis much better, and breakage rarely occurs.
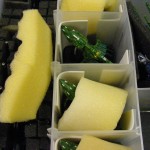
3. Cost
Even though I love my Battlefoam case, it was expensive as hell, even with a Gen Con discount. Frugal gamers have several options, based on what kind of minis you need to transport. Battlefleet Gothic lends itself to art cases or toolboxes that can hold ships well. For Epic minis, a fishing tackle box holds lots of small stands and has room for larger minis. 40K or other similarly scaled games such as Warmachine can use a variety of cases. My friend Andy used to use foam filled pistol and rifle cases, which worked great but was inadvisable to take into a secure area…
4. Aesthetics
This to me is the least important, but still worth considering. My Battlefoam case looks great. The case shown above for my Eldar looks like garbage. However, both work just fine. You need to decide which is most important. For example, my 40K Orks are partially stored in an old, rusty metal toolbox. It’s impractical, dirty looking, heavy, and makes loud noises when you open it. In short: it’s perfect! I plan on spray painting part of it white, and then using a stencil to paint black checkmarks, then hand painting a few glyphs.
There’s a lot of options. Think about it and make the case that’s right for your collection.
Next: a battle report with Stephen and the debut of my Eldar fleet! Stay tuned!
Highland October 2000 pts Azure Flames vs. Star Phantoms Space Marines
Kyle and I were the only ones to show up at first, so we got out the big guns. 2000 points, Maelstrom 4, The Spoils of War.
——————————————————————————————————–
Bozeman – Azure Flames (Salamanders Space Marines)
- Demi-Legion Formation
- Chaplain, Jump Pack (Warlord Trait: Storm of Fire, one friendly unit within 12″ gets Rending on all shots)
- Tactical Squad x10, Veteran Sergeant, Bolter-Melta, Power Fist, Meltagun, Multi-Melta
- Drop Pod
- Tactical Squad x10, Veteran Sergeant, Bolter-Flamer, Power Fist, Flamer, Multi-Melta
- Tactical Squad x10, Veteran Sergeant, Bolter-Flamer, Power Fist, Flamer, Multi-Melta
- Assault Squad x10, Jump Packs, Power Fist, 2x Flamer
- Devastator Squad x5, 4x Heavy Bolter
- Ironclad Dreadnought, Ironclad Launchers, Heavy Flamer, Chainfist
- Drop Pod
- Land Raider Spearhead
- Land Raider (Phobos Pattern)
- Land Raider Crusader, Multi-Melta
- Land Raider Redeemer, Multi-Melta
——————————————————————————————————–
Kyle – Star Phantoms Space Marines
- Demi-Legion Formation
- Chapter Master, Power Sword, Bolter-Melta, The Armour Indominus
- Tactical Squad x6, Combi-Grav, Power Sword
- Tactical Squad x6, Combi-Plasma, Plasma Gun
- Razorback, Twin Linked Lascannon
- Tactical Squad x6, Combi-Melta, Meltagun
- Drop Pod
- Assault Squad x5, Jump Packs, 2x Lightning Claws, Melta Bombs
- Devastator Squad x5, 4x Heavy Bolter
- Ironclad Dreadnought, Seismic Hammer, Ironclad Launchers, 2x Hunter-Killer Missiles
- Inquisitorial Detatchment
- Hereticus Inquisitor, Power Armour, Force Sword, Condemnor Boltgun, Psychic Lv2
- Henchman Band (various henchmen, 2 Plasma Guns, Arco-Flagellant, 3 Servitors, etc.)
- Chimera, Psybolt Ammunition
- Militarum Tempestus Detatchment
- Commissar, Plasma Pistol, Power Sword
- Militarum Tempestus Scions, 2x Hot Shot Volley Guns, Med Pack
- Valkyrie
- Officio Assassinorum Detatchment
- Vindicare Assassin
——————————————————————————————————–
Mission: The Spoils of War (Maelstrom, 3 objectives, can’t discard numerical objectives, can steal opponent’s numerical objectives)
Setup

Two of my Tactical Squads with Flamers got into the Crusader and Redeemer.
Turn 1 – Star Phantoms
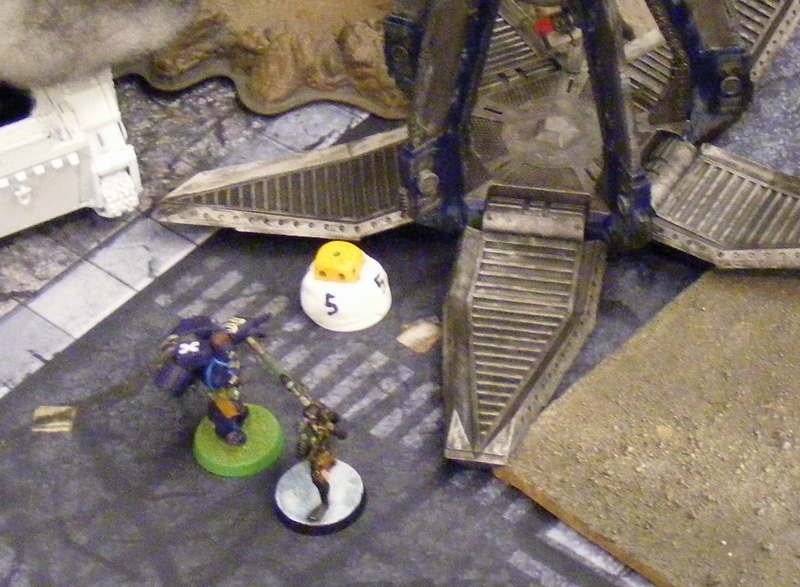
Melta squad drops in, and puts one penetrating hit on the Redeemer (the Weapon Destroyed result is ignored thanks to the formation special rules). Razorback advances, and the other Tactical Squad snake-eyes a Difficult Terrain test and have to run to move through a small building. Inquisitor and squad move up in the Chimera. Heavy Bolters put the hurt on the Chaplain and his squad. Due to Mission rules, I score one point from Kyle’s Tactical Objective for Objective 1.

Melta doesn’t pop a Land Raider.

Squads getting into position.

The Chaplain takes a wound, and two Assault Marines bite the dust.
Turn 1 – Azure Flames
Chaplain Advances. Land Raider Redeemer kills the Melta squad that drop podded in. Land Raider Phobos kills the Inquisitor’s Chimera, and the Heavy Bolters kill some of his squad. Assault combat squad with Sergeant pops the Razorback. Melta Tactical Squad drops in, combat squads, and shoots some of the Tactical Squad in the small building and the Inquisitor’s squad. The Chaplain fails to charge. Turn not pictured.
Turn 2 – Star Phantoms
Ironclad drops in and Melta shot does one hull point to the Crusader. Heavy Bolters hit the Azure Flames Heavy Bolters, killing the sergeant and one Heavy. Assault Squad deep strikes just outside of the Devastator’s line of sight. Inquisitor’s Squad makes for Objective 4 in the small ruin to gain a point. Plasma Squad kills 3 Assault Marines, then charges. They lose one to zero, break, are caught, and stay. Valkyrie comes in, fires on the Melta squad leaving only the Meltagun alive.

Ironclad drops are contagious for a reason! They are scary!

You can’t see us, nyah nyah!

The Inquisitor gets Objective 4.

Shooting was much more effective than charging.
Turn 2 – Azure Flames
The combat with the Assault and Tactical squad continues, with one Star Phantom going down. Tactical Squad in the Crusader shoots the small Tactical Squad, reducing them to 2 and breaking them. Land Raider Redeemer kills 3 of the Assault Squad with a Flamestorm Cannon. Devastators fire on the Inquisitor, killing all of his squad and wounding him once. I gain 2 more points. Land Raider Phobos puts two pens on the Ironclad, but it survives minus one Hunter Killer missile!

The fight drags on.

Objective 2 is claimed for a point.

The Assault Squad threat is still there, but less so.
Turn 3 – Star Phantoms
Assault Squad jumps into the building, fires a bolt pistol, kills a Devastator, and they break and flee, out of assault range! One more tactiacl marine goes down in the small fight by the wrecked Razorback. Space Marine Chapter Master, attached to the Militarum Scion squad with Commisar, grav-chutes in! Combined fire from that and several other sources reduces the Flamer squad to the sergeant and one bolter! Surviving Inquisitor assaults the five bolter marines, whiffs, killing only one. I score that point because the five bolter marines have Objective Secured. Ironclad charges the Land Raider Phobos, does one hull point.

This fight is taking a while…

A Chapter Master in good company. How is HE taking orders from a COMMISSAR? Don’t know, but it works.

The Inquisitor assaults with a fist full of ones.
Turn 3 – Azure Flames
Land Raider Redeemer finishes off the last of the Assault Squad as the Devastators move back up to Objective 1. Land Raider finishes the Ironclad. My Ironclad drops in and kills one of the remaining squad that regrouped earlier. The Inquisitor kills all but one of the bolter Marines. The lone Meltagun Tactical Marine puts a hull point on the Valkyrie in hover mode, and then charges but misses.

The Assault Squad couldn’t stand up to two turns of fire.

Ironclad is finally dealt with.

The fight is finally over!

The Inquisitor steps up his game as the lone Melta tries to blast the Valkyrie.
Turn 4 – Star Phantoms
Inquisitor uses Gate of Infinity to try to score a point by being in my deployment zone. Stormtroopers charge the remaining tactical squad, kill the Sergeant in a challenge, and then whiff leaving one bolter marine. The Chapter Master breaks off and shoots his Combi-Melta at the Crusader, but misses. Two different one-man bolter squads charge the Assault Marines. One dies to Overwatch, the other dies in combat. The Valkyrie tries to hurt the Land Raider Phobos but fails.
*sound of Star Trek transporter*
The last bolter is in a pickle as the Chapter Master’s meltagun whiffs.

That went well.
Turn 4 – Azure Flames
Ironclad Dreadnought charges the Imperial Guard, killing them all. Assault Squad moves and runs to get objective 2 for a point. The Land Raider Crusader does one wound to the Chapter Master with a bolter. Then, it does three wounds with the Assault Cannon and Kyle rolls 3 1’s, taking him out! Squad in the Redeemer pops out and kills the Inquisitor. Every other thing around them fires at the Valkyrie and misses.

The center is cleared by a lot of firepower and one really bad Armour Save roll. The Chapter Master goes down in a flurry of 1’s!

The Inquisitor is taken down by flamers as the Valkyrie dodges several shots.
Turn 5 – Star Phantoms
Vindicare Turbo Penetrator round kills the Ironclad in ONE SHOT. Heavy Bolters kill one surviving bolter marine.

One shot, one kill. Vindicator takes down a Dreadnought.

The Heavy Bolter squad has been the star of the game. They have been laying down a withering hail of fire all game.
Turn 5 – Azure Flames
Lone Meltagun hides behind the Crusader as it advances, killing 2 Devastators. Tactical squad charges the Drop Pod, killing it. Redeemer kills the other Pod. Assault Marines move up and despite Assault Doctrine can’t get the range to assault the Vindicare.

Eep.

Two pods down.
 Just can’t charge, even with a re-roll!
Turn 6 – Star Phantoms
Valkyrie tries yet again to hurt a Land Raider and fails. To gain a point, the Vindicare pops an Assault Marine and assaults the Sergeant, but both of them whiff.
Make yourself useful, Valkyrie!
Both players have an objective to kill a unit in close combat, so the winner will earn a point.
Turn 6 – Azure Flames
Vindicare kills the Sergeant for a point. Land Raider goes Flat out and other units move or run to give me all 6 objectives for FOUR POINTS! Game ends.
Vindicare earns a point by beating up the Assault Sergeant.

Mad dash…

…for FOUR POINTS!
——————————————————————————————————–
Final Score
Azure Flames: 15 + Linebreaker, Slay the Warlord and First Blood for 18
Star Phantoms: 5 + Slay the Warlord for 6.
——————————————————————————————————–
The above explanations don’t show how Kyle rolled abysmally in critical situations. He’d have had another couple points if the Inquisitor had killed the bolters on objective 2. He also had some bad penetration rolls and shots that he needed. The Land Raider should have died from the Ironclad, but got off light with one hull point. This was a game lost on dice rolls.
Next: I’m going to try to get some time off to paint. Back to the grindstone.
September Highland Game Club belated report.
Due to my new job, I totally forgot to write up the batrep from last month’s Highland Game Club! As such, I’ve forgotten the context of the battle, and only remember the highlights.
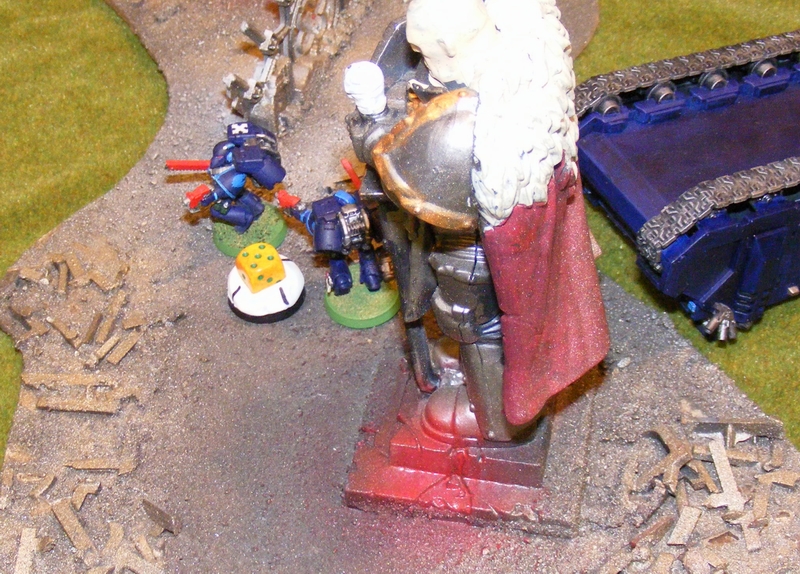
First, I squared off with a new player who didn’t even have his own models! He borrowed the Orks owned by the club from the Black Reach box set. I tried to match the Space Marine contingent of the Black Reach set as faithfully as I could.
 In the end, one half of a tactical squad and the Captain were all that was left on the board! Close game and taught the basic funamentals!
—————————————————————————————————————-
Later, Andrew and I squared off with 1750 points. We both took Space Marines with a Demi-Legion. Andrew also took a Knight Titan…
Here are some pics:

Andrew refused the flank! I should have seen that coming. I’m getting old.

Andrew’s Titan accounted for half the army and was able to kill multiple units per turn. It was not very fun, as I had nothing to deal with it.

I dropped into Andrew’s backfield to cause havoc. It did a lot but I couldn’t stop his whole army.
 I took a Whirlwind/Land Speeder formation that did quite a lot! The second whirlwind even stood up to two rounds of shooting from a Knight after it’s sibling was destroyed early on.
In the end, Andrew won 14 to 8. Ugh. Knights are the worst. I need to make a Sternguard squad that has 10 combi-meltas.
Next, the battle report from this month!