Fourstrands 15th anniversary! AFK swap meet!
This past Saturday I celebrated the 15th anniversary of Fourstrandshobby.com! I’m a bit bad at remembering to post about it though. However some really cool stuff happened!
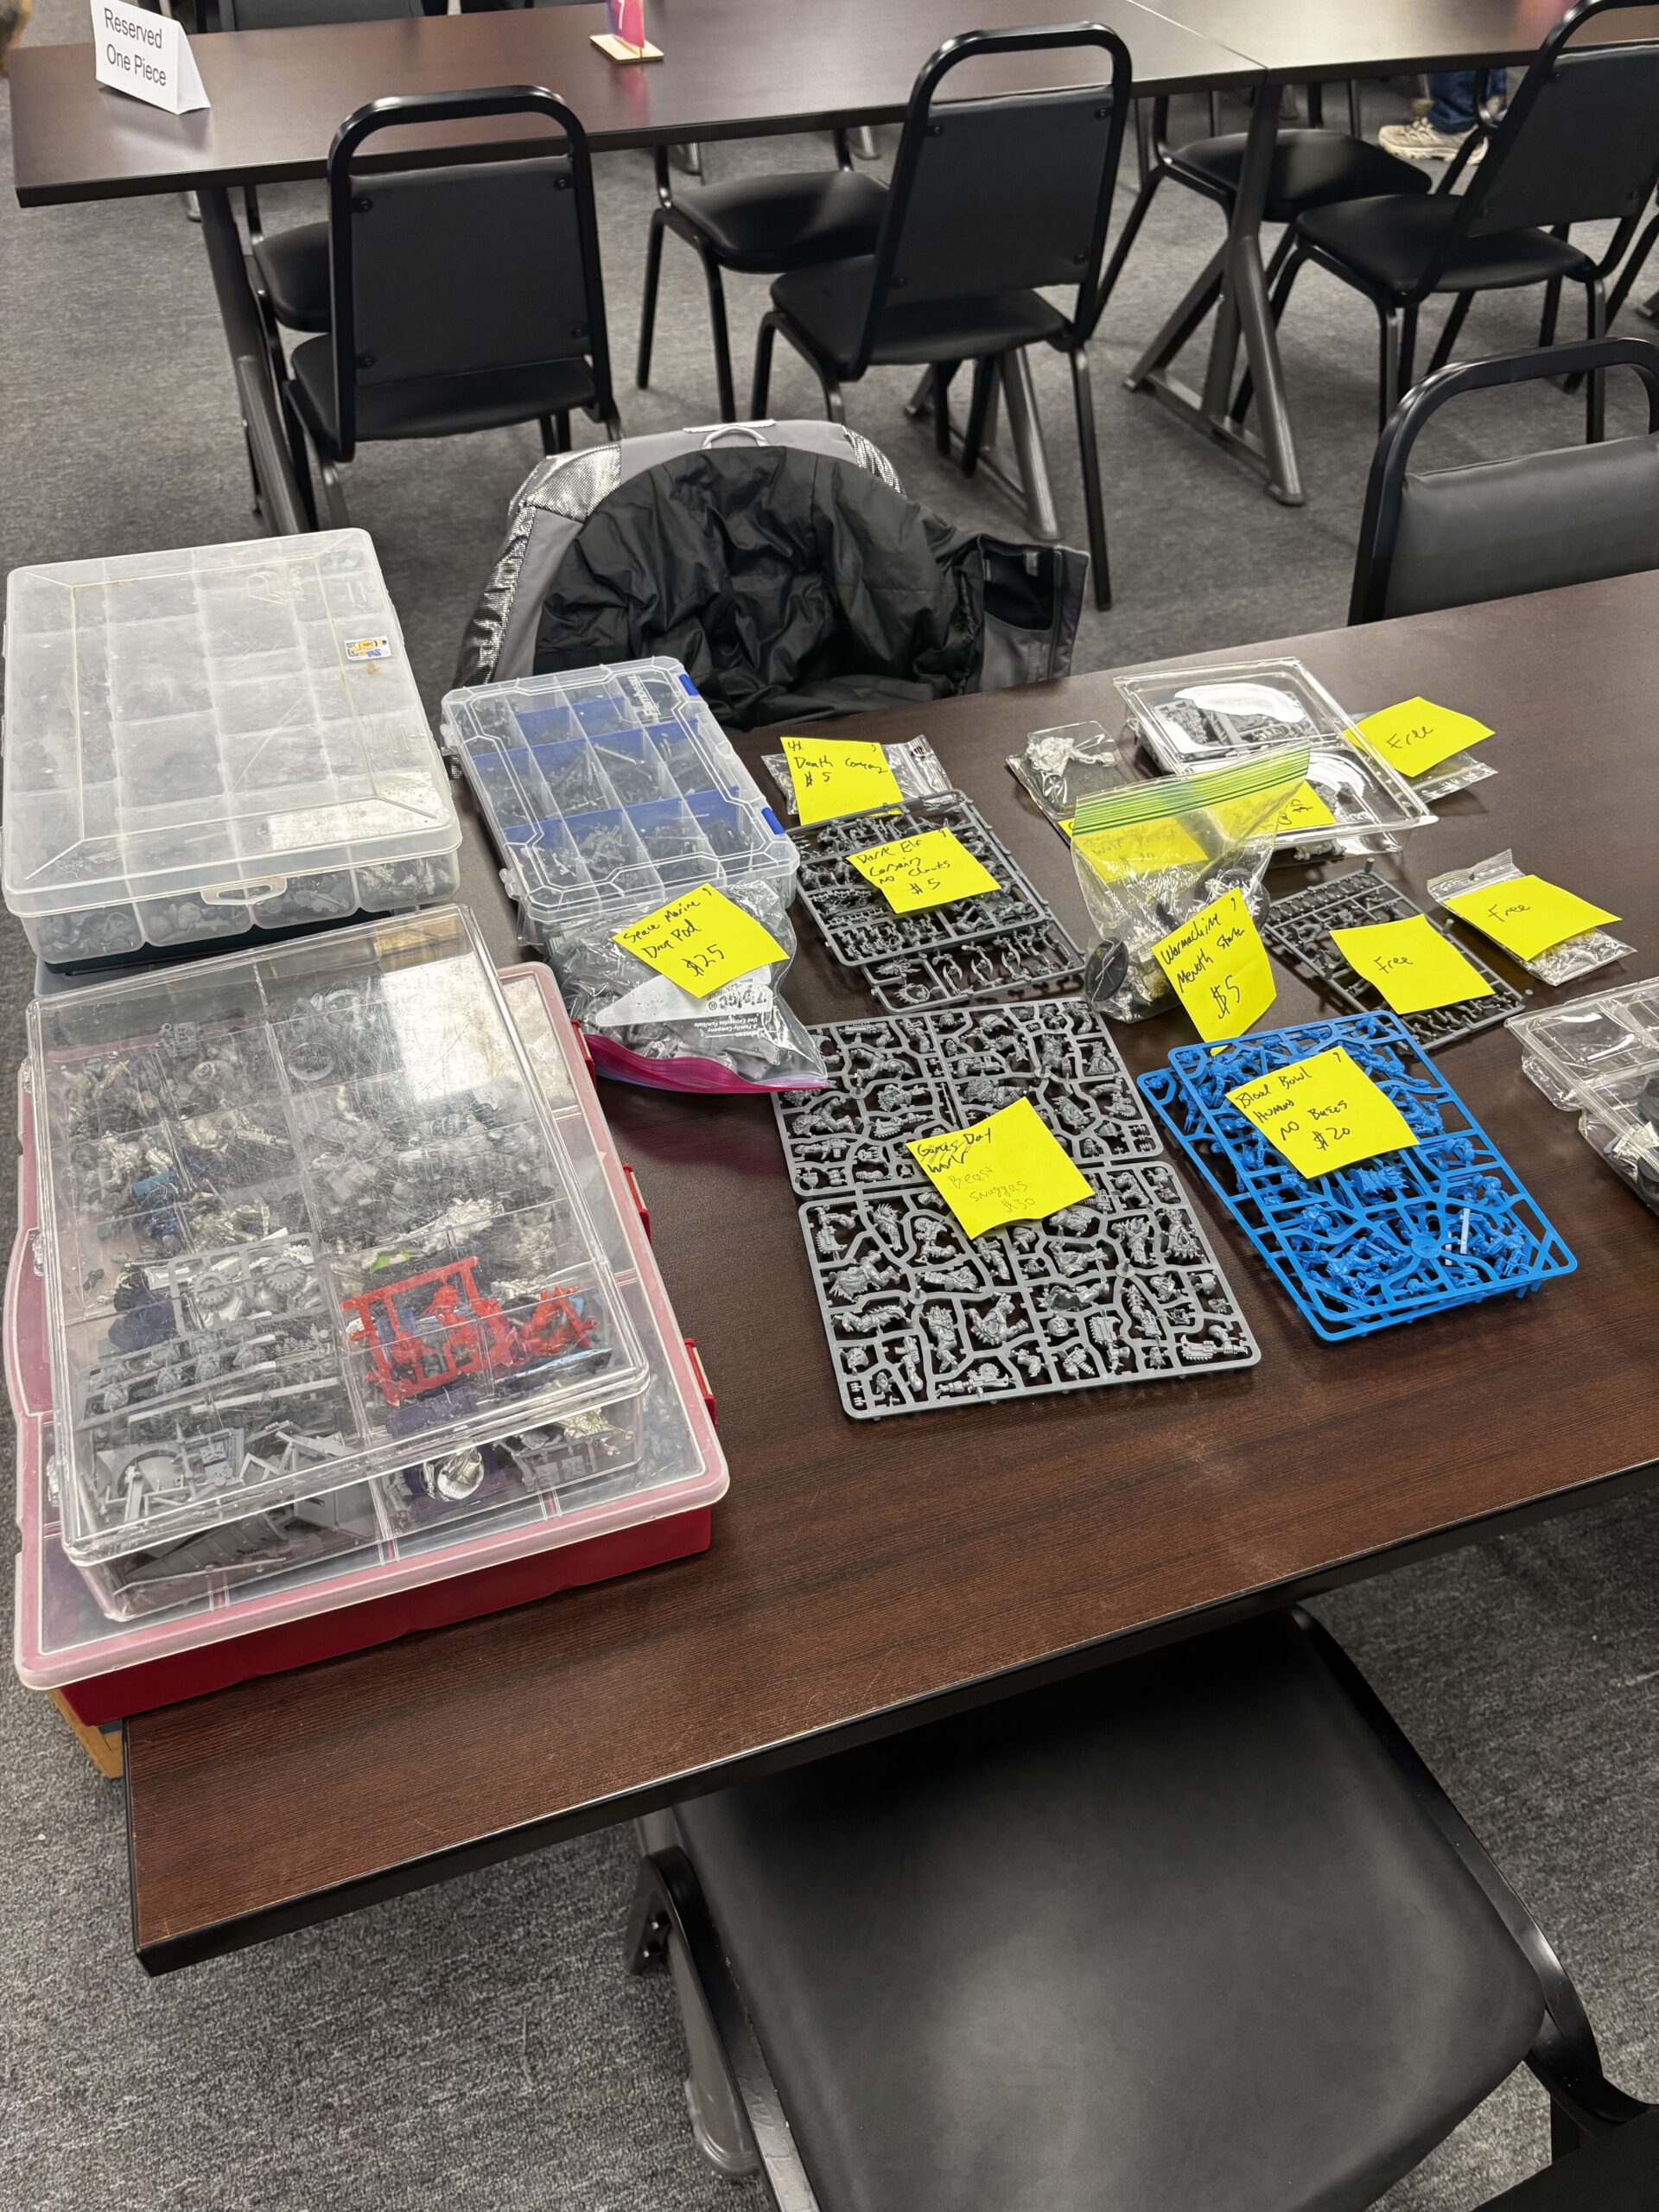
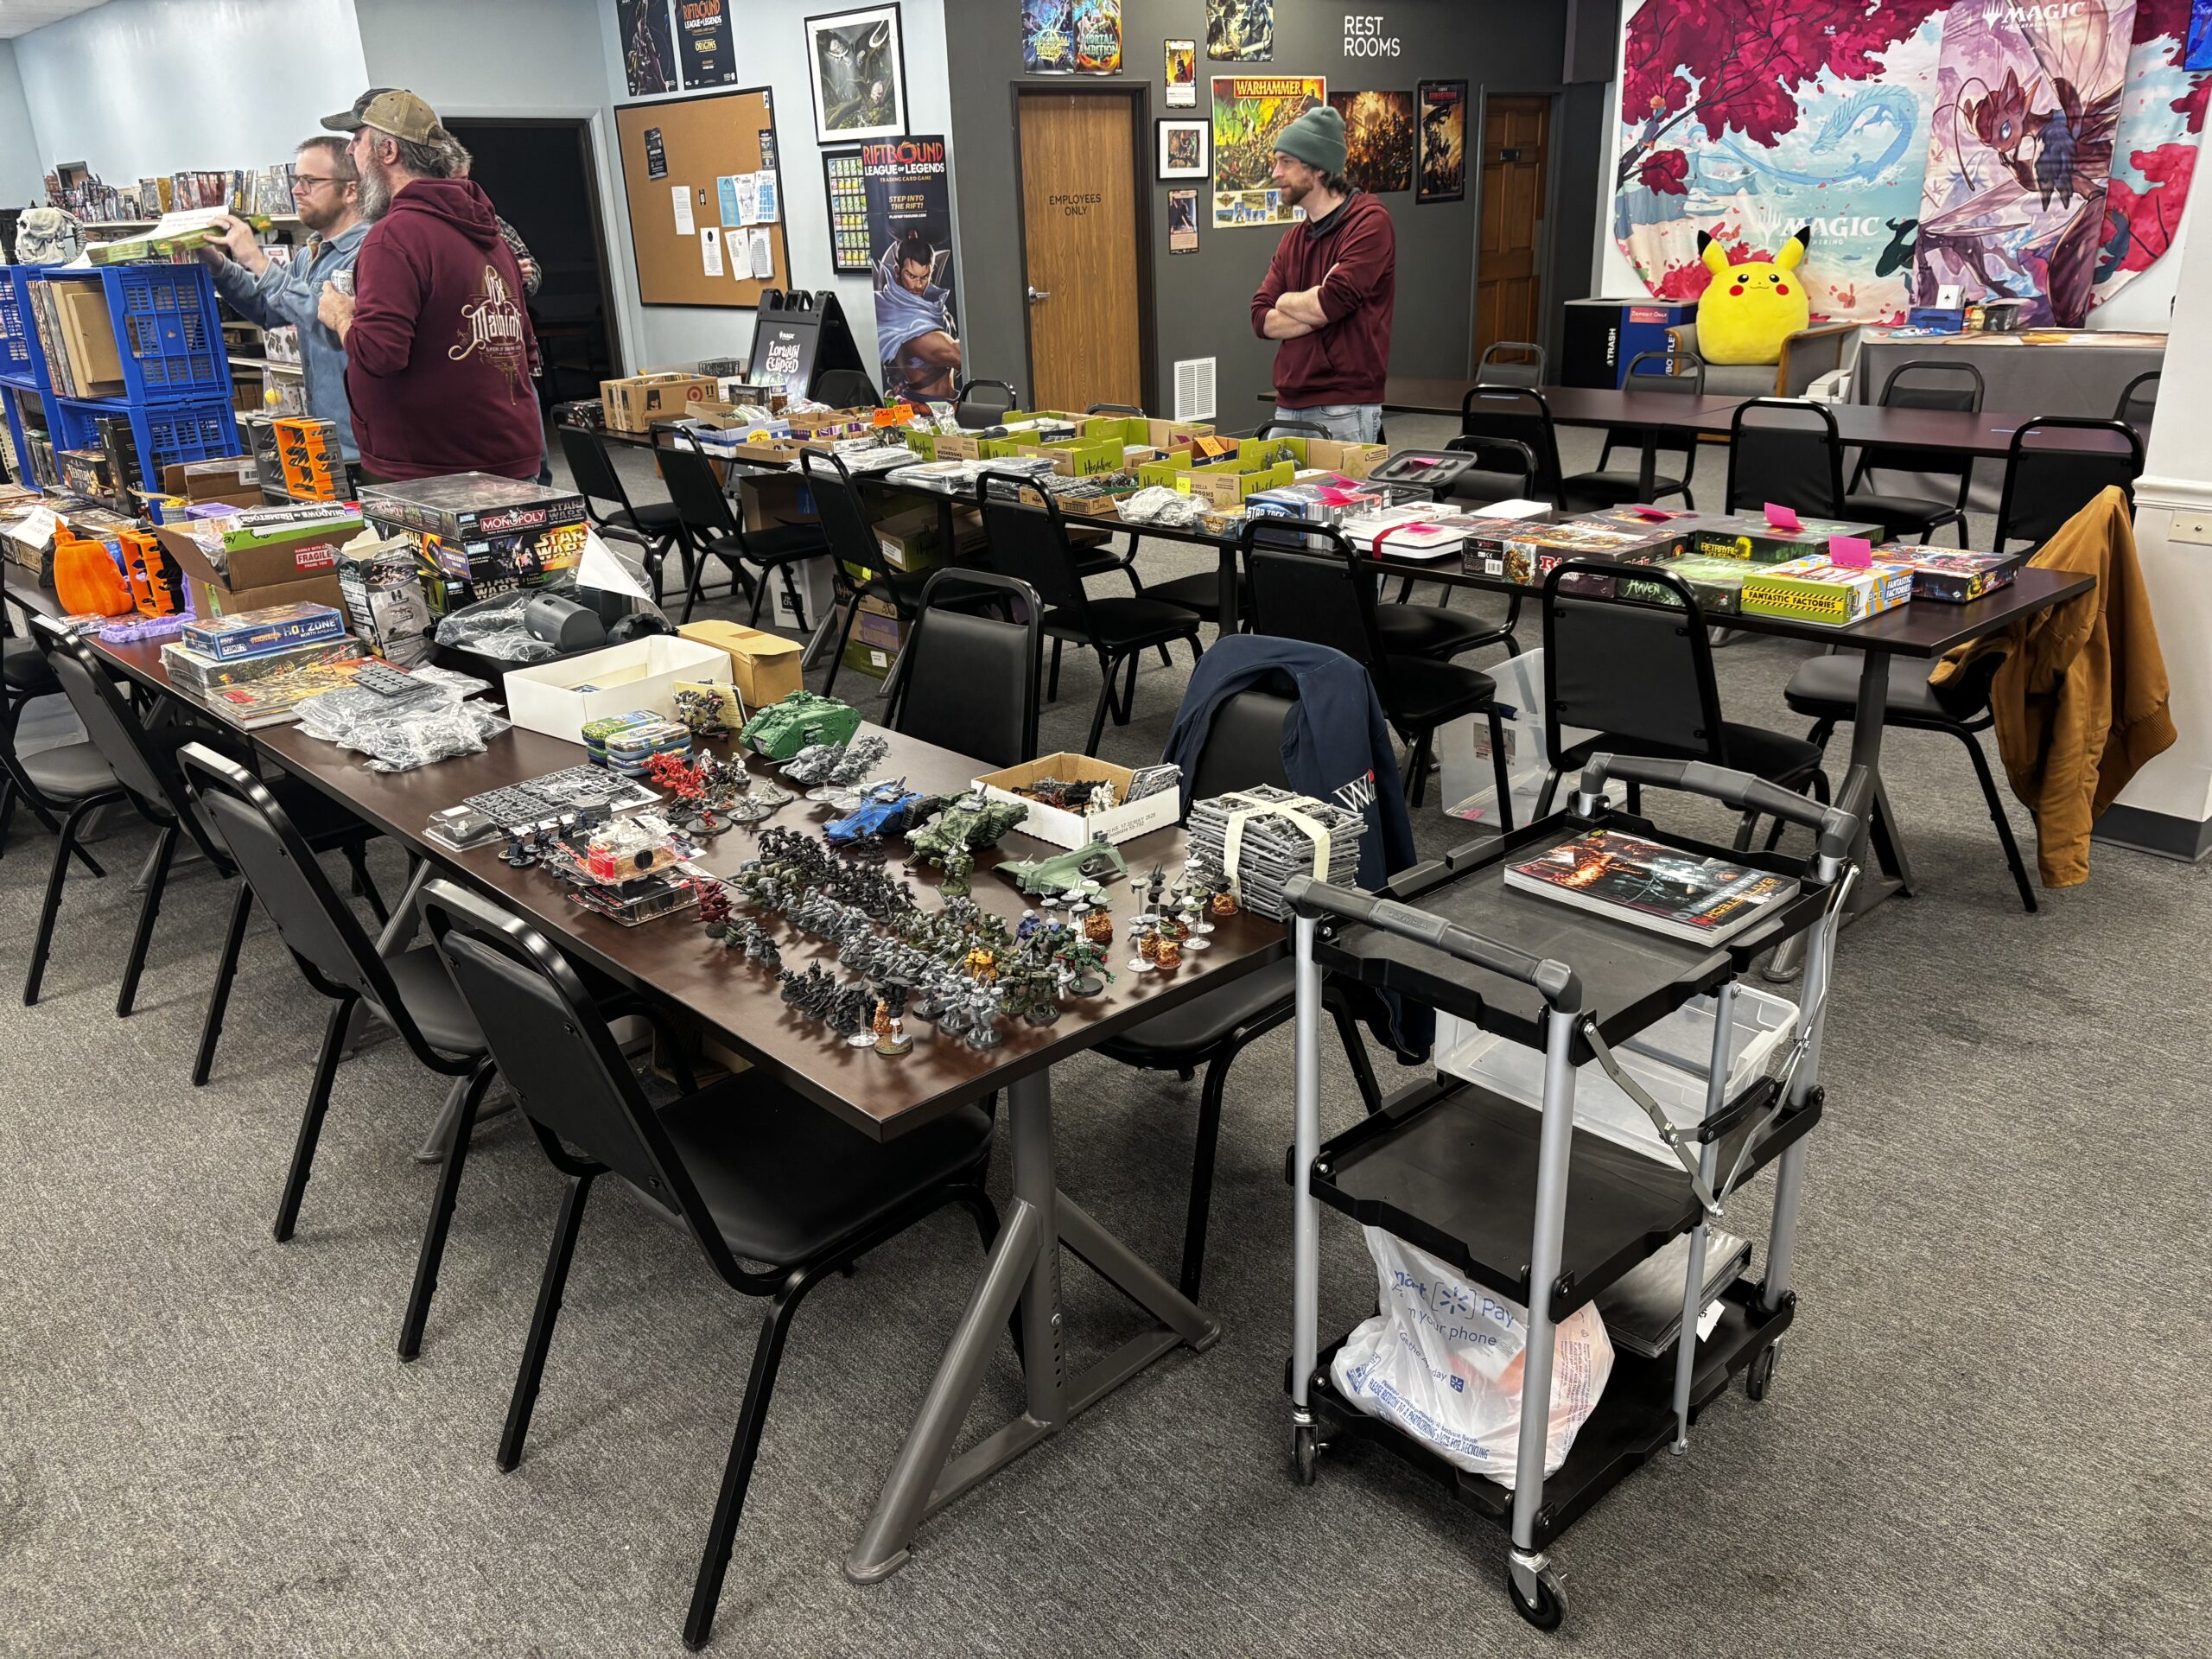
AFK Games in Holt hosted a swap meet, and I’m glad to say I sold a bunch of stuff sitting in my basement gathering dust. I also picked up a Star Wars board game. But the best part was meeting a younger guy and another guy my age who play Battlefleet Gothic! Expect a battle report and possibly a campaign!
Further, Lexington and Andy were there and we caught up on old times! Great memories. I also brought my Bitz Boxes and gave away some bitz to some younger kids who were just getting in to 40k!
Next I have some vacation planned, but I’m adding to my Ork Kommandos and trying to finish the Primaris Captain project!
Finish It Complete! All Painting competitions finished!
It is done! All painting competitions are one hundred percent complete!
This has been a long time coming. So many things to paint. There were a lot of difficulties, like the tiny details on all the Legion minis, the colors on the Necromunda girls, and the sheer volume of the Orks. But I worked hard and budgeted time, and it paid off.
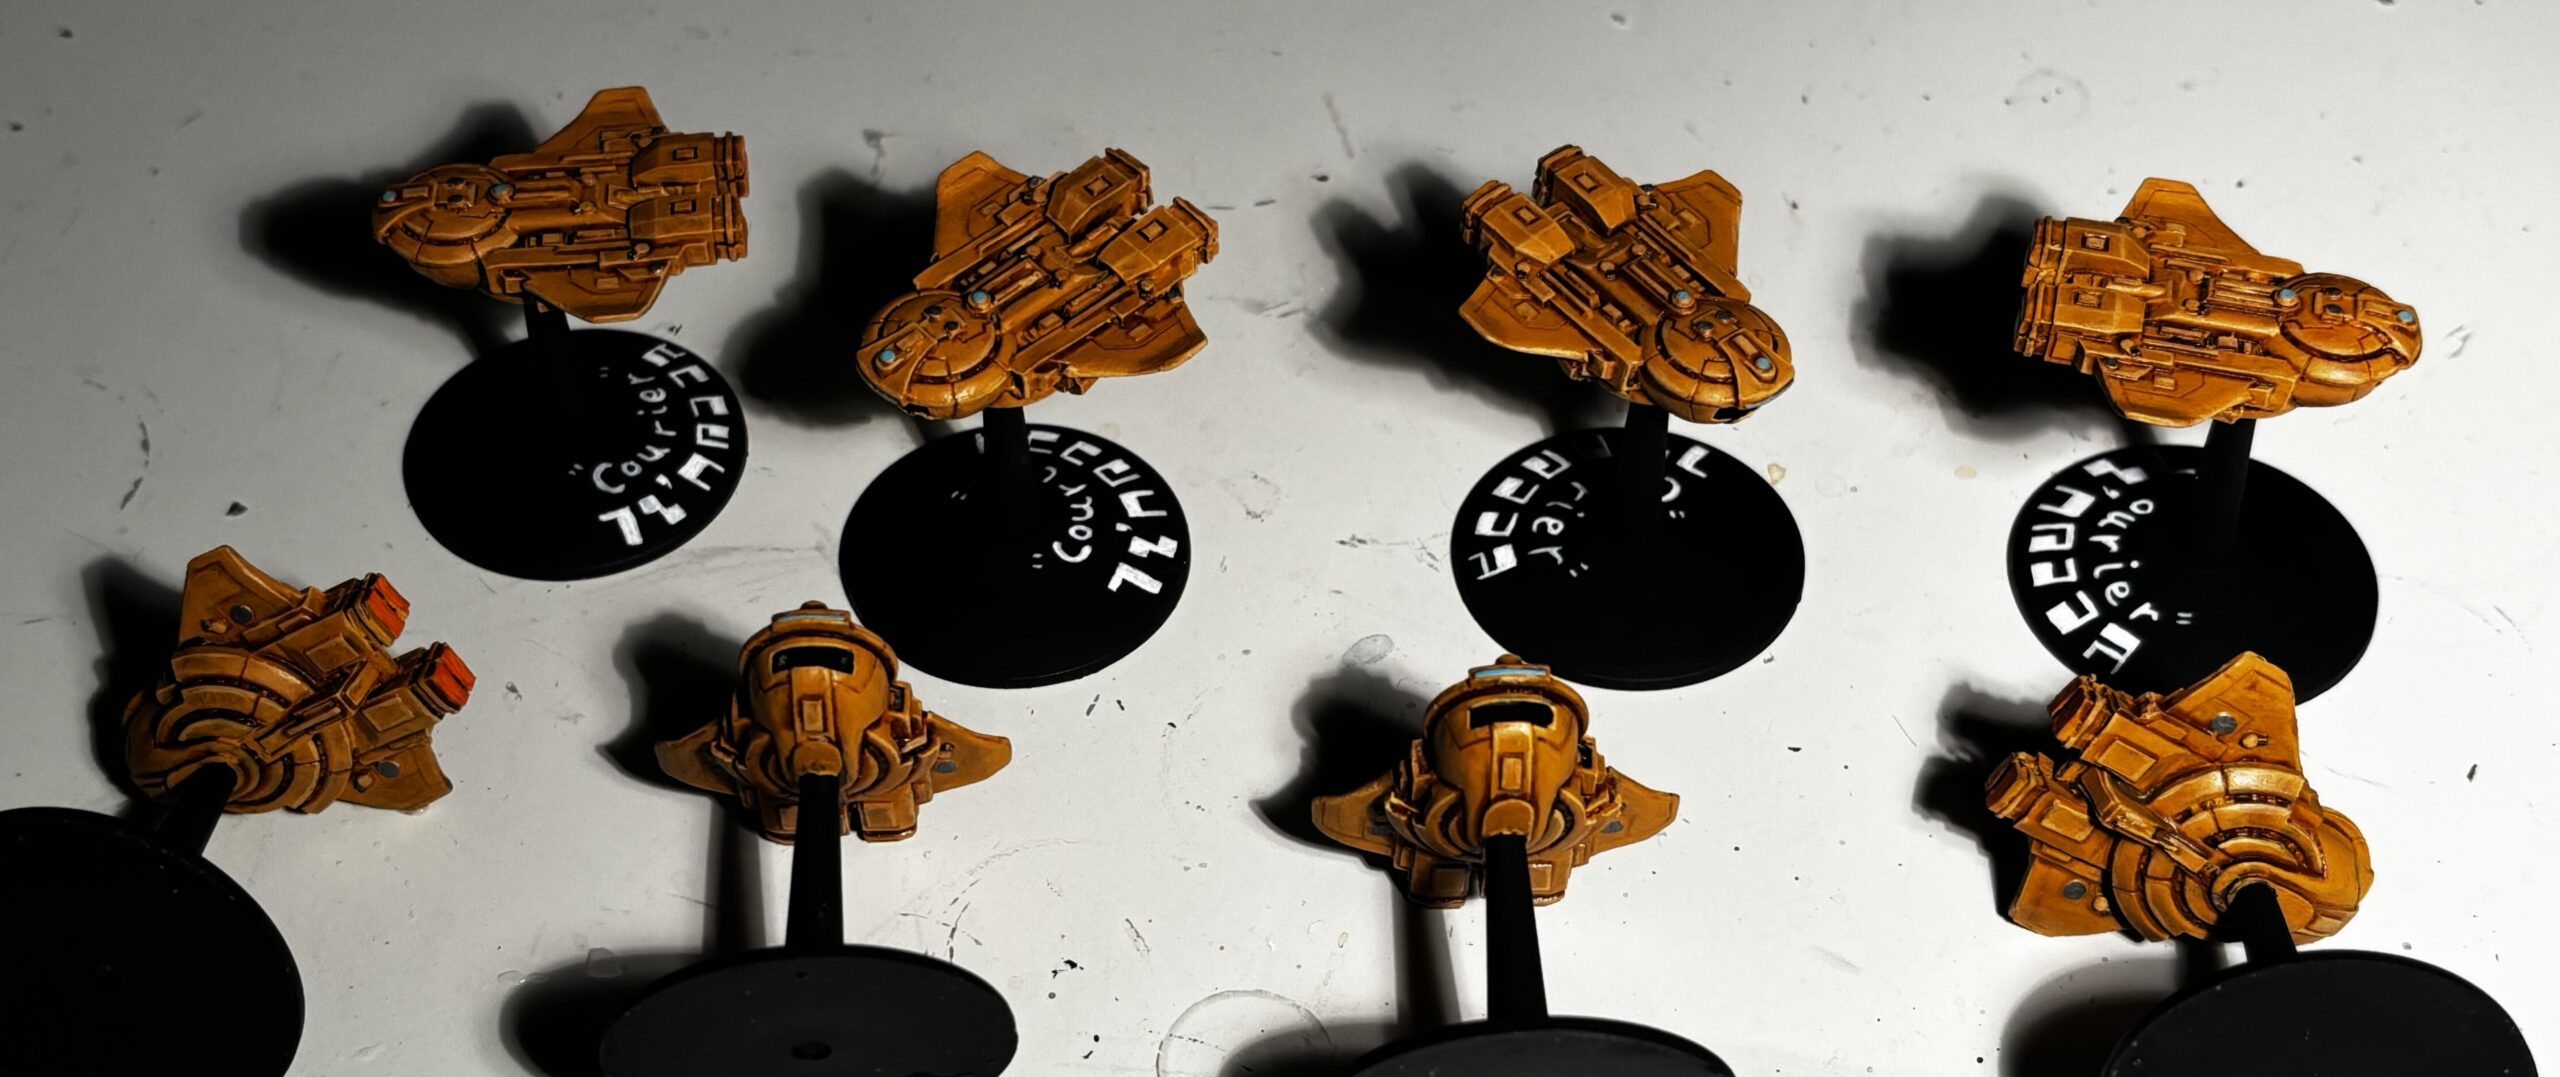
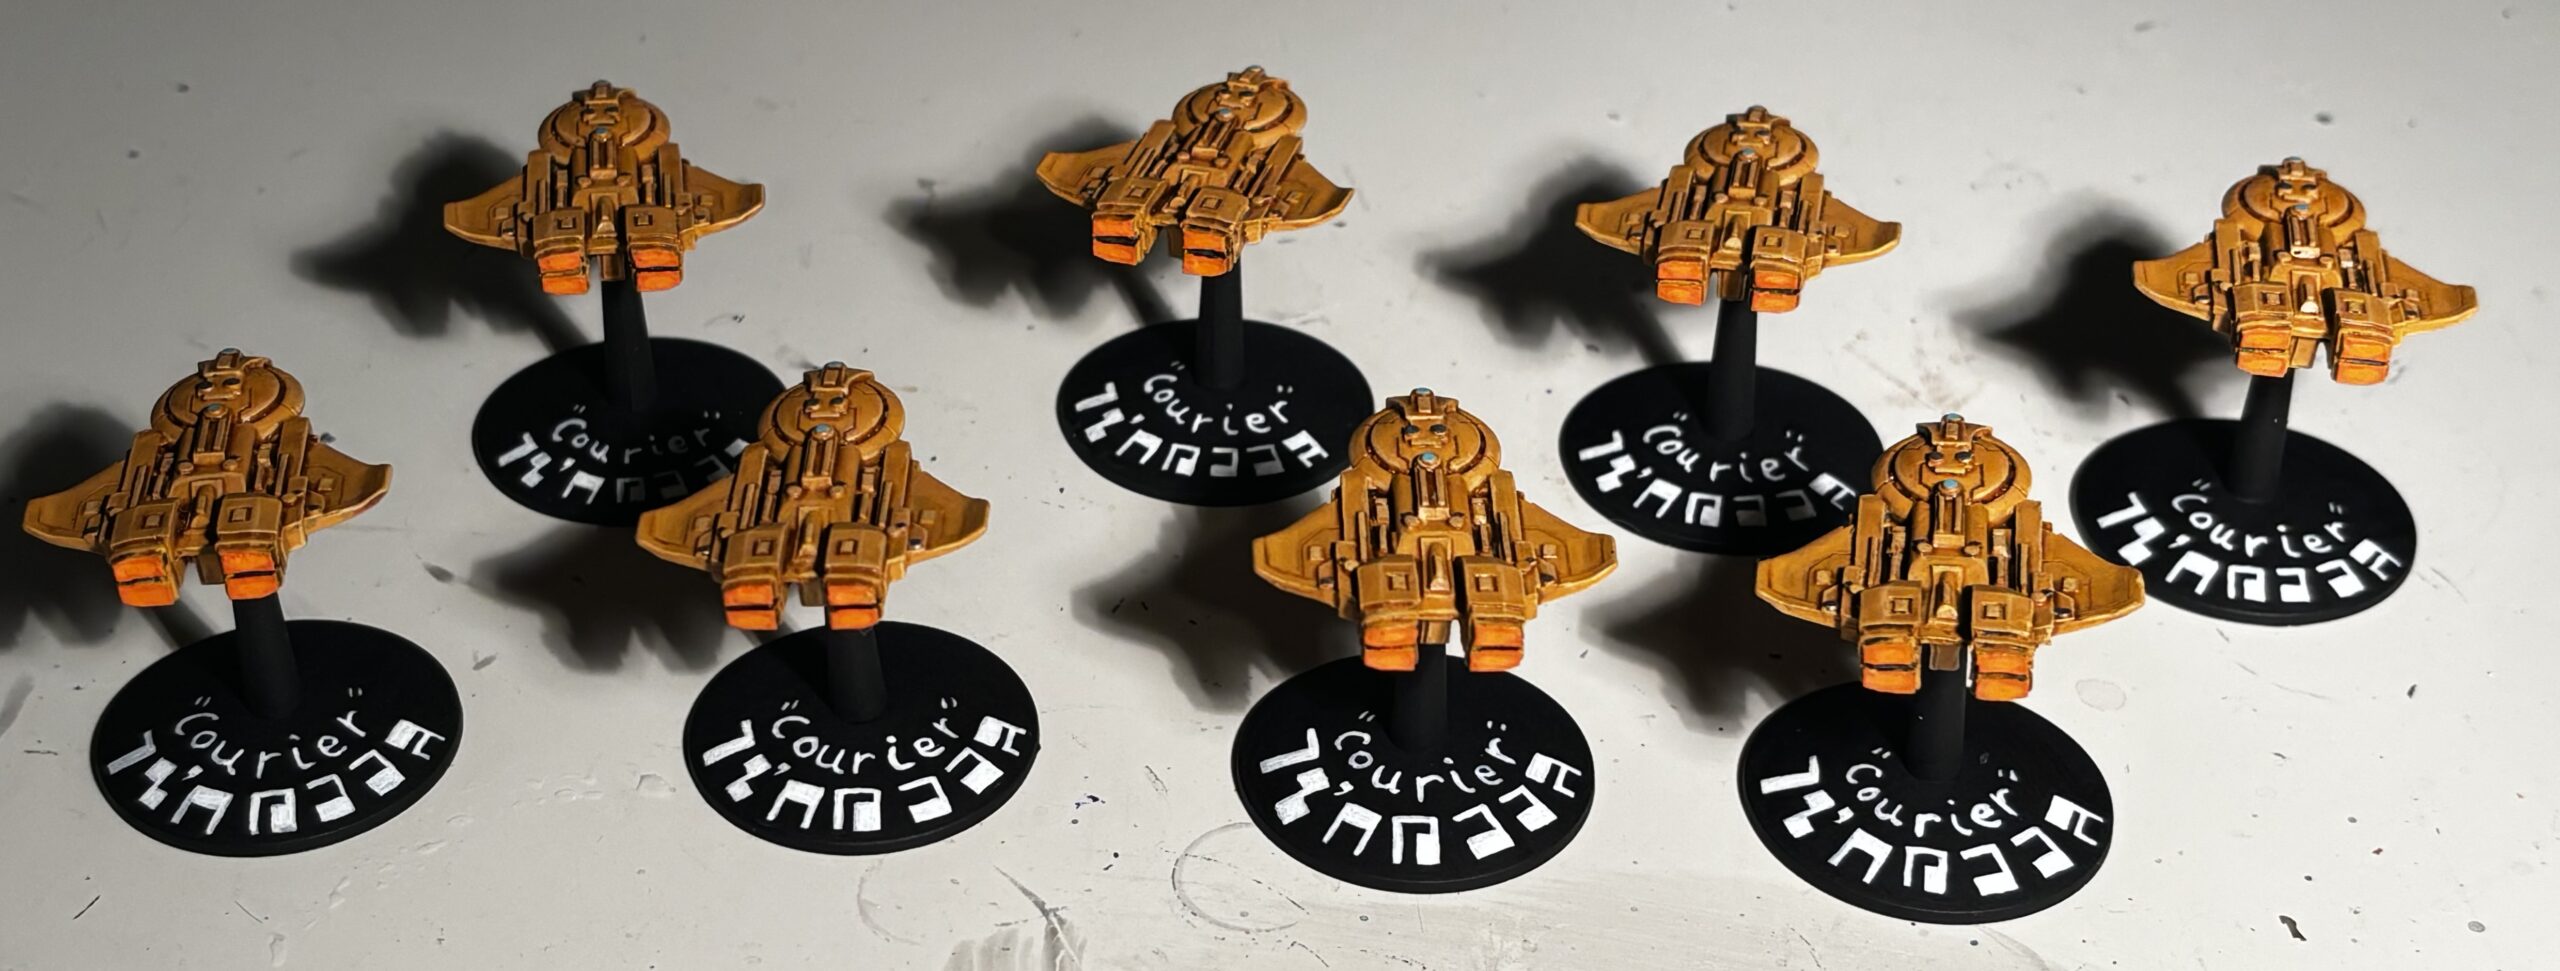
Without further ado, here’s the final project: The Nicassar Dhows!
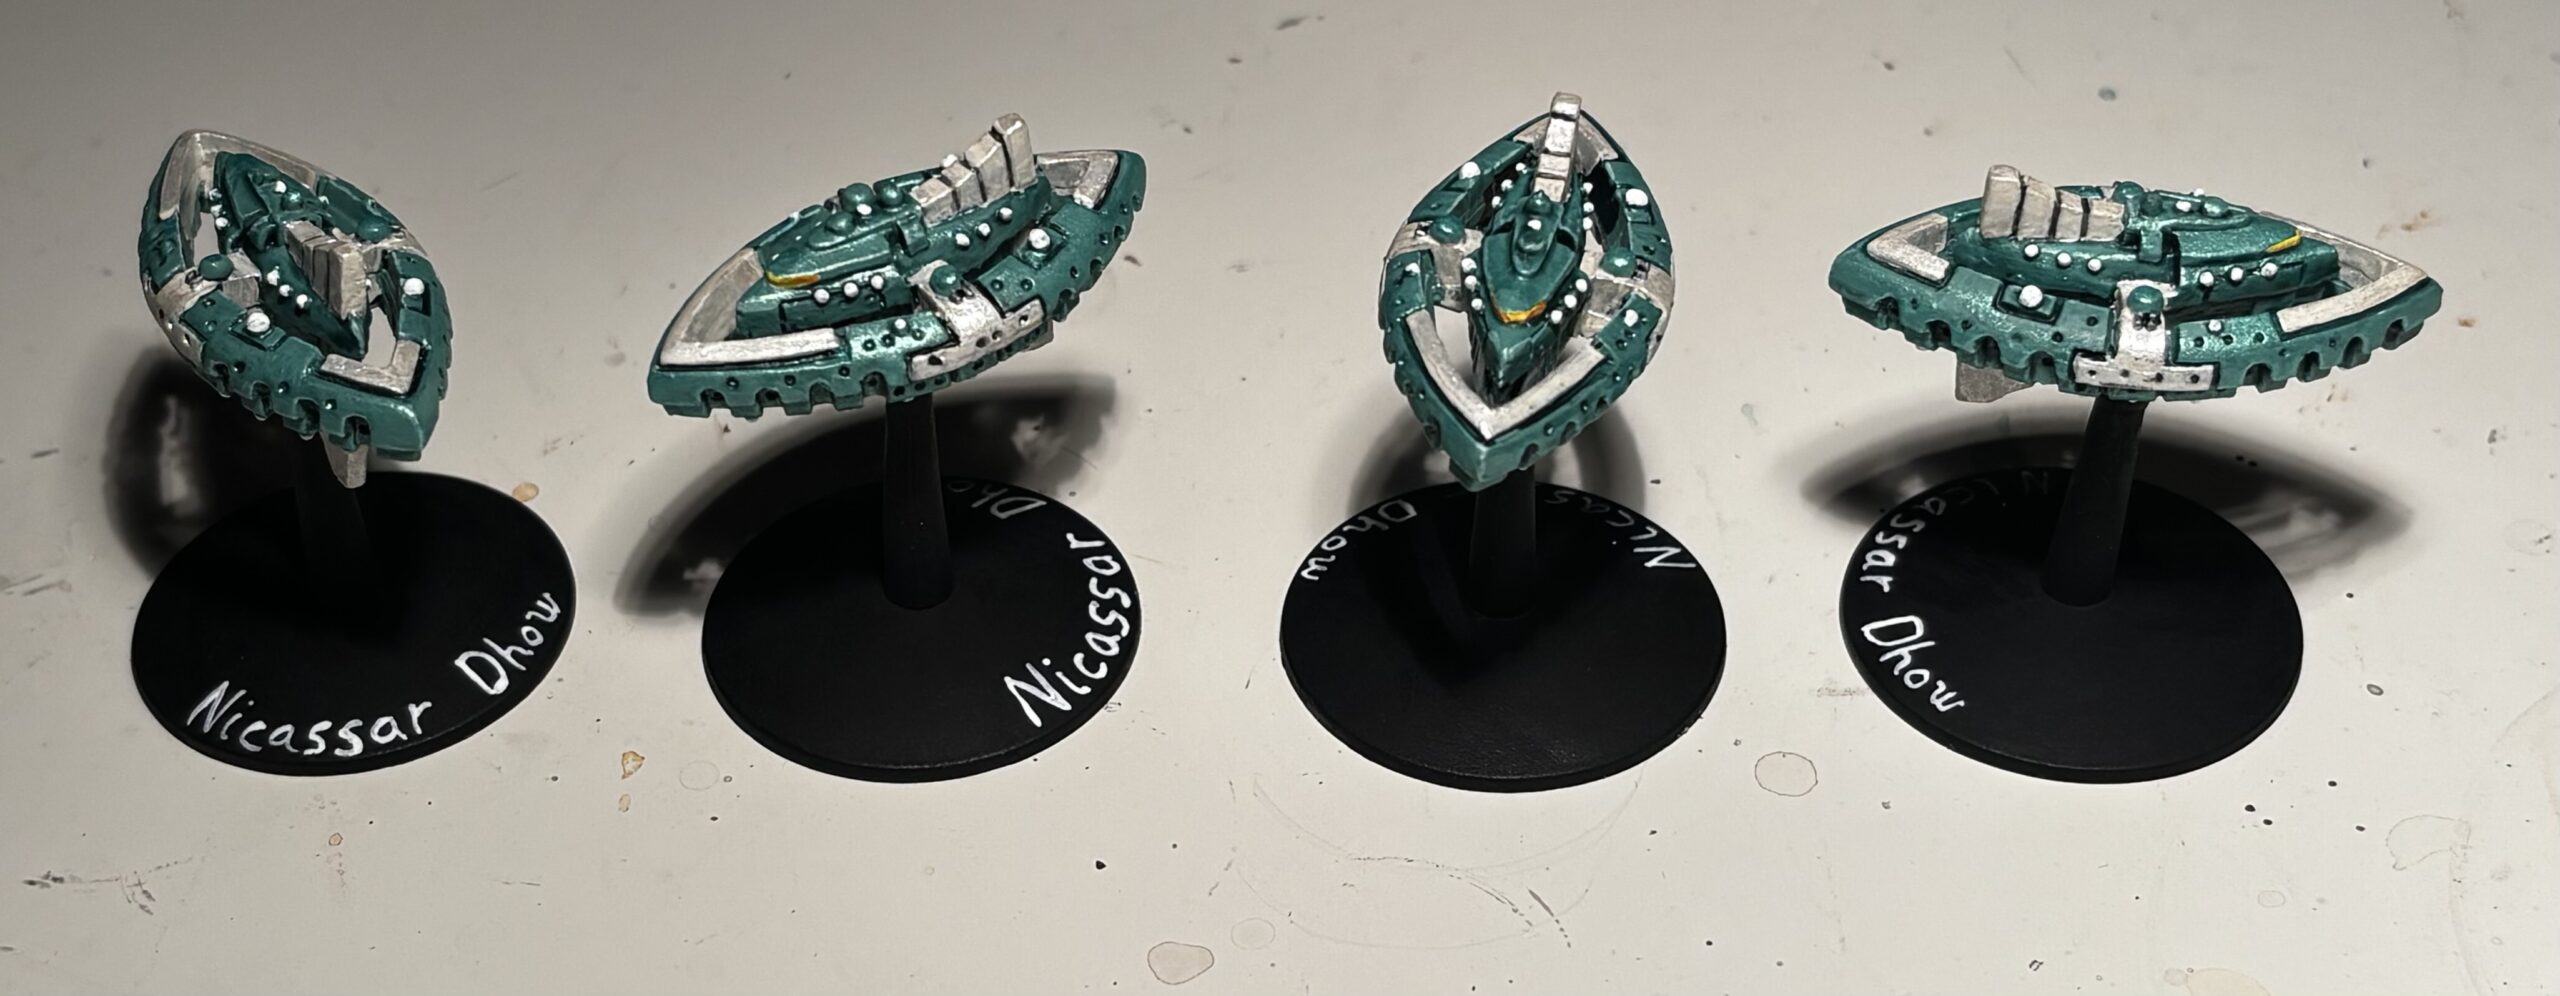
These Dhows are painted in the same color scheme as the “official” scheme shown back long ago when GW sold these, but elevated with Turbo Dork paints. They don’t photograph well, but let me assure you they are SHIMMERY.
Of course, these Dhows are magnetized to their bases to allow them to do… this!
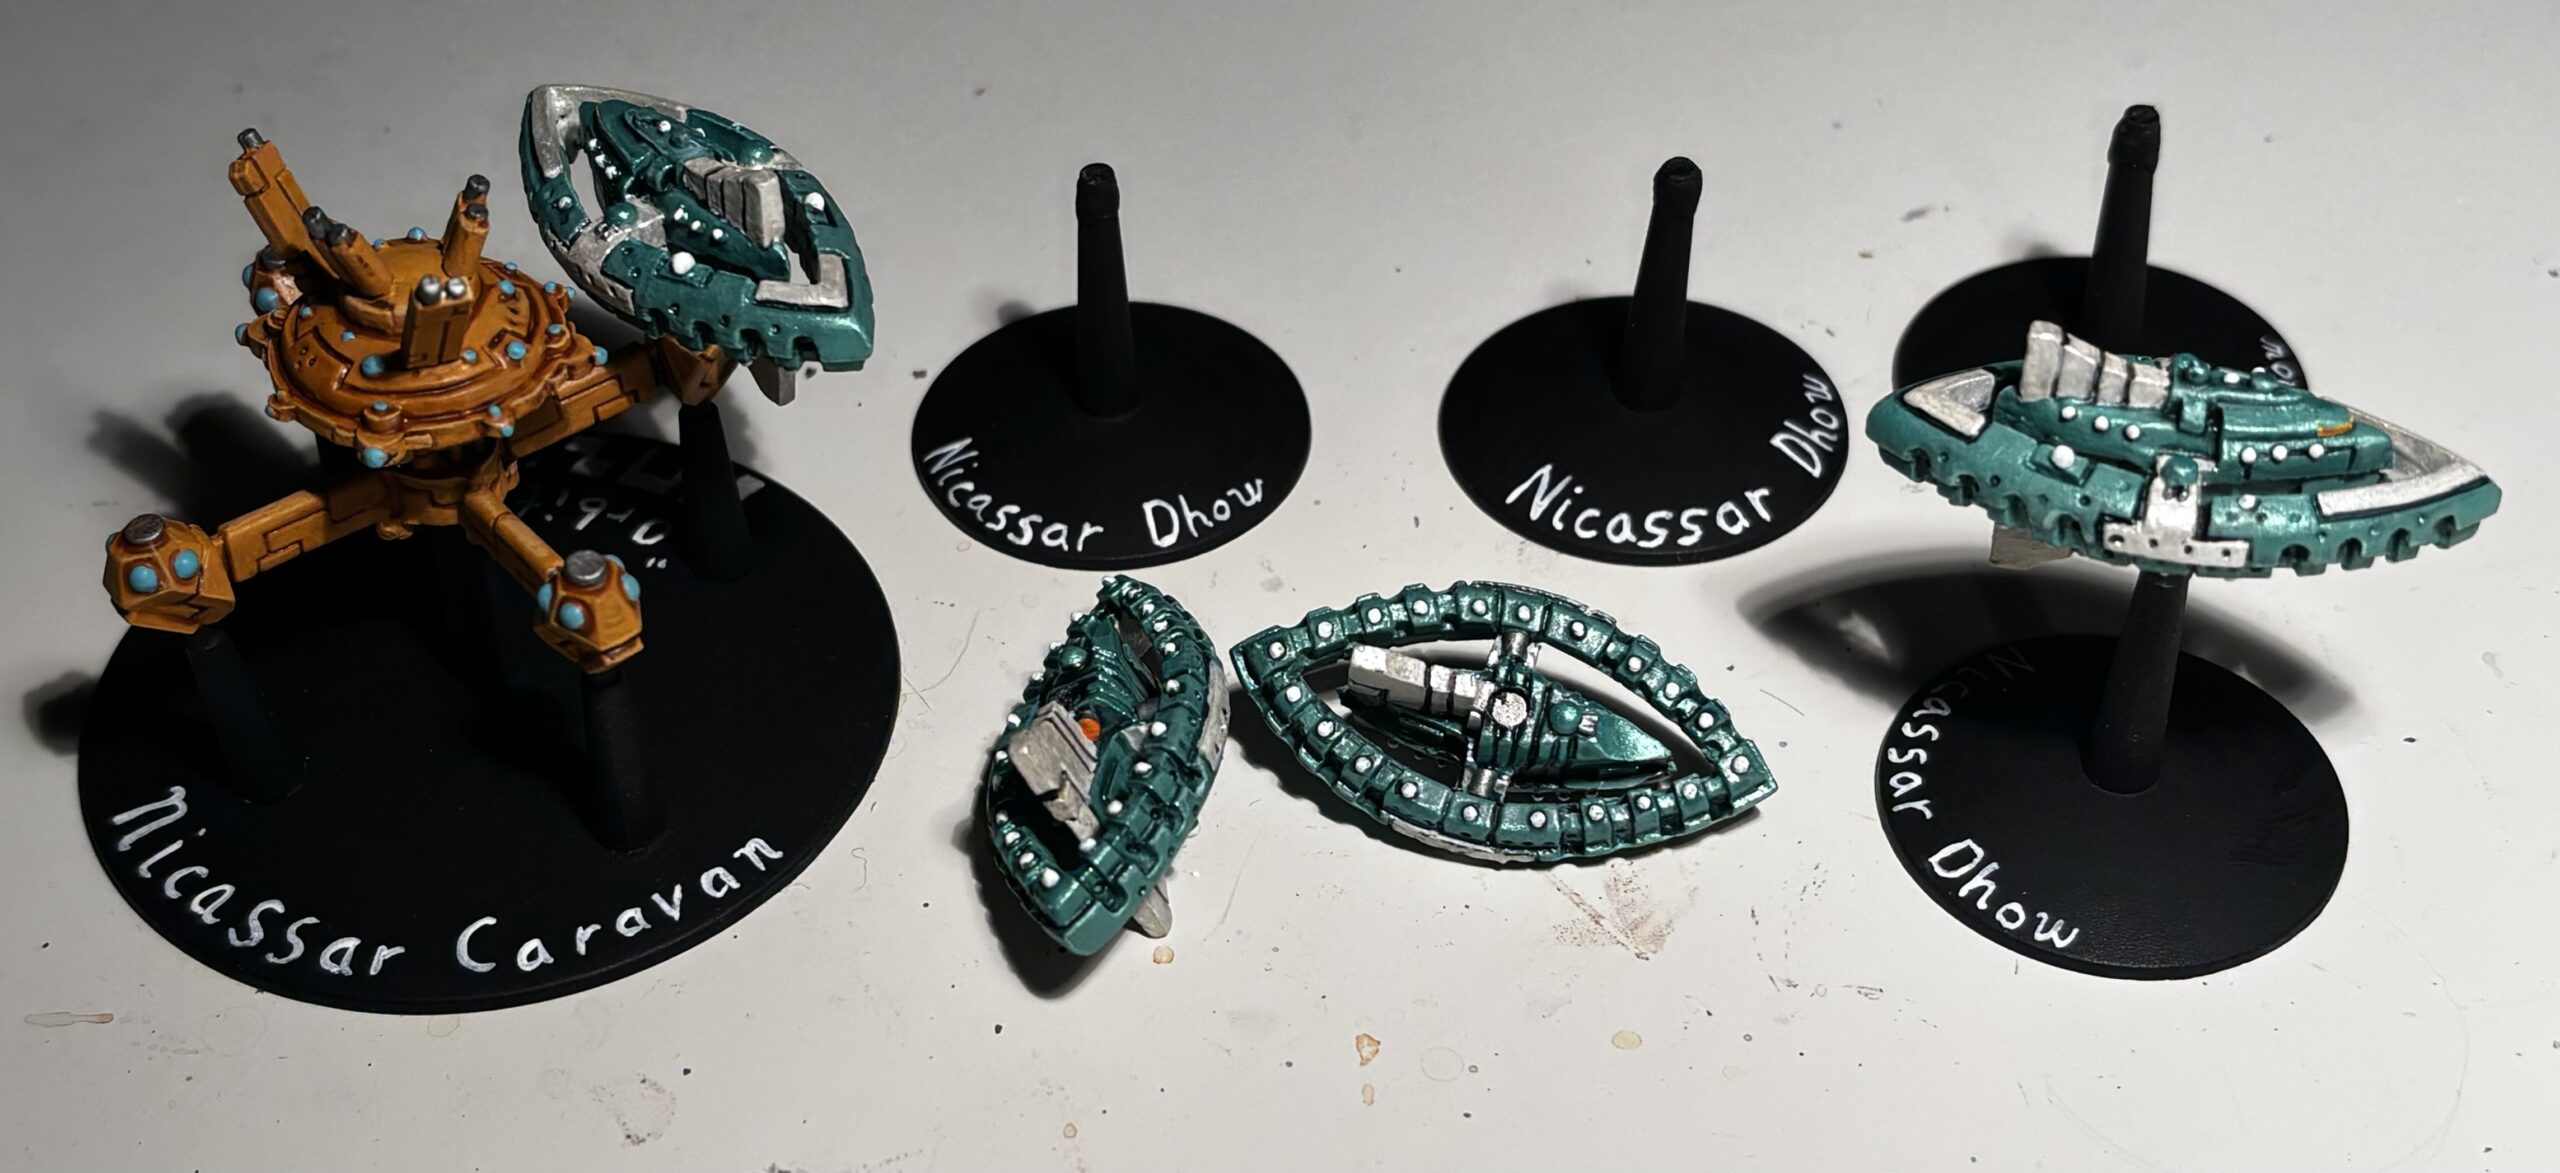
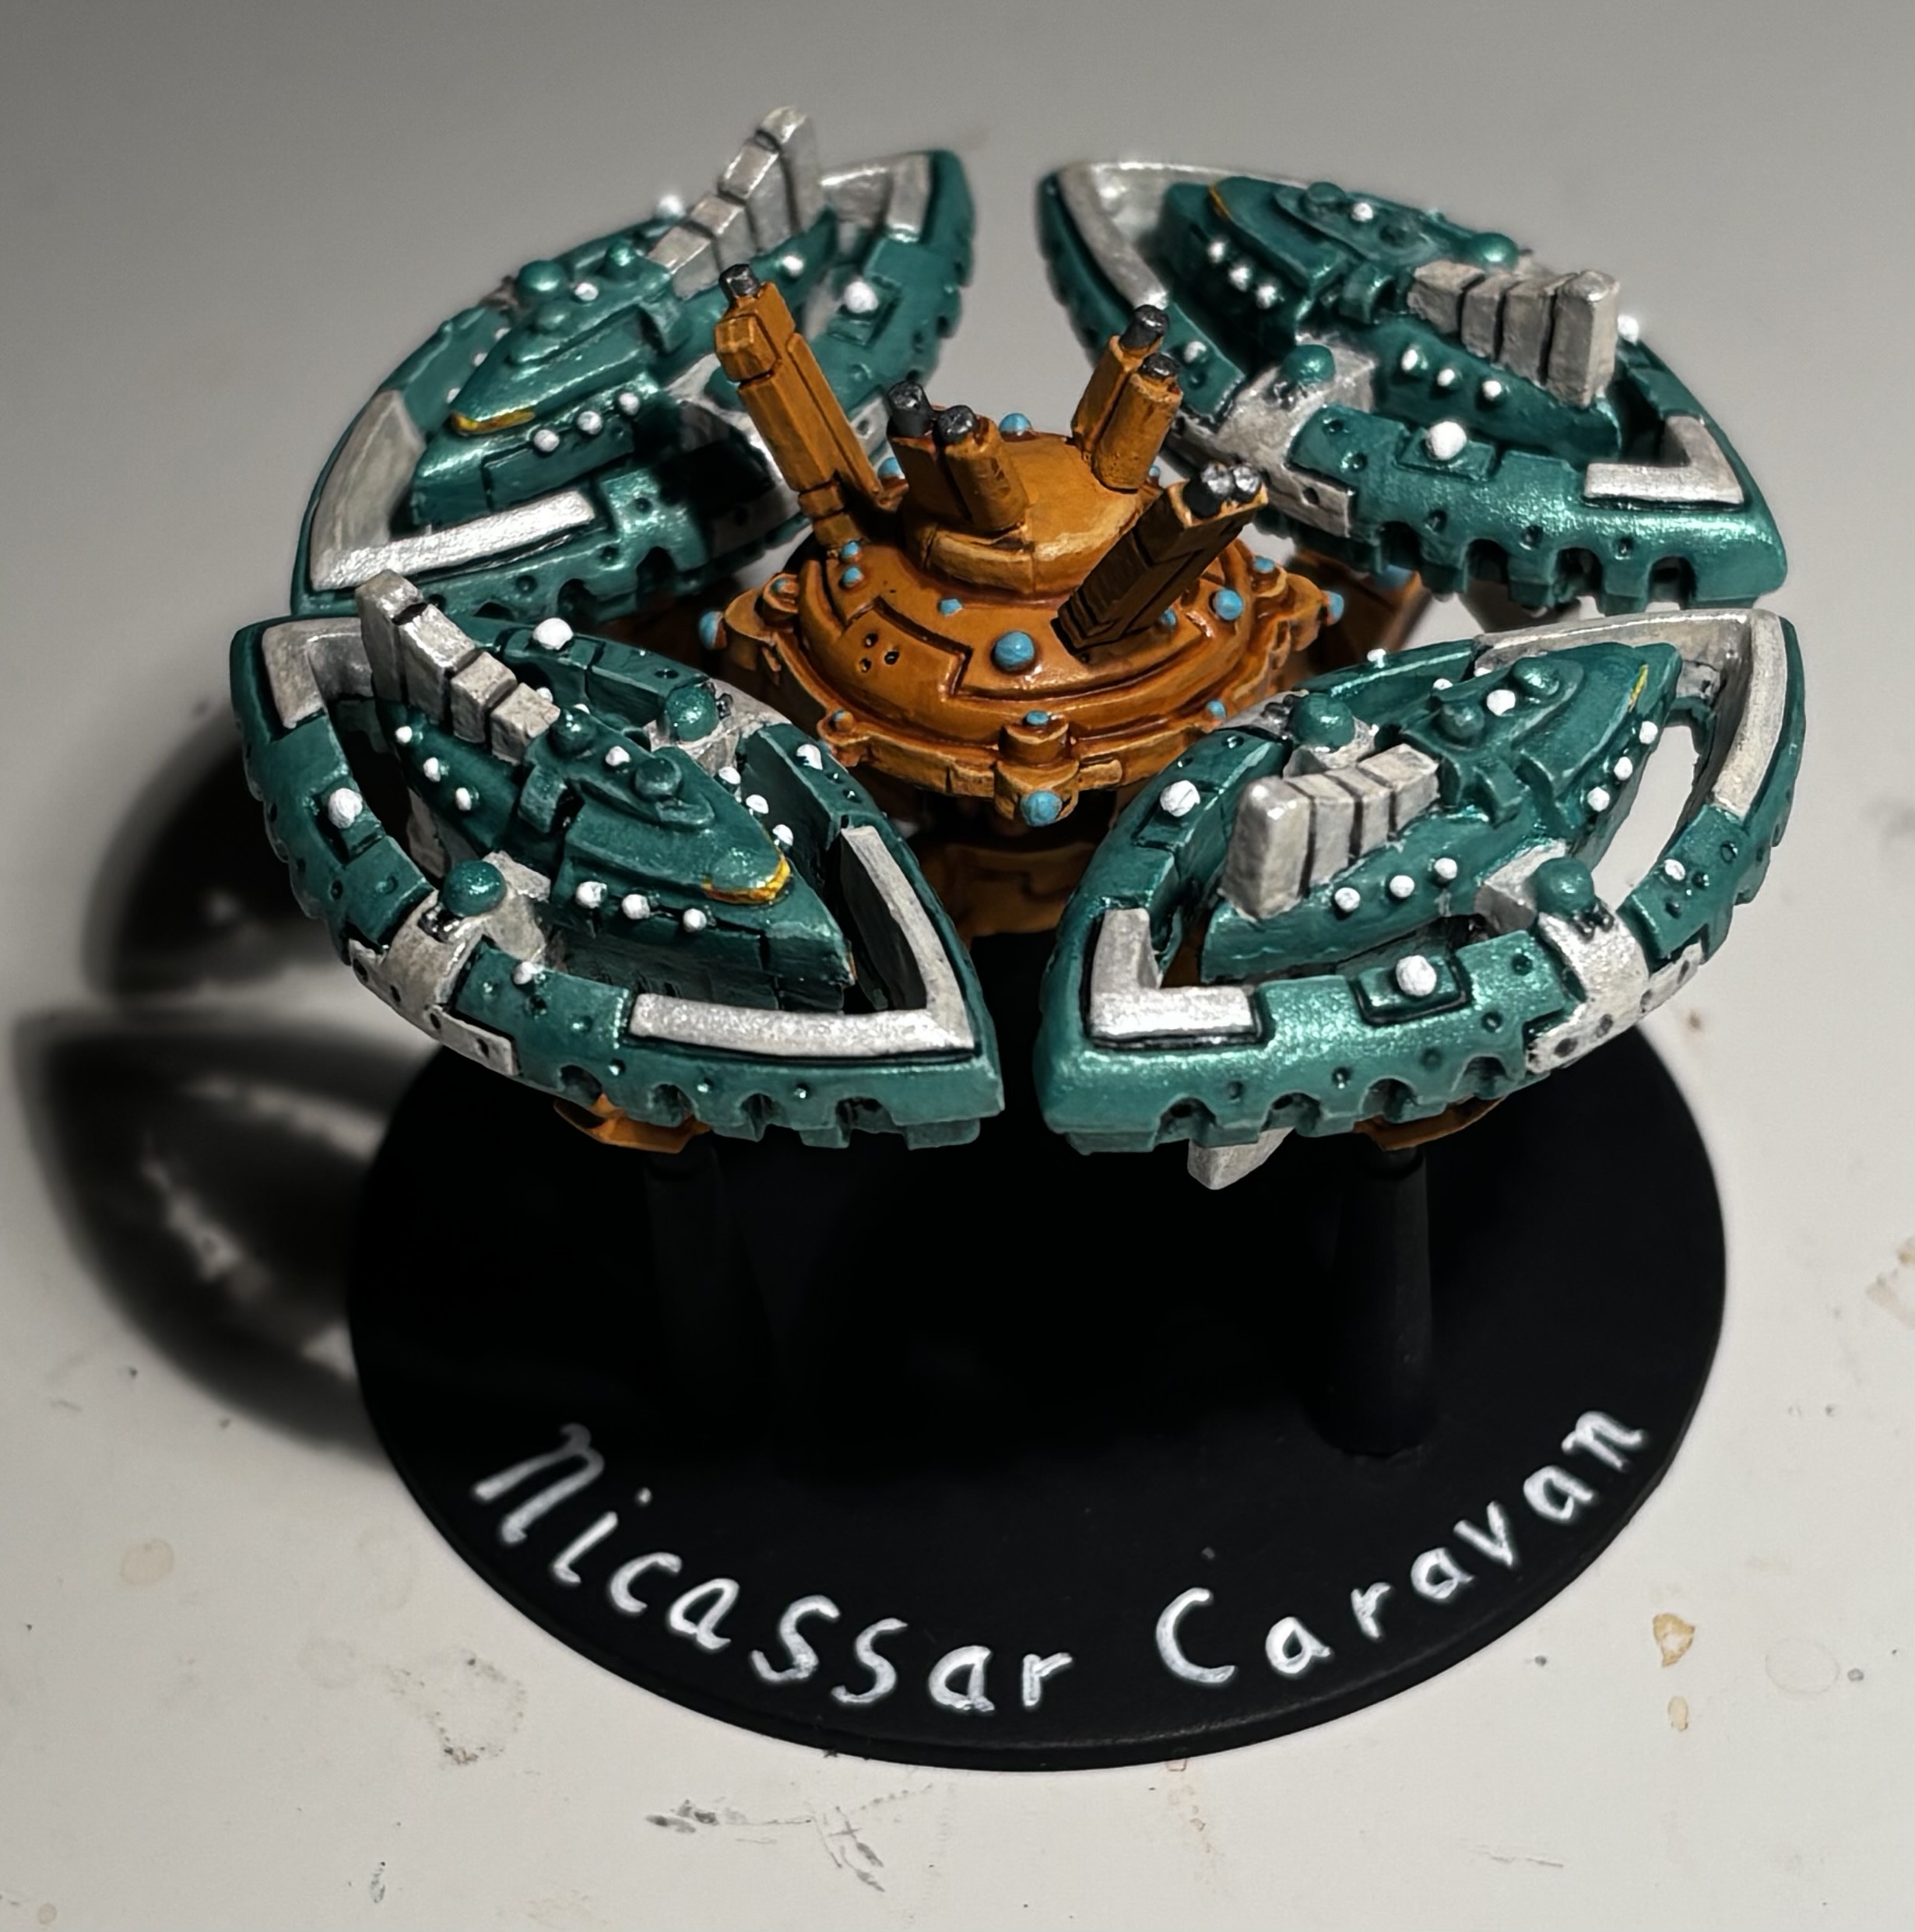
Adding the Dhows to the Orbital I painted previously lets me field a Caravan if I wish. Basically a much worse version of the Blackstone Fortress, but also cheaper.
With this, the Finish It competition is complete!
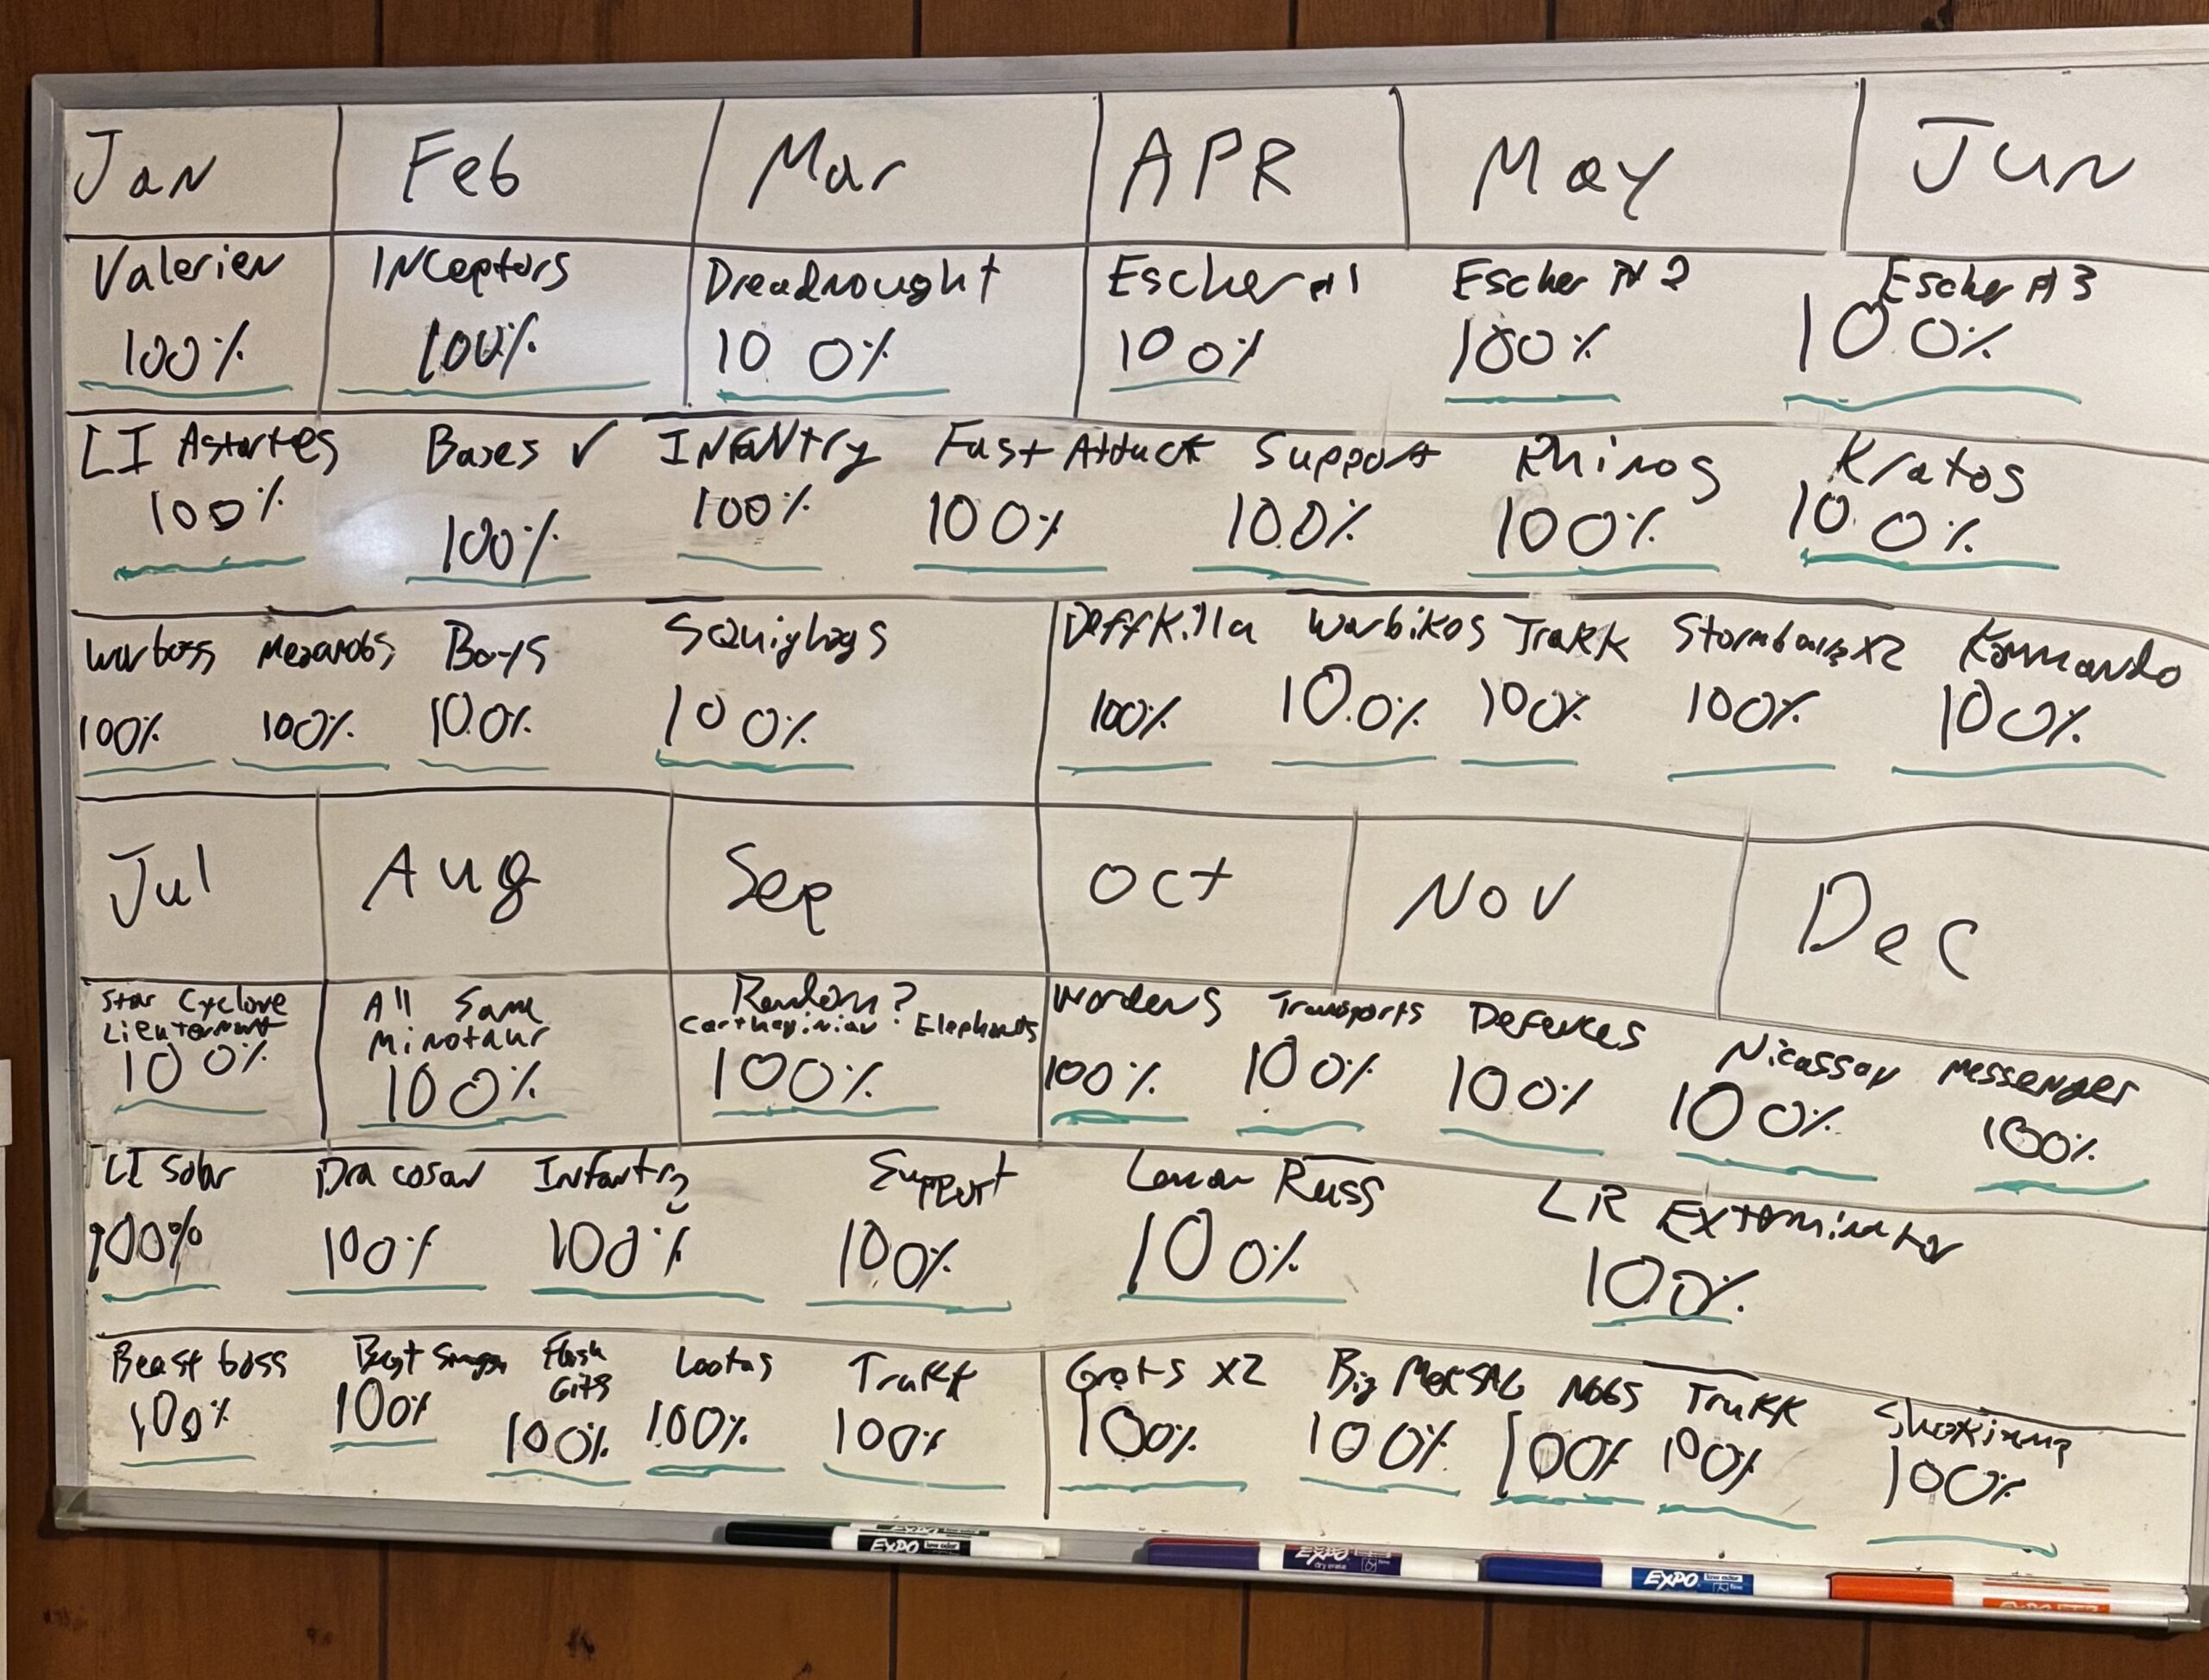
Here is the whole Finish It challenge.
Wait a minute… that’s not my normal work table. That looks like…
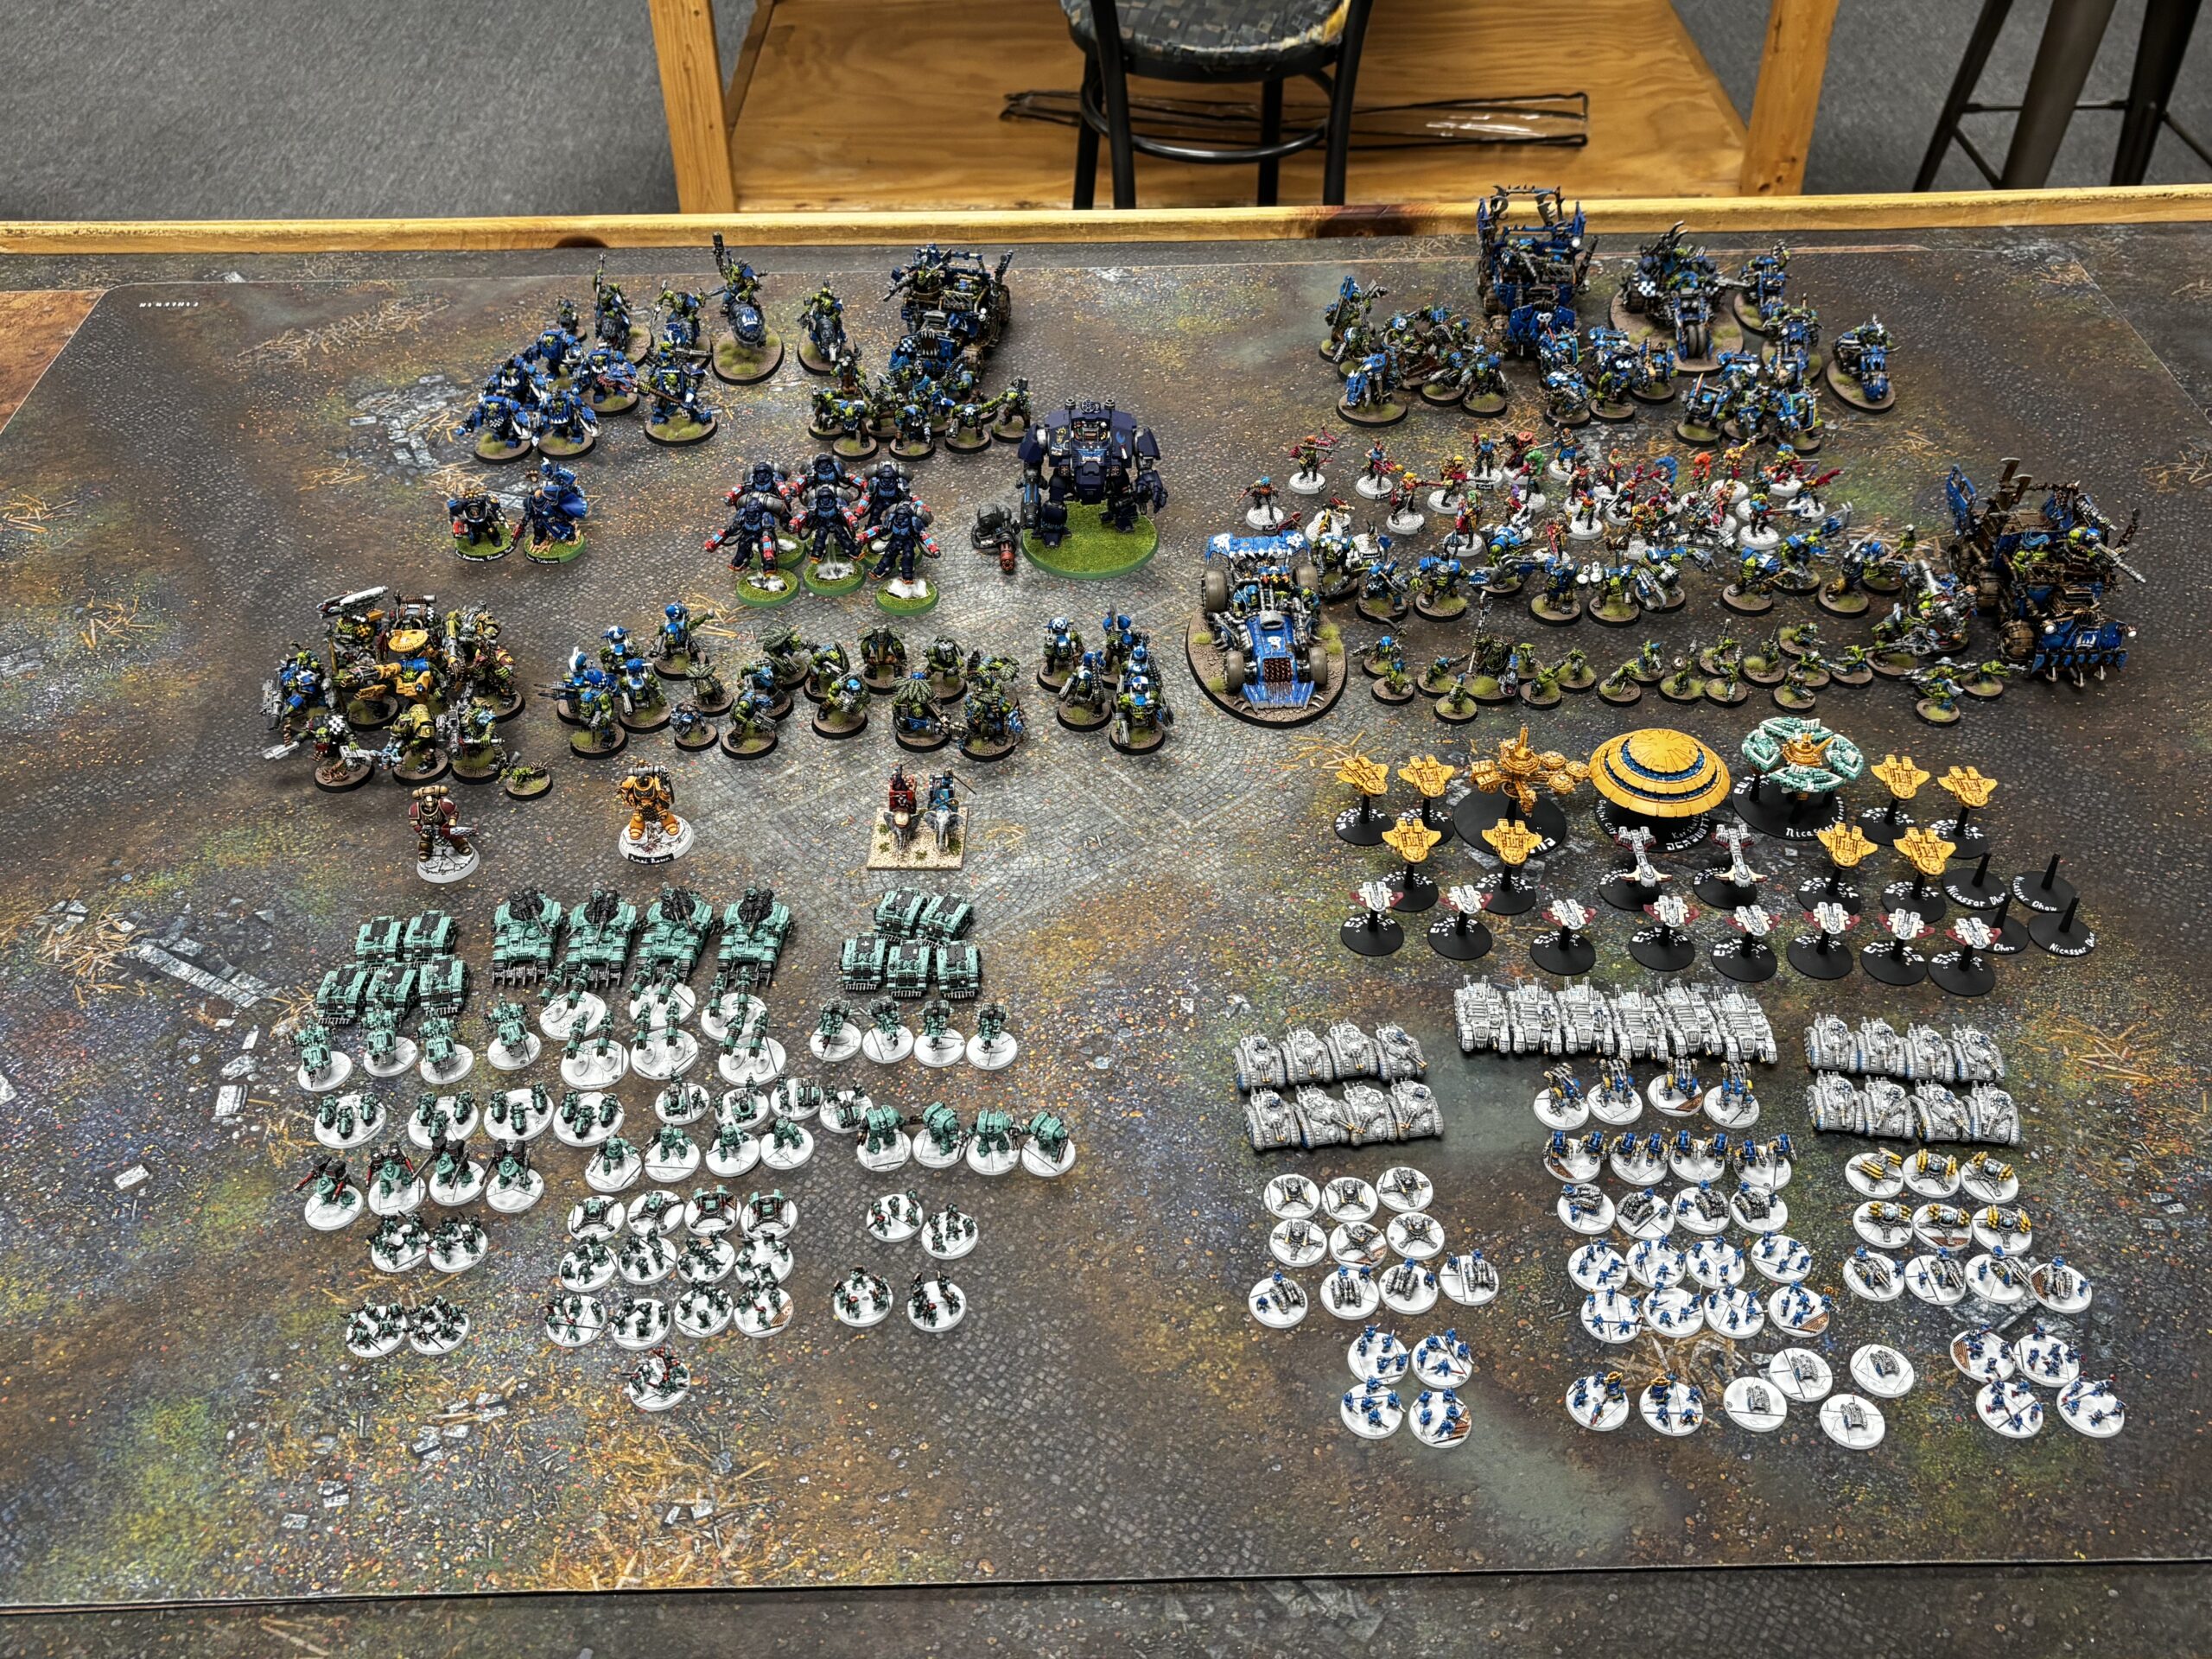
WHOA! That’s a lot of minis! In fact, it’s ALL OF THE MINIS I PAINTED THIS YEAR!

Oh, yes, this is pretty far away. Zoom and Enhance! (or just take more pics)
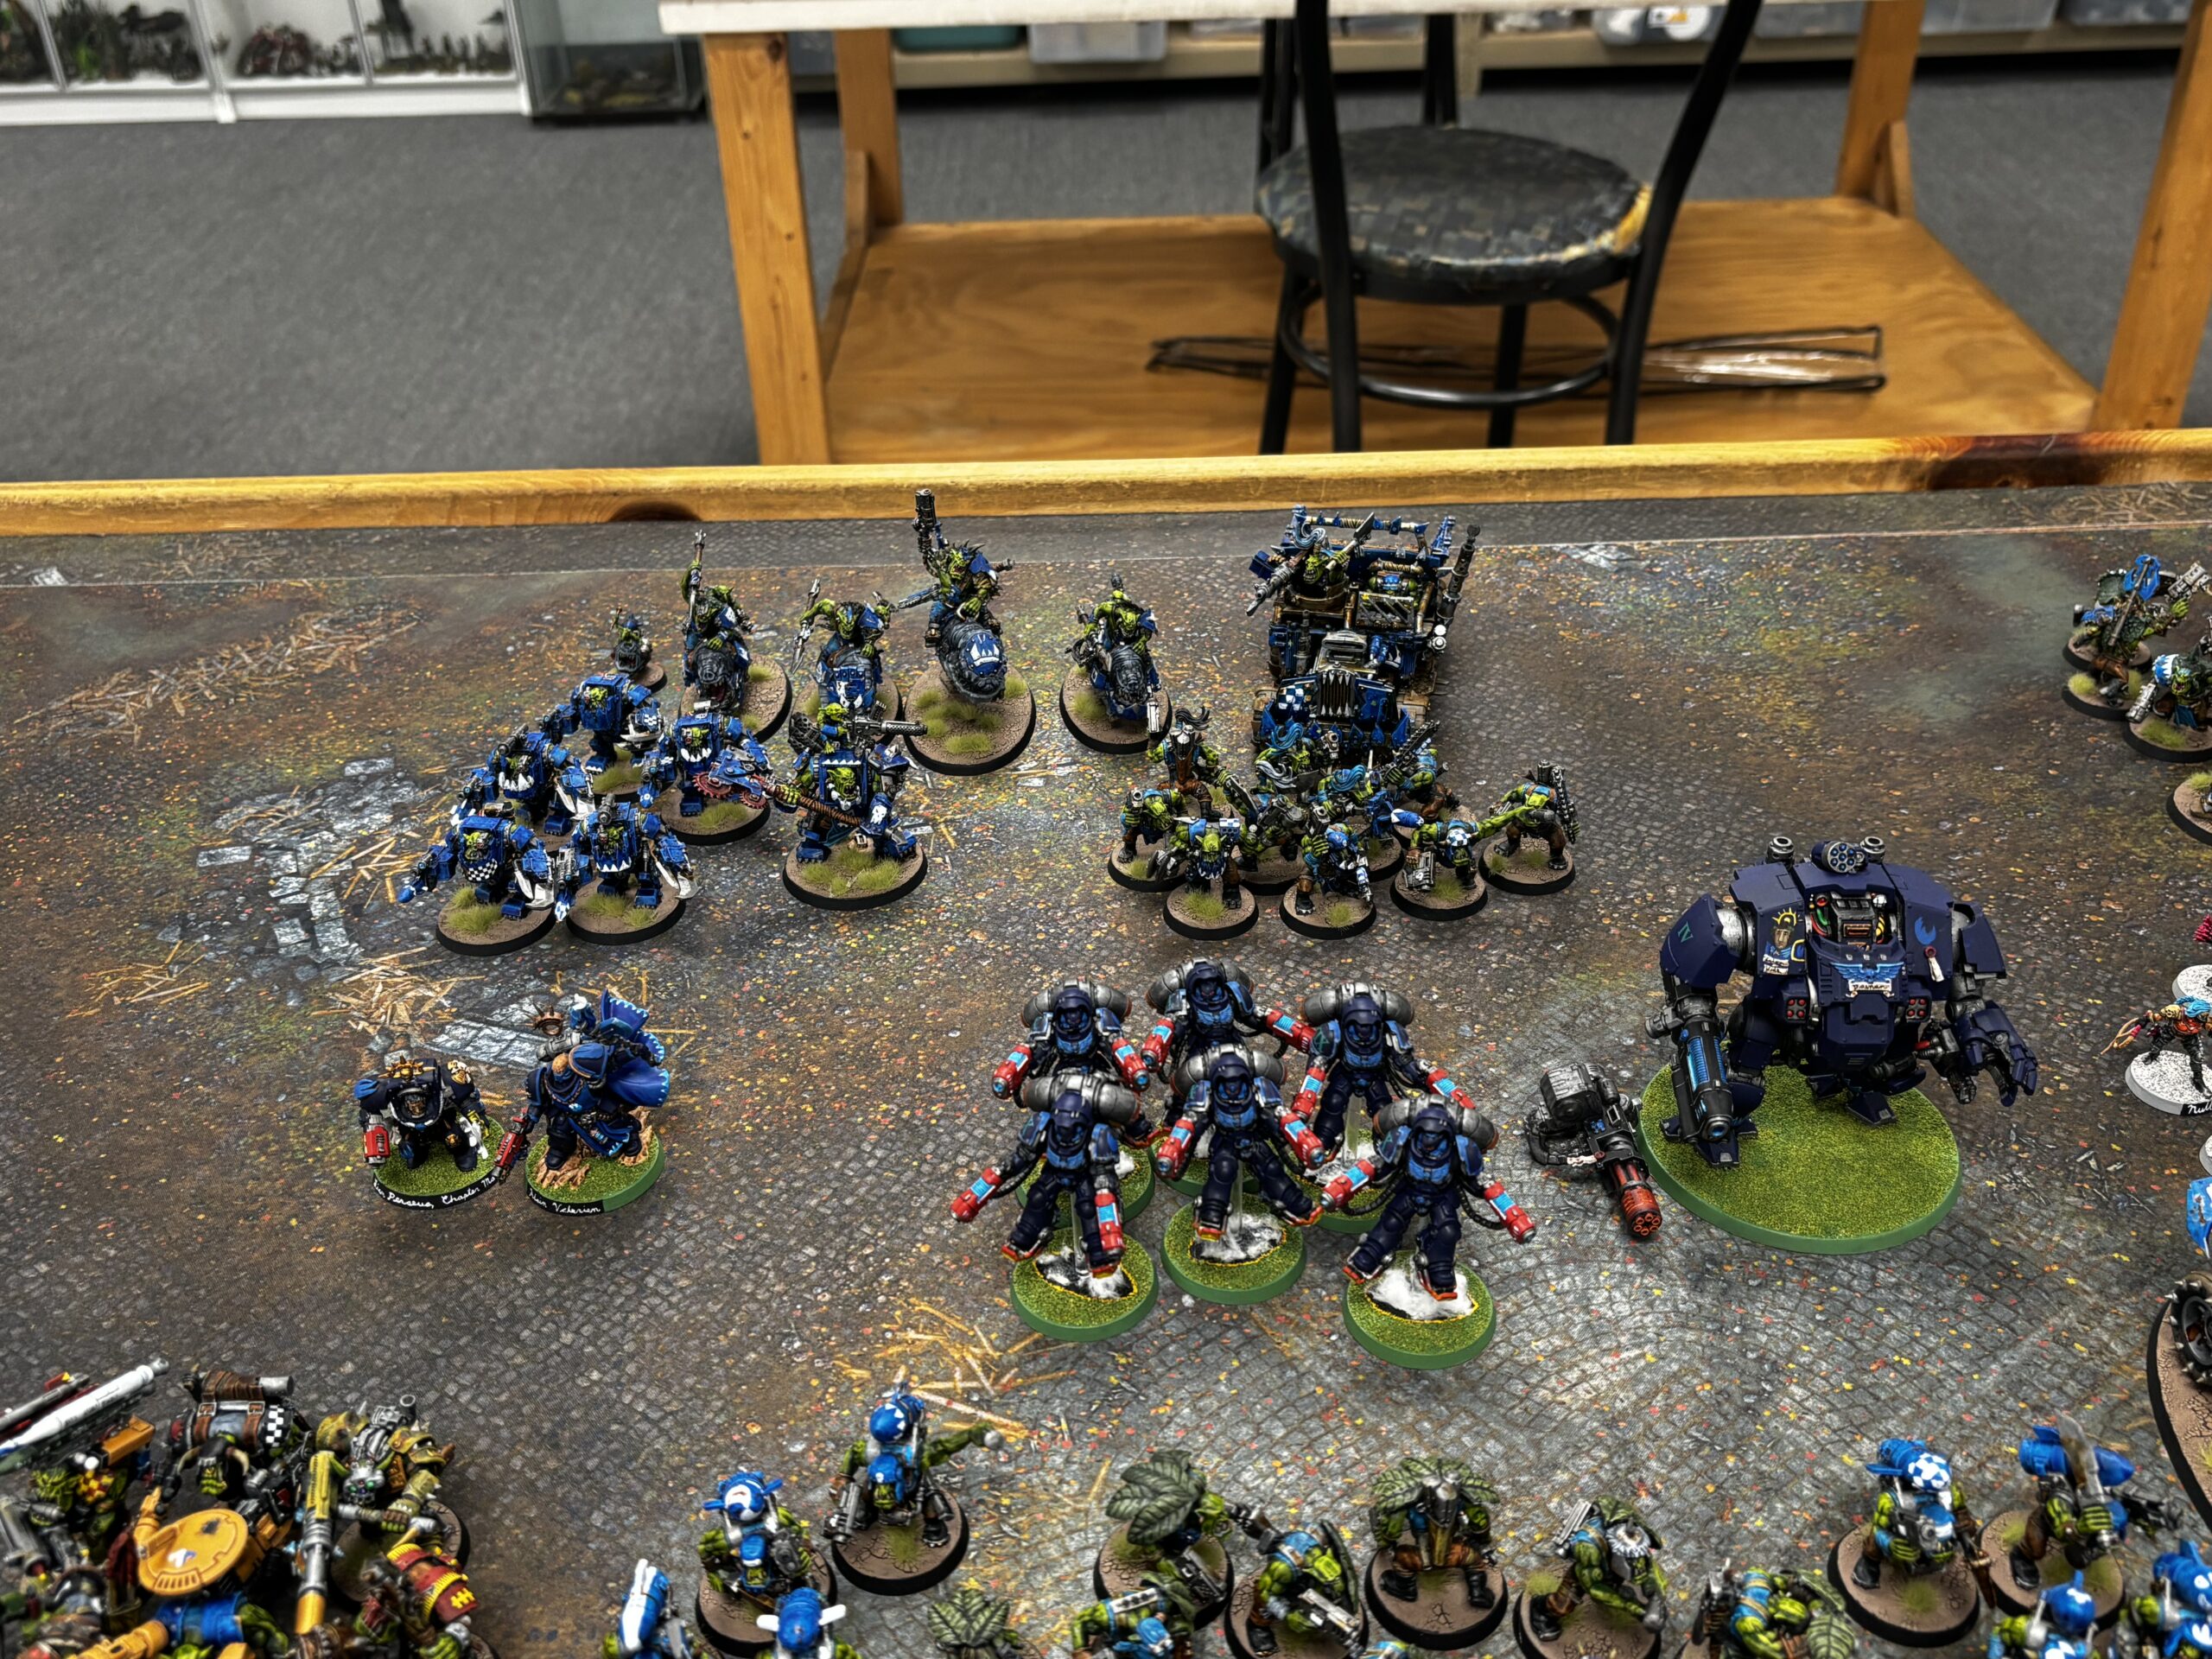
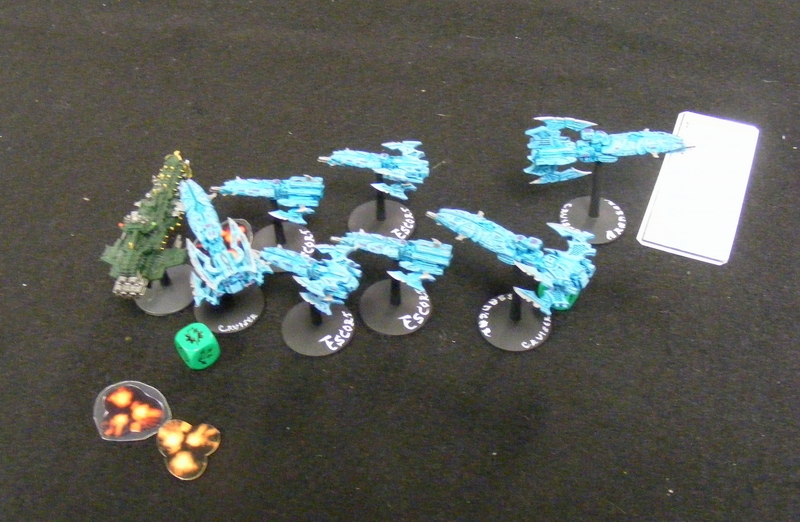
Here’s Q1. The Space Marines are: Chapter Master Perseus (painted BEFORE the competitions but during January), Captain Valerien, a unit of six Intercessors, and a Redemptor Dreadnought. Above them, a Warboss in Mega Armour, five Meganobs, Ten Ork Boys, and a unit of Squighogs plus a Trukk that should have been in Q3 but looks better here.
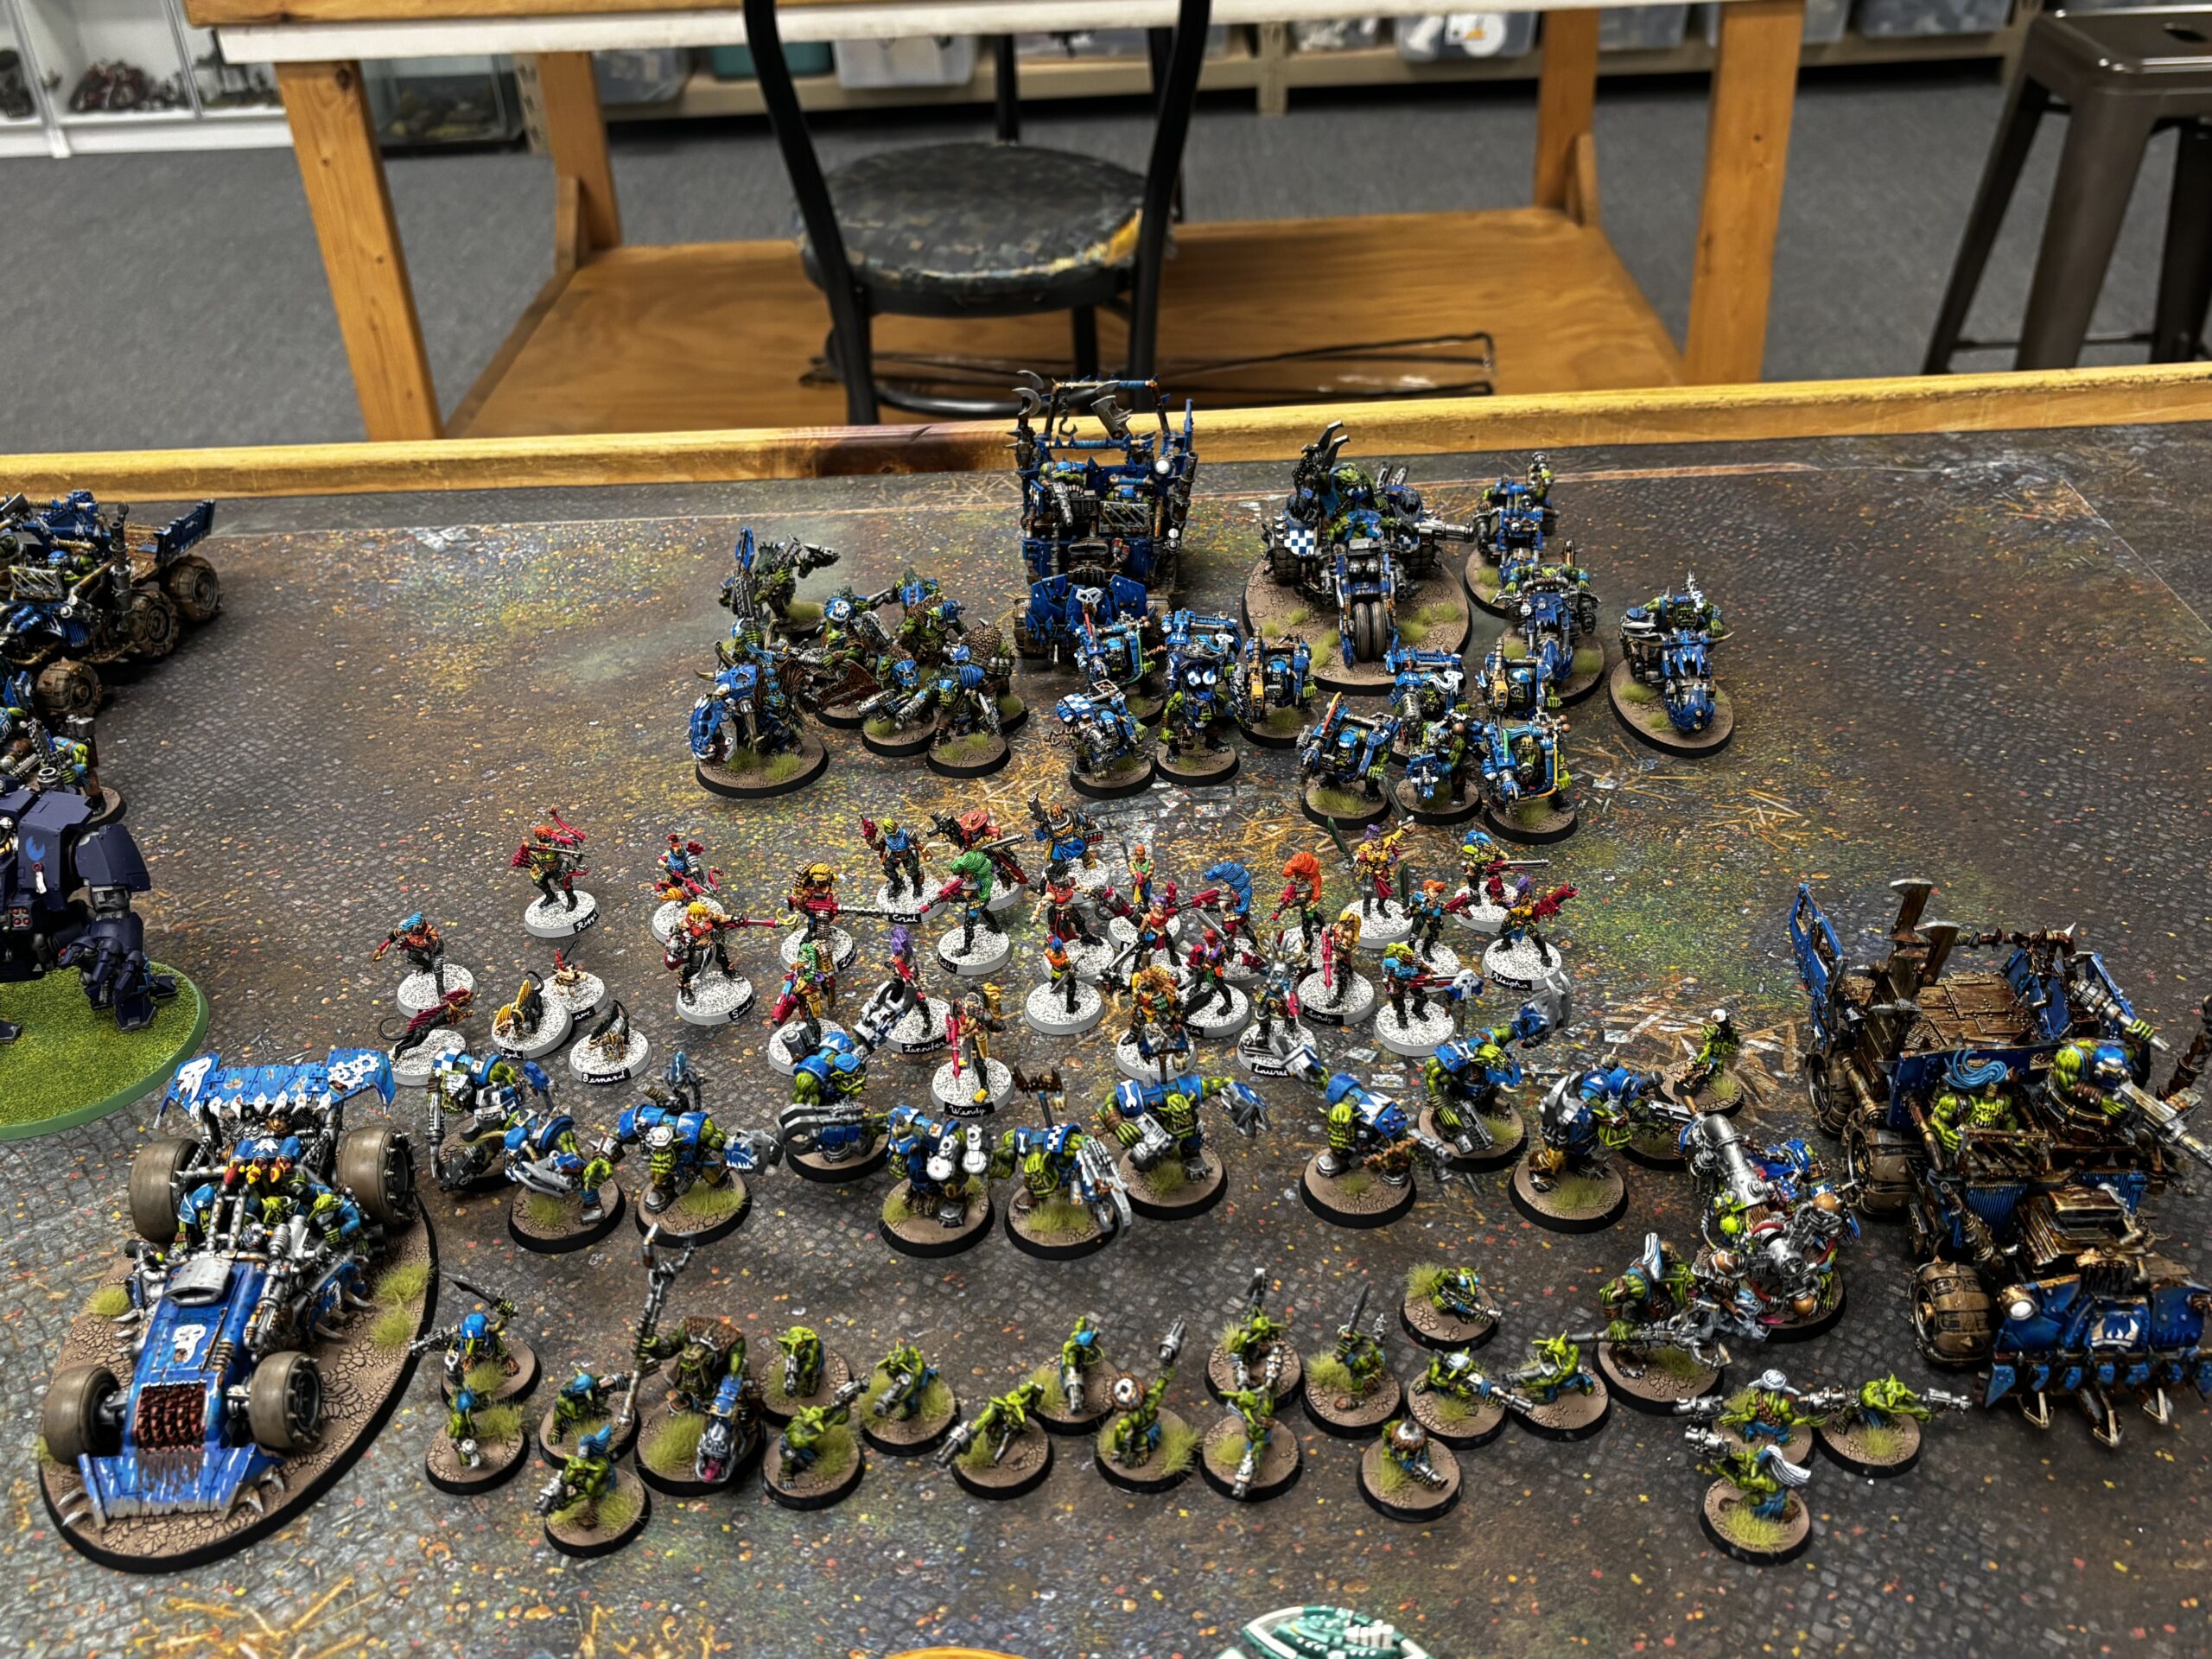
Q2 starts in the middle with the Necrimunda Escher gangers and friends, then above with the Orks, a Beastboss, ten Beast snaggas, eight Lootas with two Spannas, a Deffkilla Wartrike, three Warbikers, and a Trukk. Below, from Q2 orks, a Shokkjump Dragsta, 10 Nobs, a Big Mek with a Shokk Attack gun, 20 Gretchin with two Runtherds, and a Trukk.
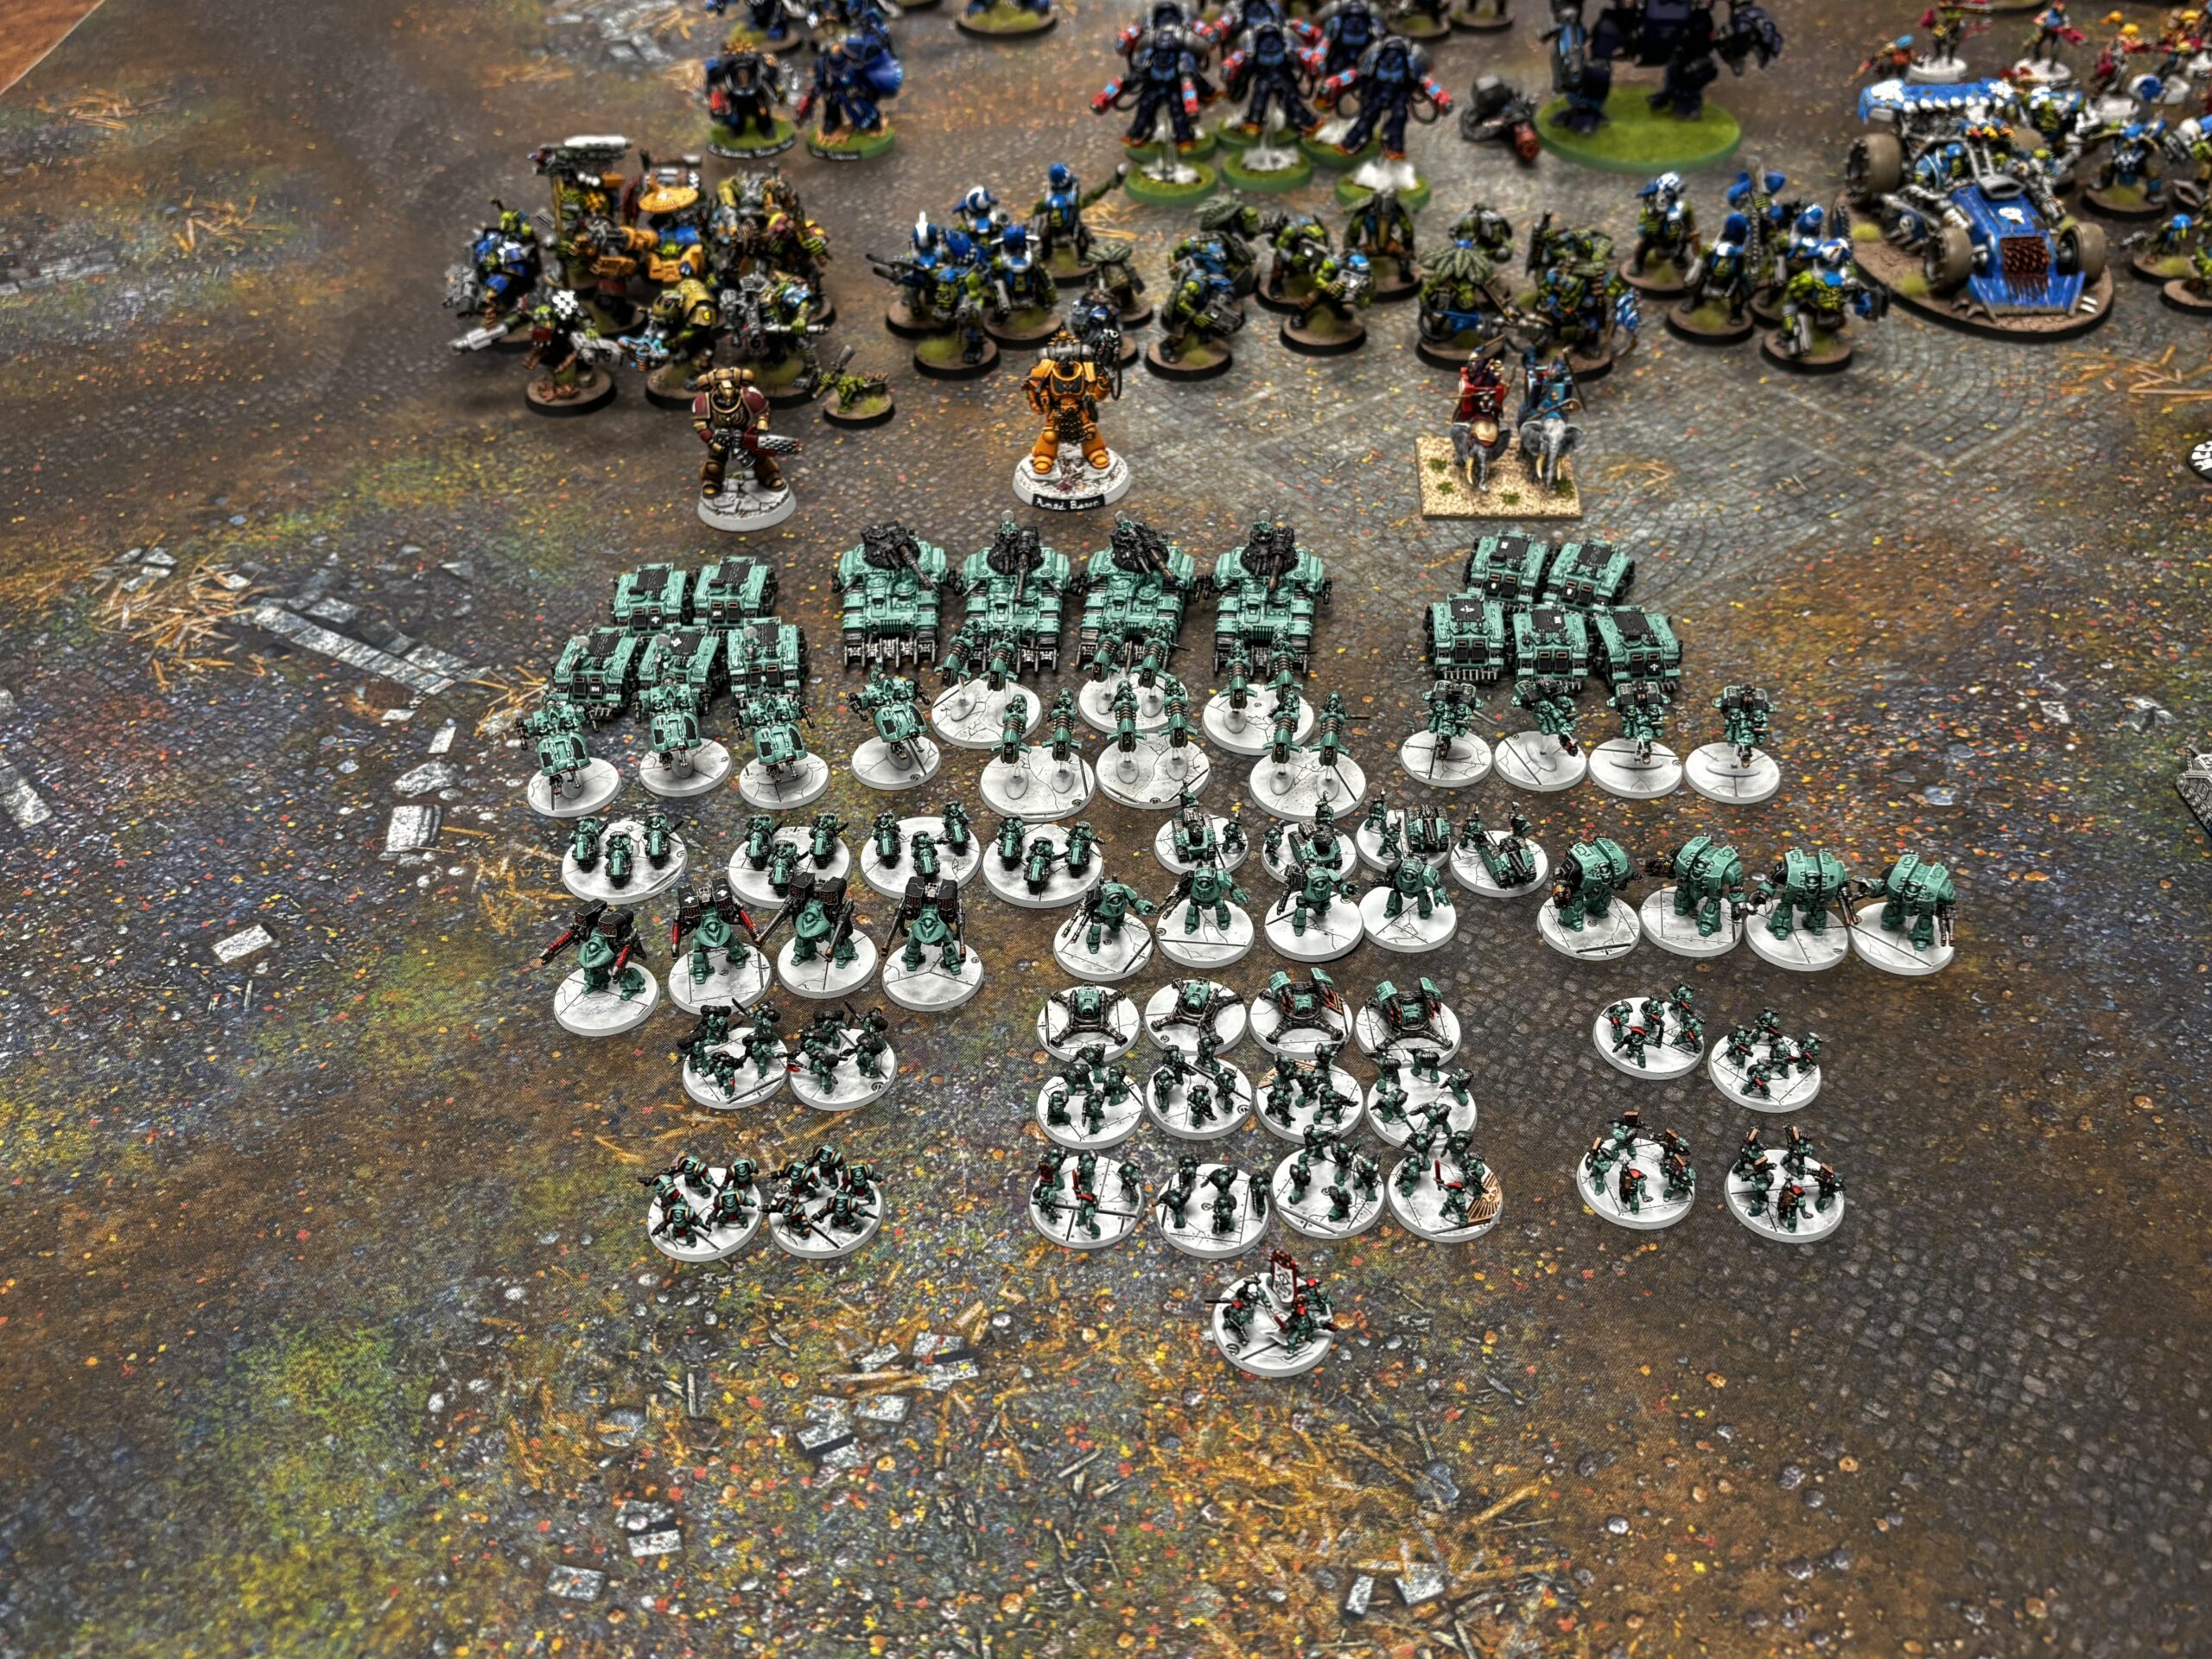
This is Q3 with the first 1/2 year competition. Above, 10 Flash Gitz, two units of 5 Stormboys, and 10 Kommandos. In the middle, the All the Same competition Minotaur, the Color Competition Lieutenant from the Star Cyclones, and the Carthaginian Elephants. Below that, the 1/2 year competition Legiones Astartes Sons of Horus, consisting of two sprues each of: Infantry, Support, Fast Attack, Rhinos, and Kratos tanks.
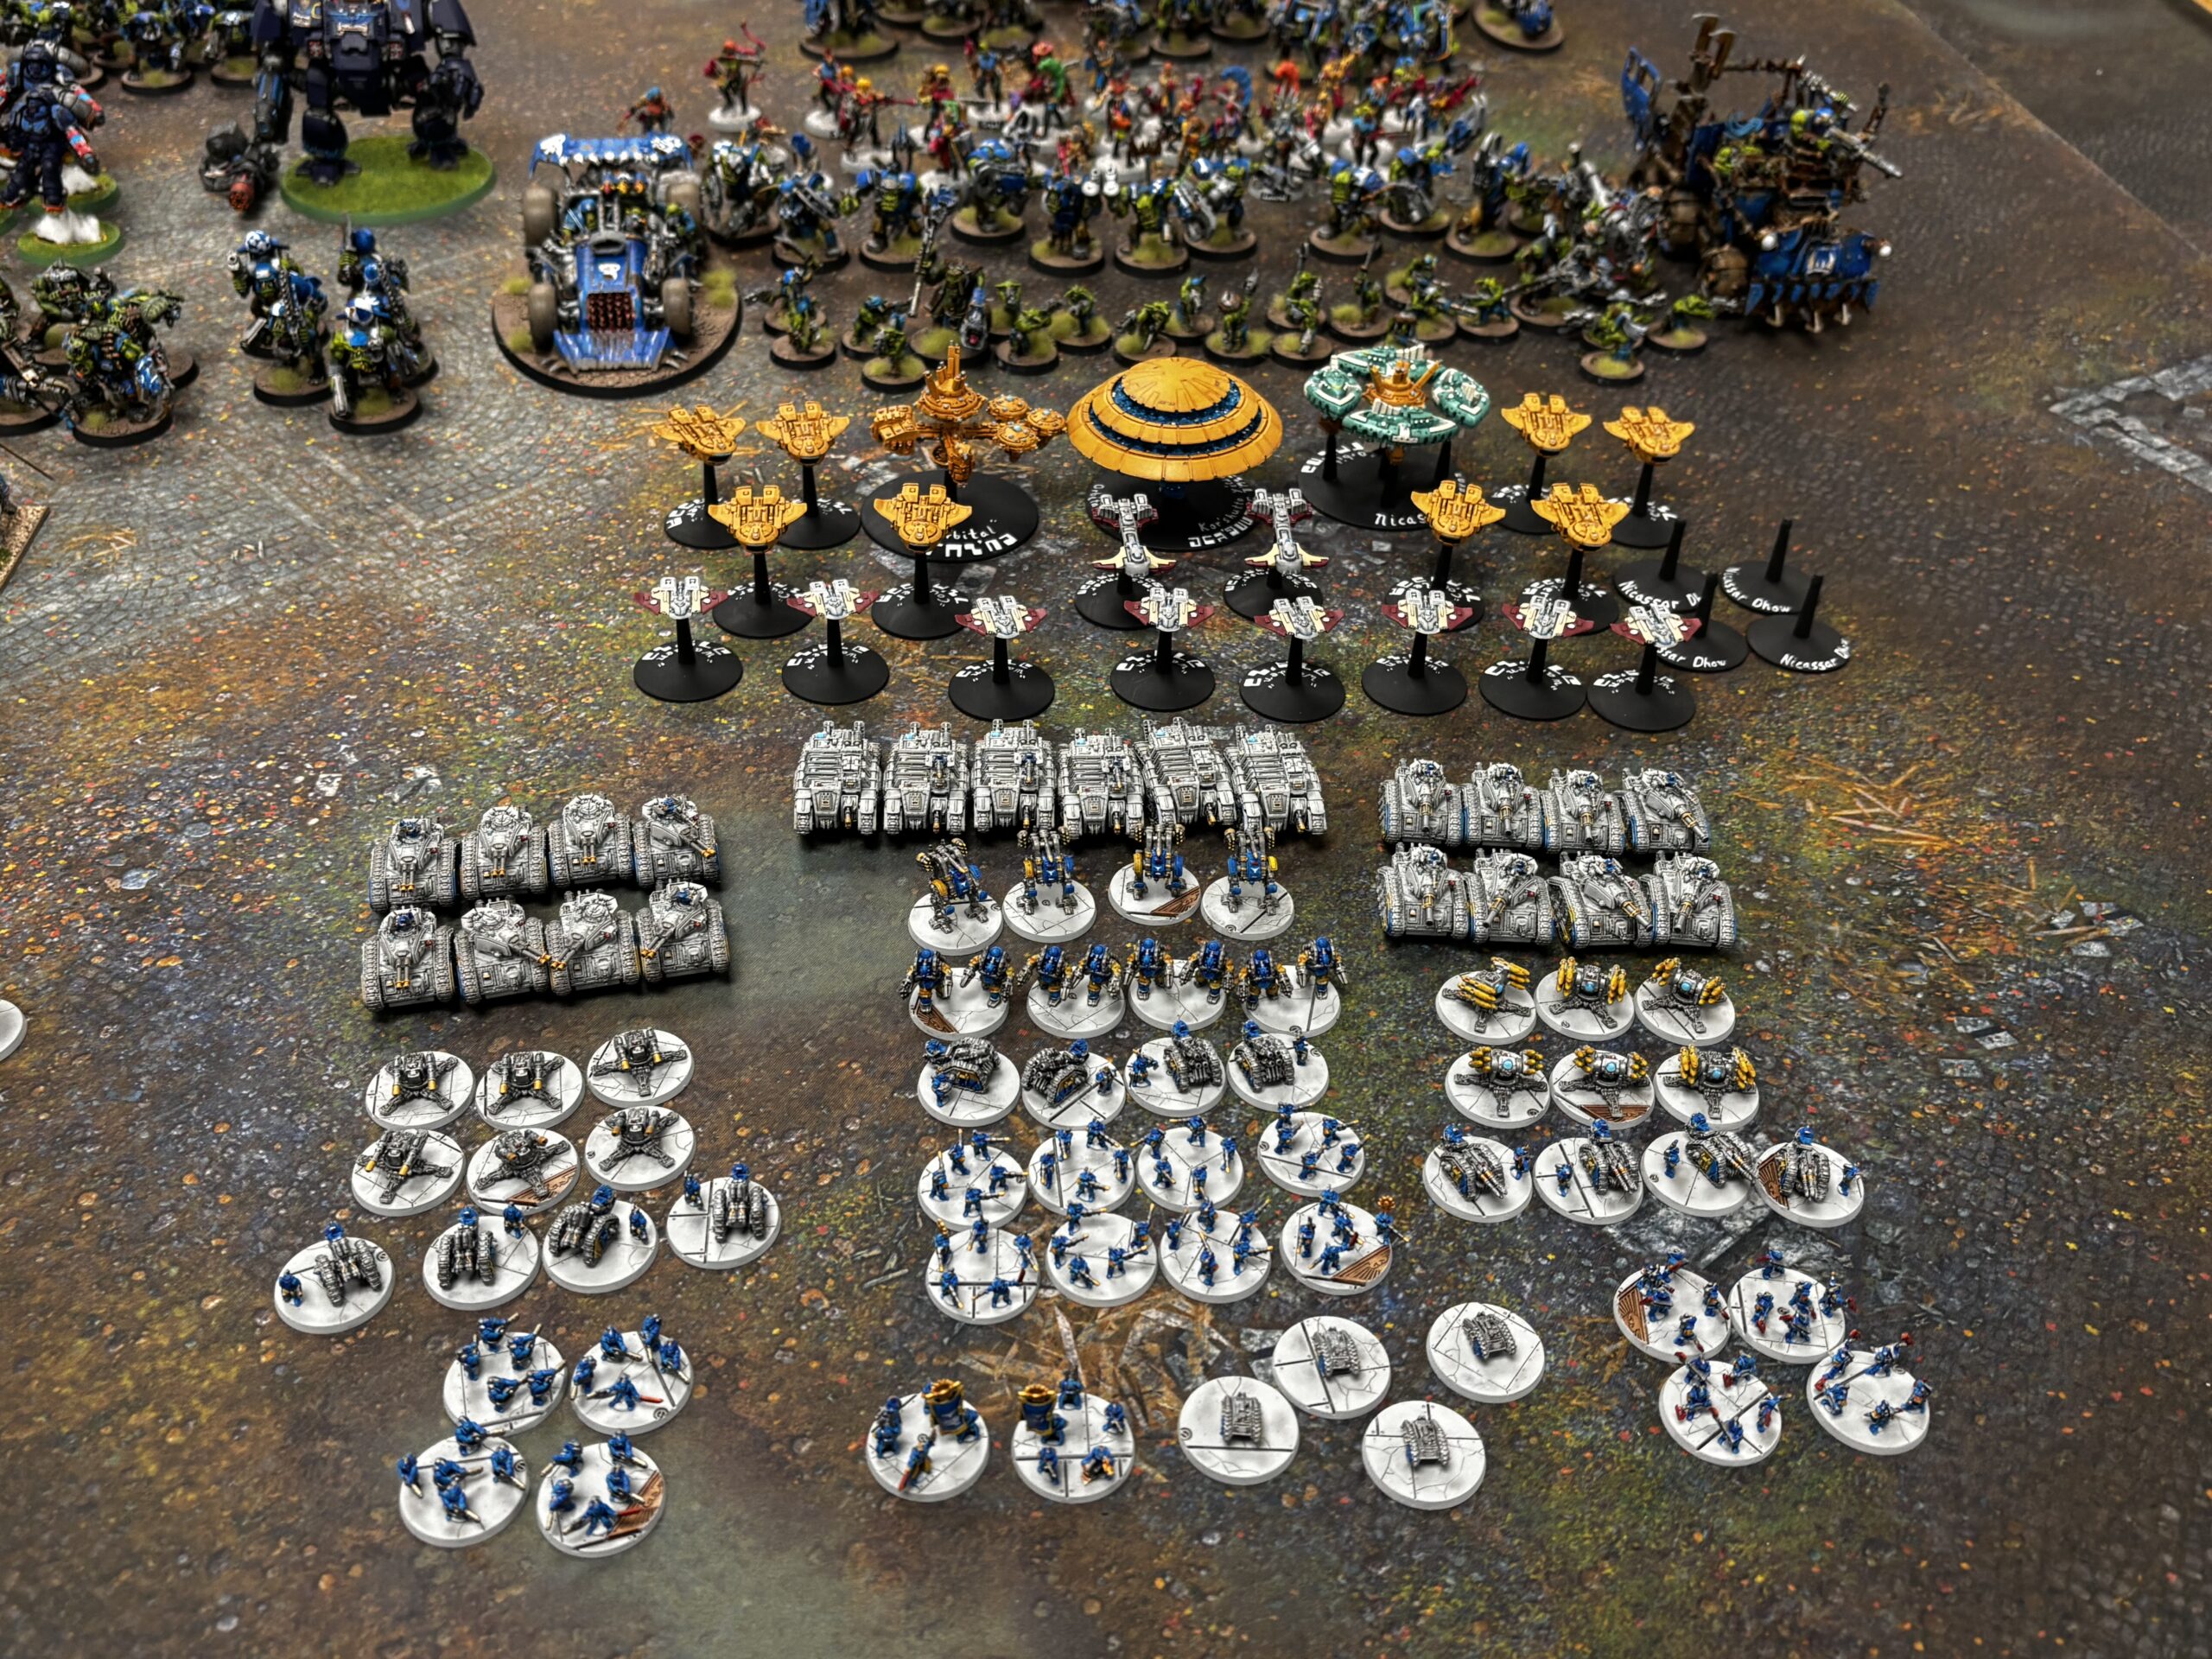
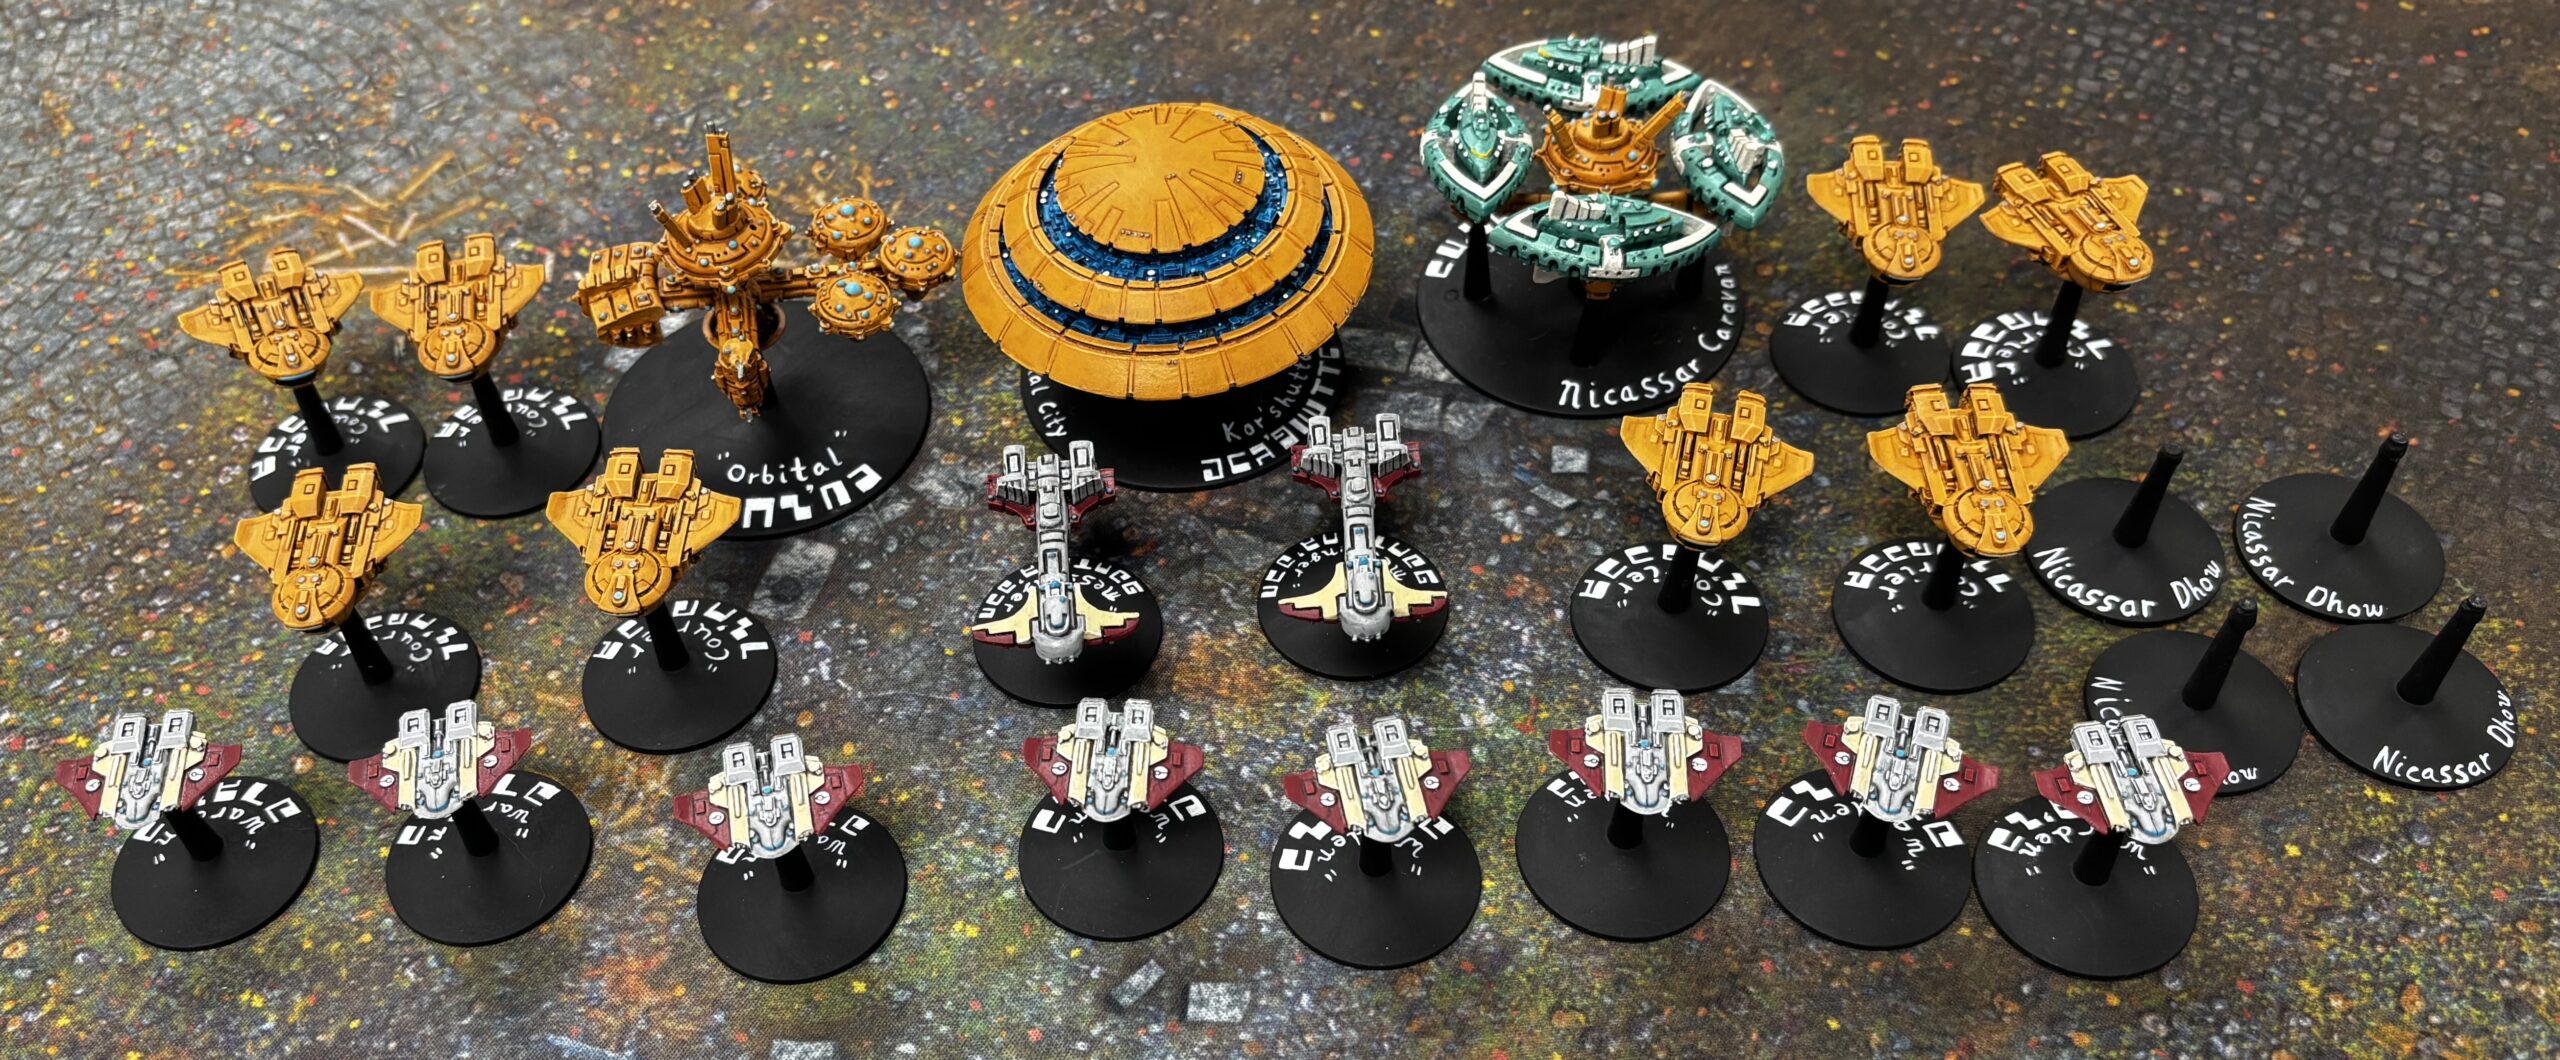
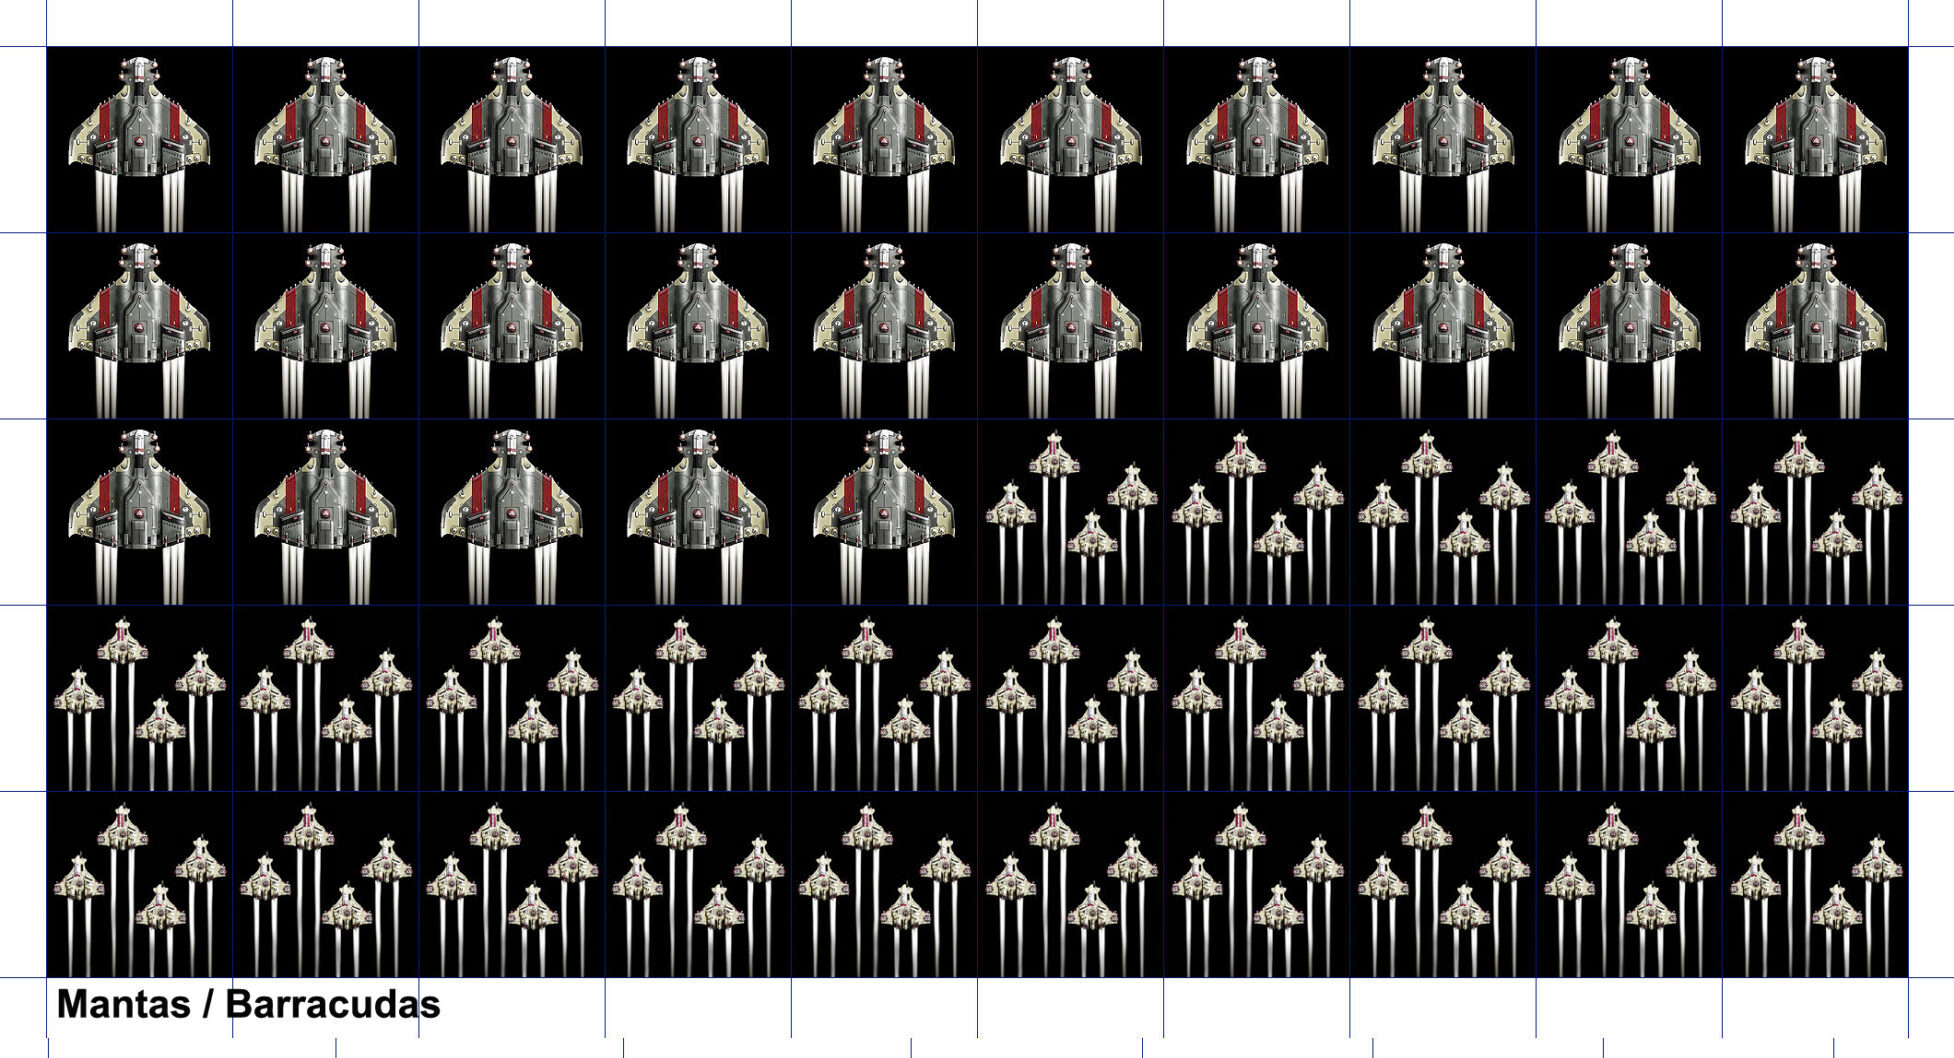
Finally, here’s Q4 and the 2nd 1/2 year competition. The orks were seen better above. The Finish It competition is eight Tau Wardens, two Tau Messengers, eight Tau Transports, a general purpose Orbital, an Air Caste city, an Orbital with four Gravitic Hooks which can be combined with four Nicassar Dhows to make a Nicassar Caravan, and of course the Dhows and their magnetic bases. Below that, the 2nd 1/2 year Solar Auxilia, which consists of two sprues each of: Infantry, Support, Dracosans, Leman Russ, and Leman Russ Exterminators.
There you have it! That’s a year of painting! Slightly more if you count Perseus. Am I done?
HAHAHAHAHAHA NOPE!
There’s a super secret project I’m working on! (don’t get hyped, it’s small, but it is secret!) Additionally, I am planning out next year; this won’t be at AFK, as my pile of gray doesn’t line up with the competitions anymore.
Speaking of AFK, here are the minis due by the end of the year in the cases, ready for judging:
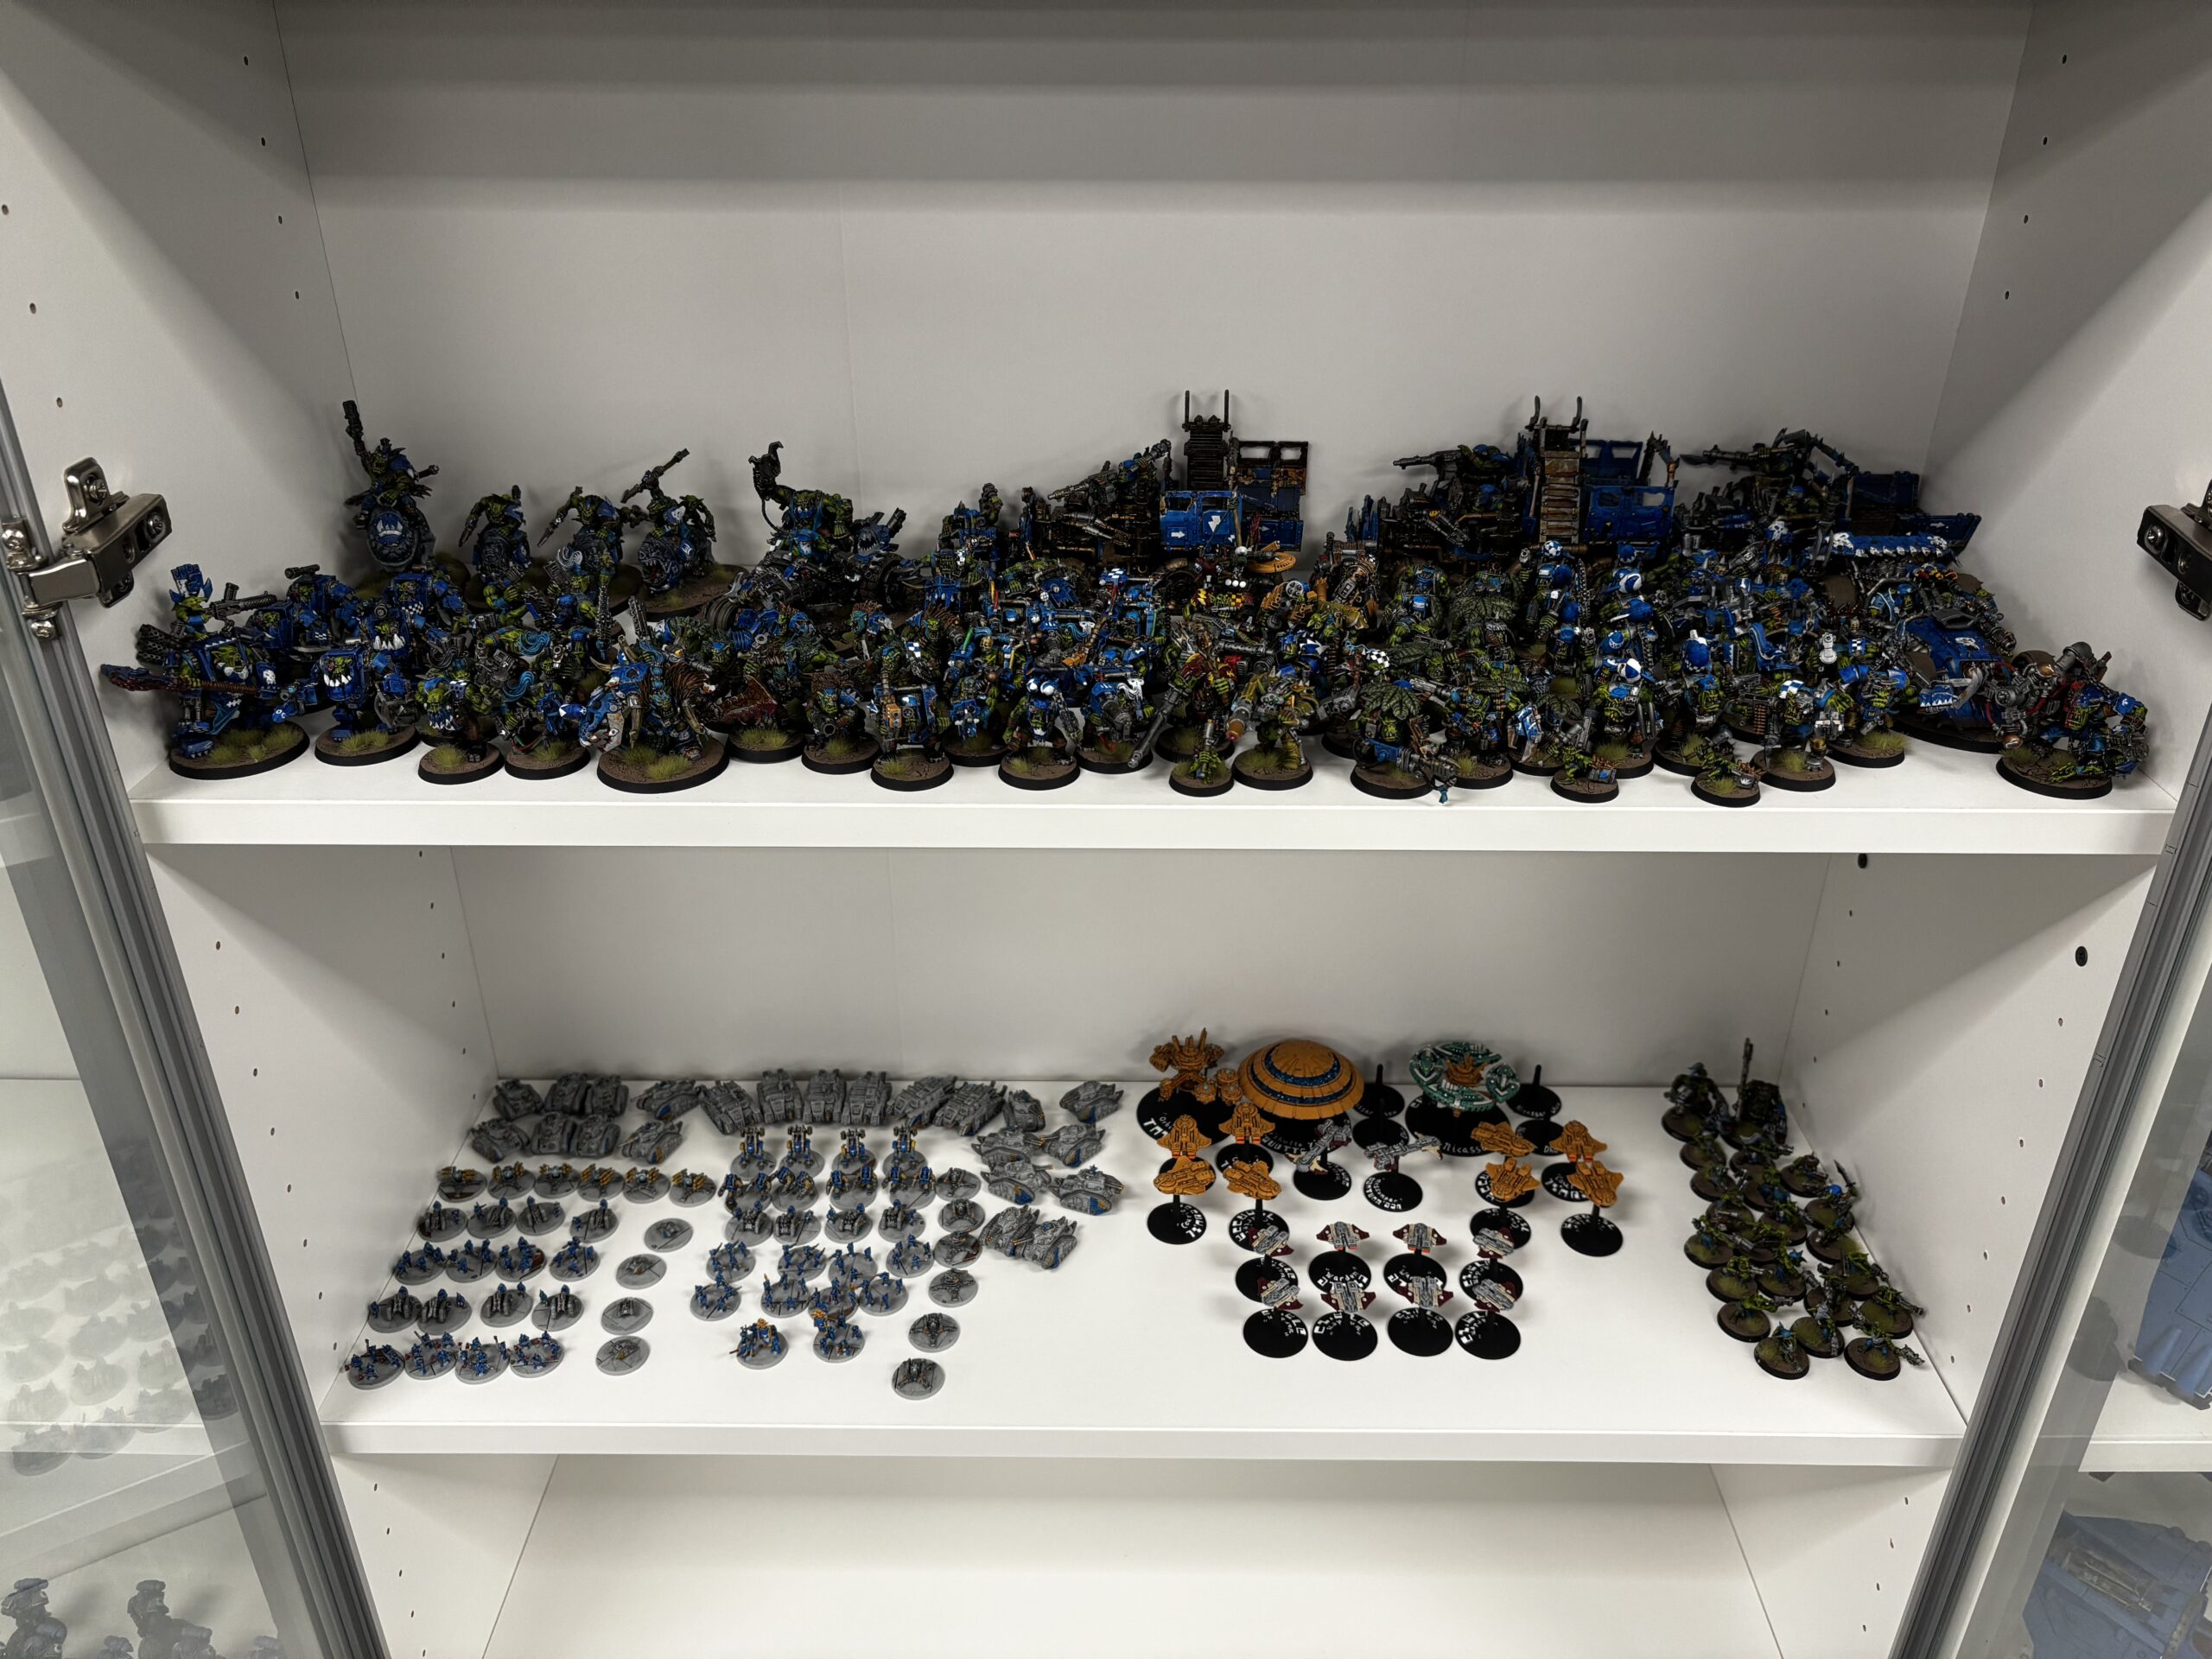
You’ll notice that the Orks are so numerous they don’t fit on one shelf!
Next, the Super Secret Project, and a timeline for 2026, in which we will celebrate the 15th anniversary of Fourstrandshobby.com!
Finish It – Tau Orbital City and Defences
Long ago I won an ebay auction for some leftover bits from a Tau Orbital box. From them, I cobbled together two stations; one to be a Nicassar Caravan, magnetized to hold four Nicassar Dhows, and another with the leftover bits.
Additionally, I managed to snag a Forge World Tau Kor Caste Orbital City. All three of these were one “project” for the Tau fleet “finish it” competition.


The Orbital City is important enough to have a real T’au name like a capitol ship. Kor’shutto Y’eldi’retha directly translates to “Air Caste Orbital City Winged Ones University/Temple,” but more accurately tranlsates to “Air Caste Elite Pilot Academy.”
Basically,

…but for Tau.
The Orbitals were cobbled together from pewter bits and pieces of Tau Drones, as well as Tau Battlesuit Drone Controllers.
Next: I finish the 6 month 1/2 Army challenge with eight Leman Russ Battle Tanks for my Legion Imperialis Solar Auxilia! After that, four Nicassar Dhows to finish the “finish it” challenge and twenty Grots with two Runtherds and I am done with all of my painting challenges!
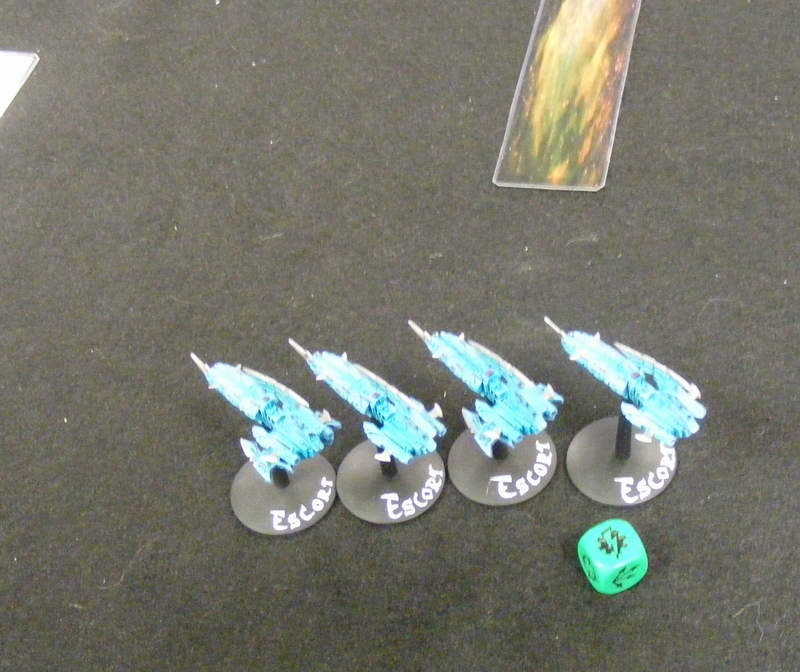
Double Update: Year Long – Ork Nobs and Finish It – Tau Transports
It’s been a bit busy, so I’ve had this project done for a bit. 10 Ork Nobs with Power Klaws and two Ammo Runts:

Those have been done for a week. These, however, have just been finished. The Finish It challenge continues with my Tau Transports:
Sadly, of the ten transports I originally primed, two were so laden with bubbles from the resin casting process that I abandoned them. Because I acquired these secondhand through eBay, I have no recourse. Oh well.
Next: an Ork Trukk to get it off my countertop, and then some Tau Orbitals and an Air Caste City!
Finish It Addendum – Tau Orbital
Long ago I ordered a bunch of Tau Battlefleet Gothic stuff including a partially used Tau Orbital box set. For those who don’t know, each box has two tops, two centers, and a variety of arms of which each center can hold four.
I used the center and one of the tops to make my Nicassar Rig. However I had a bunch of leftover bitz for a long time. For the Finish It challenge, I flexed my dormant conversion skills and took a Tau Drone piece and a Space Marine Melta Bomb to finally use up these leftover parts to make this:
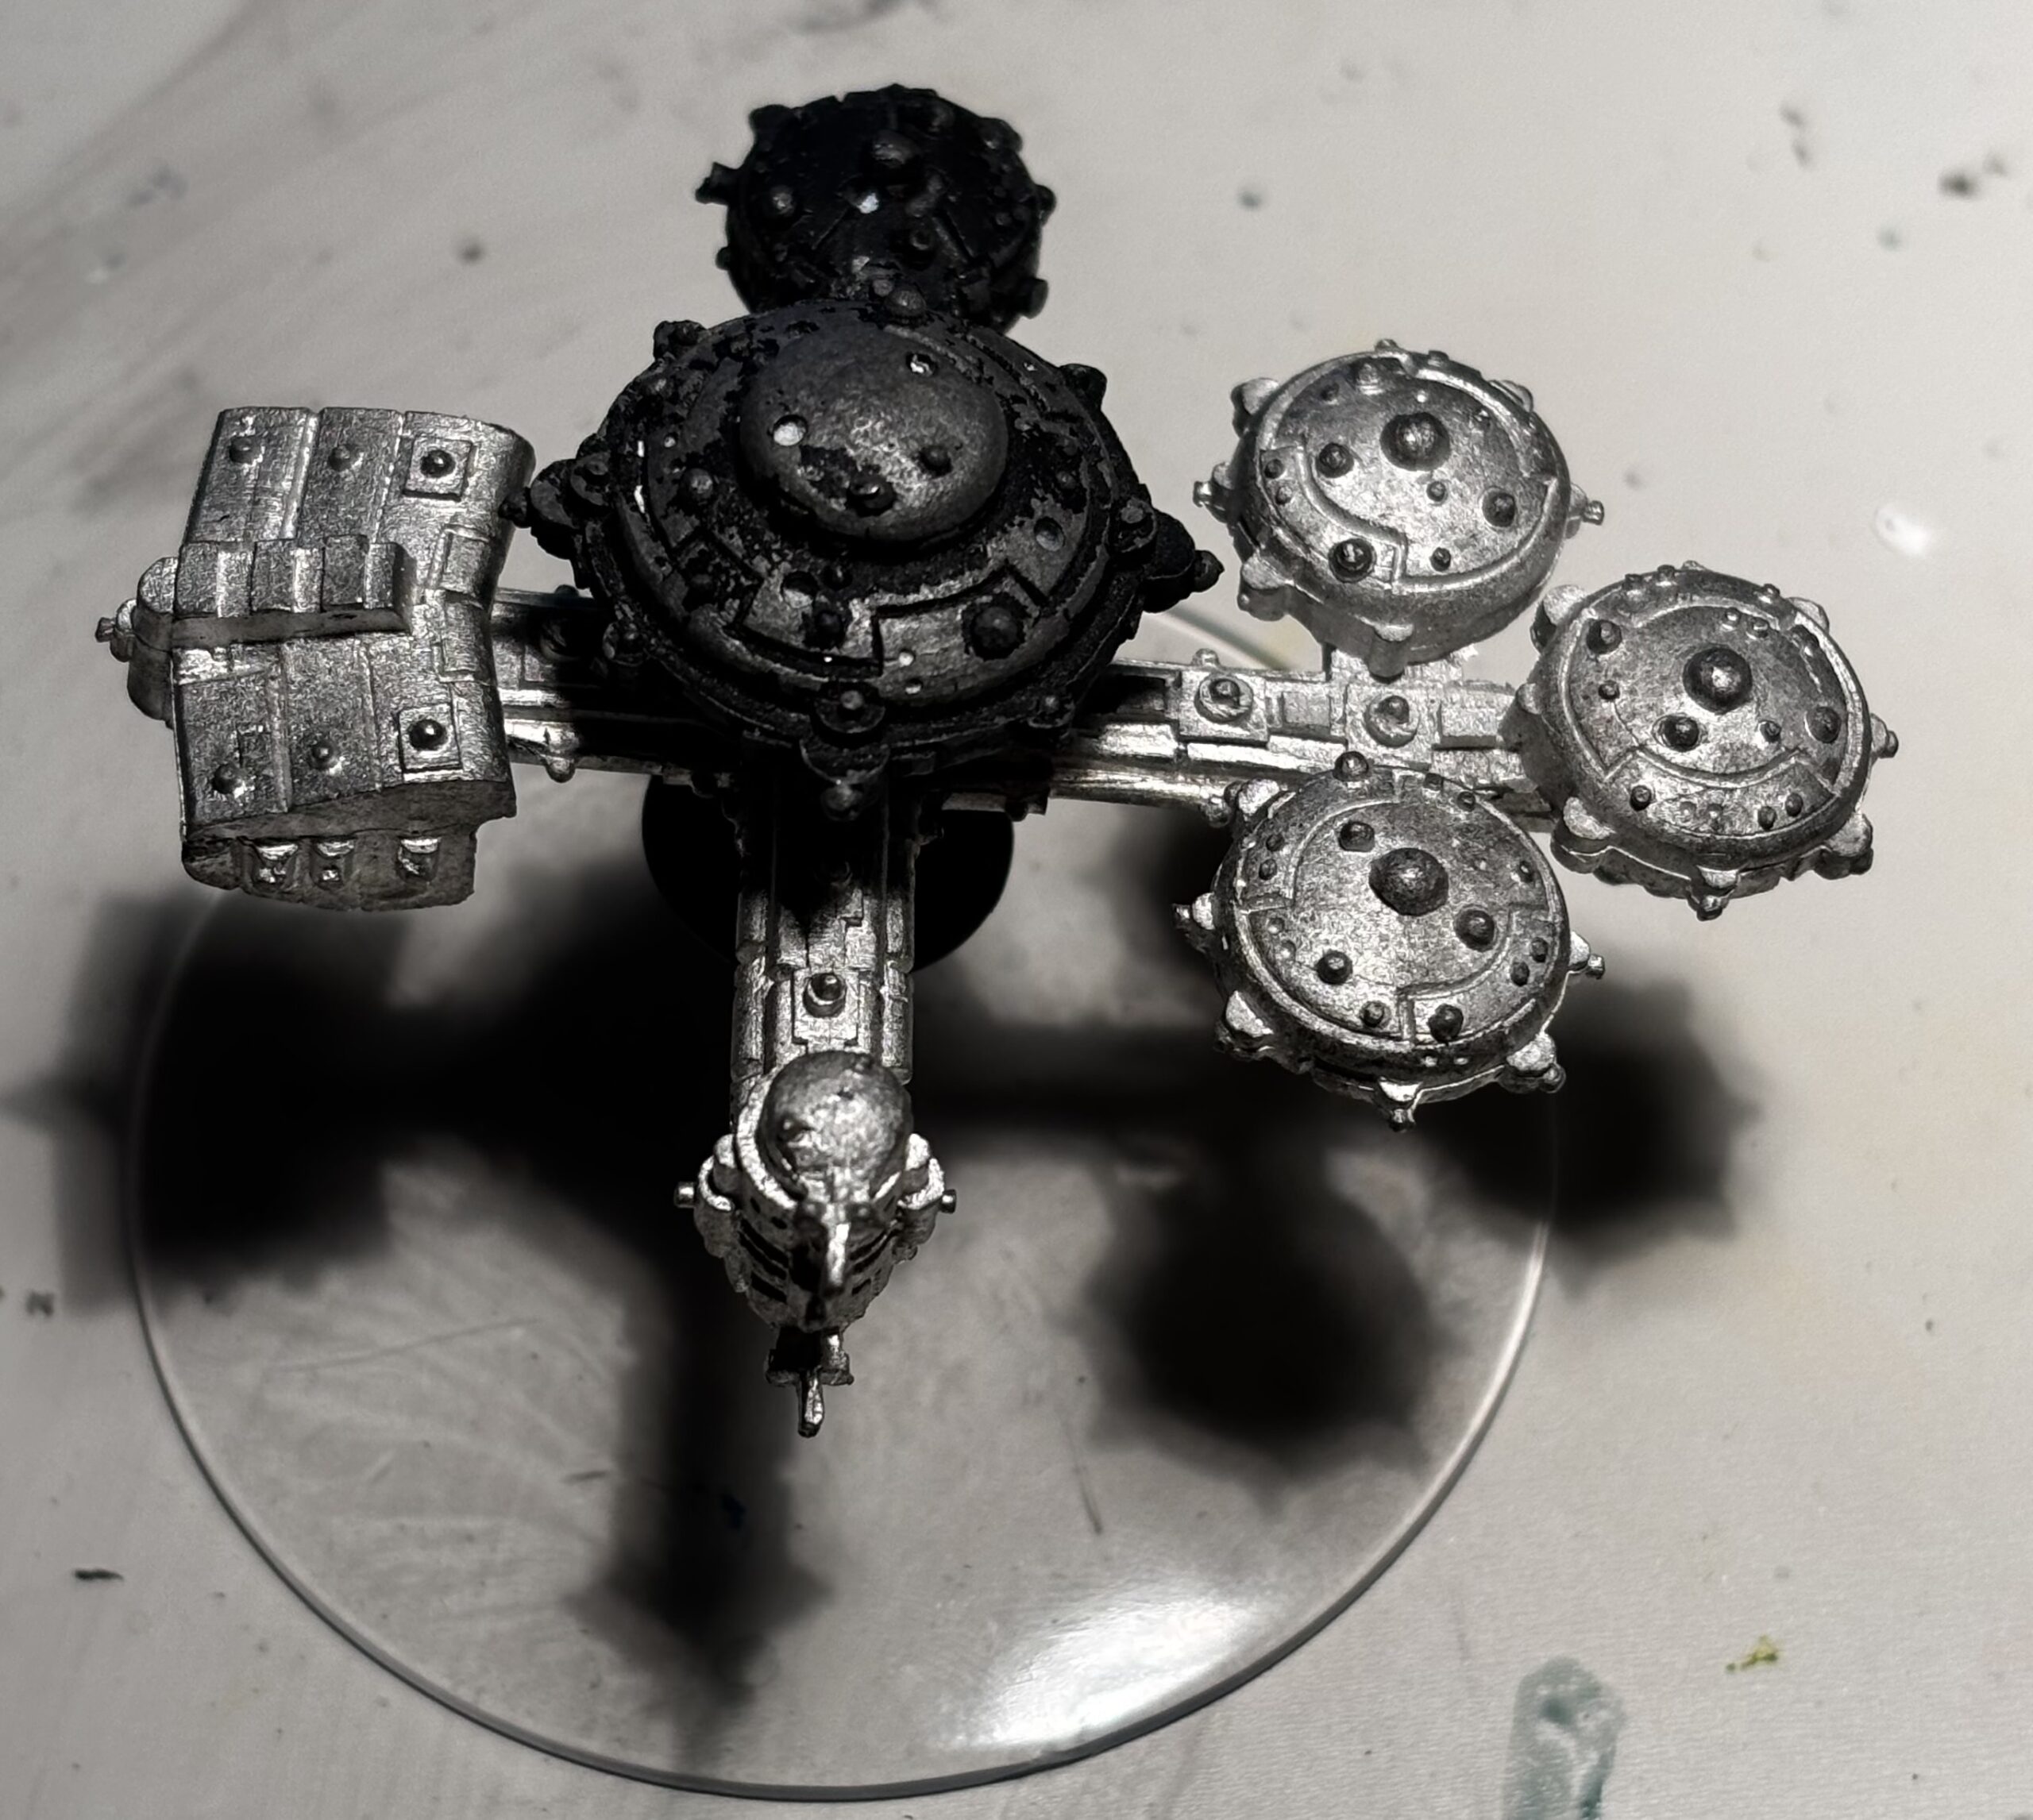

She’s an ugly baby and she’s not optimized for the best play, but it can put out a lance and a squadron of attack craft while also having two shields, a Tracking System, and another HP to make it moderately durable.
This will be painted at the same time as the other Tau defences such as the Orbital City and the Nicassar Rig. Next: the Ork Nobs that are currently in progress and then Tau transports!
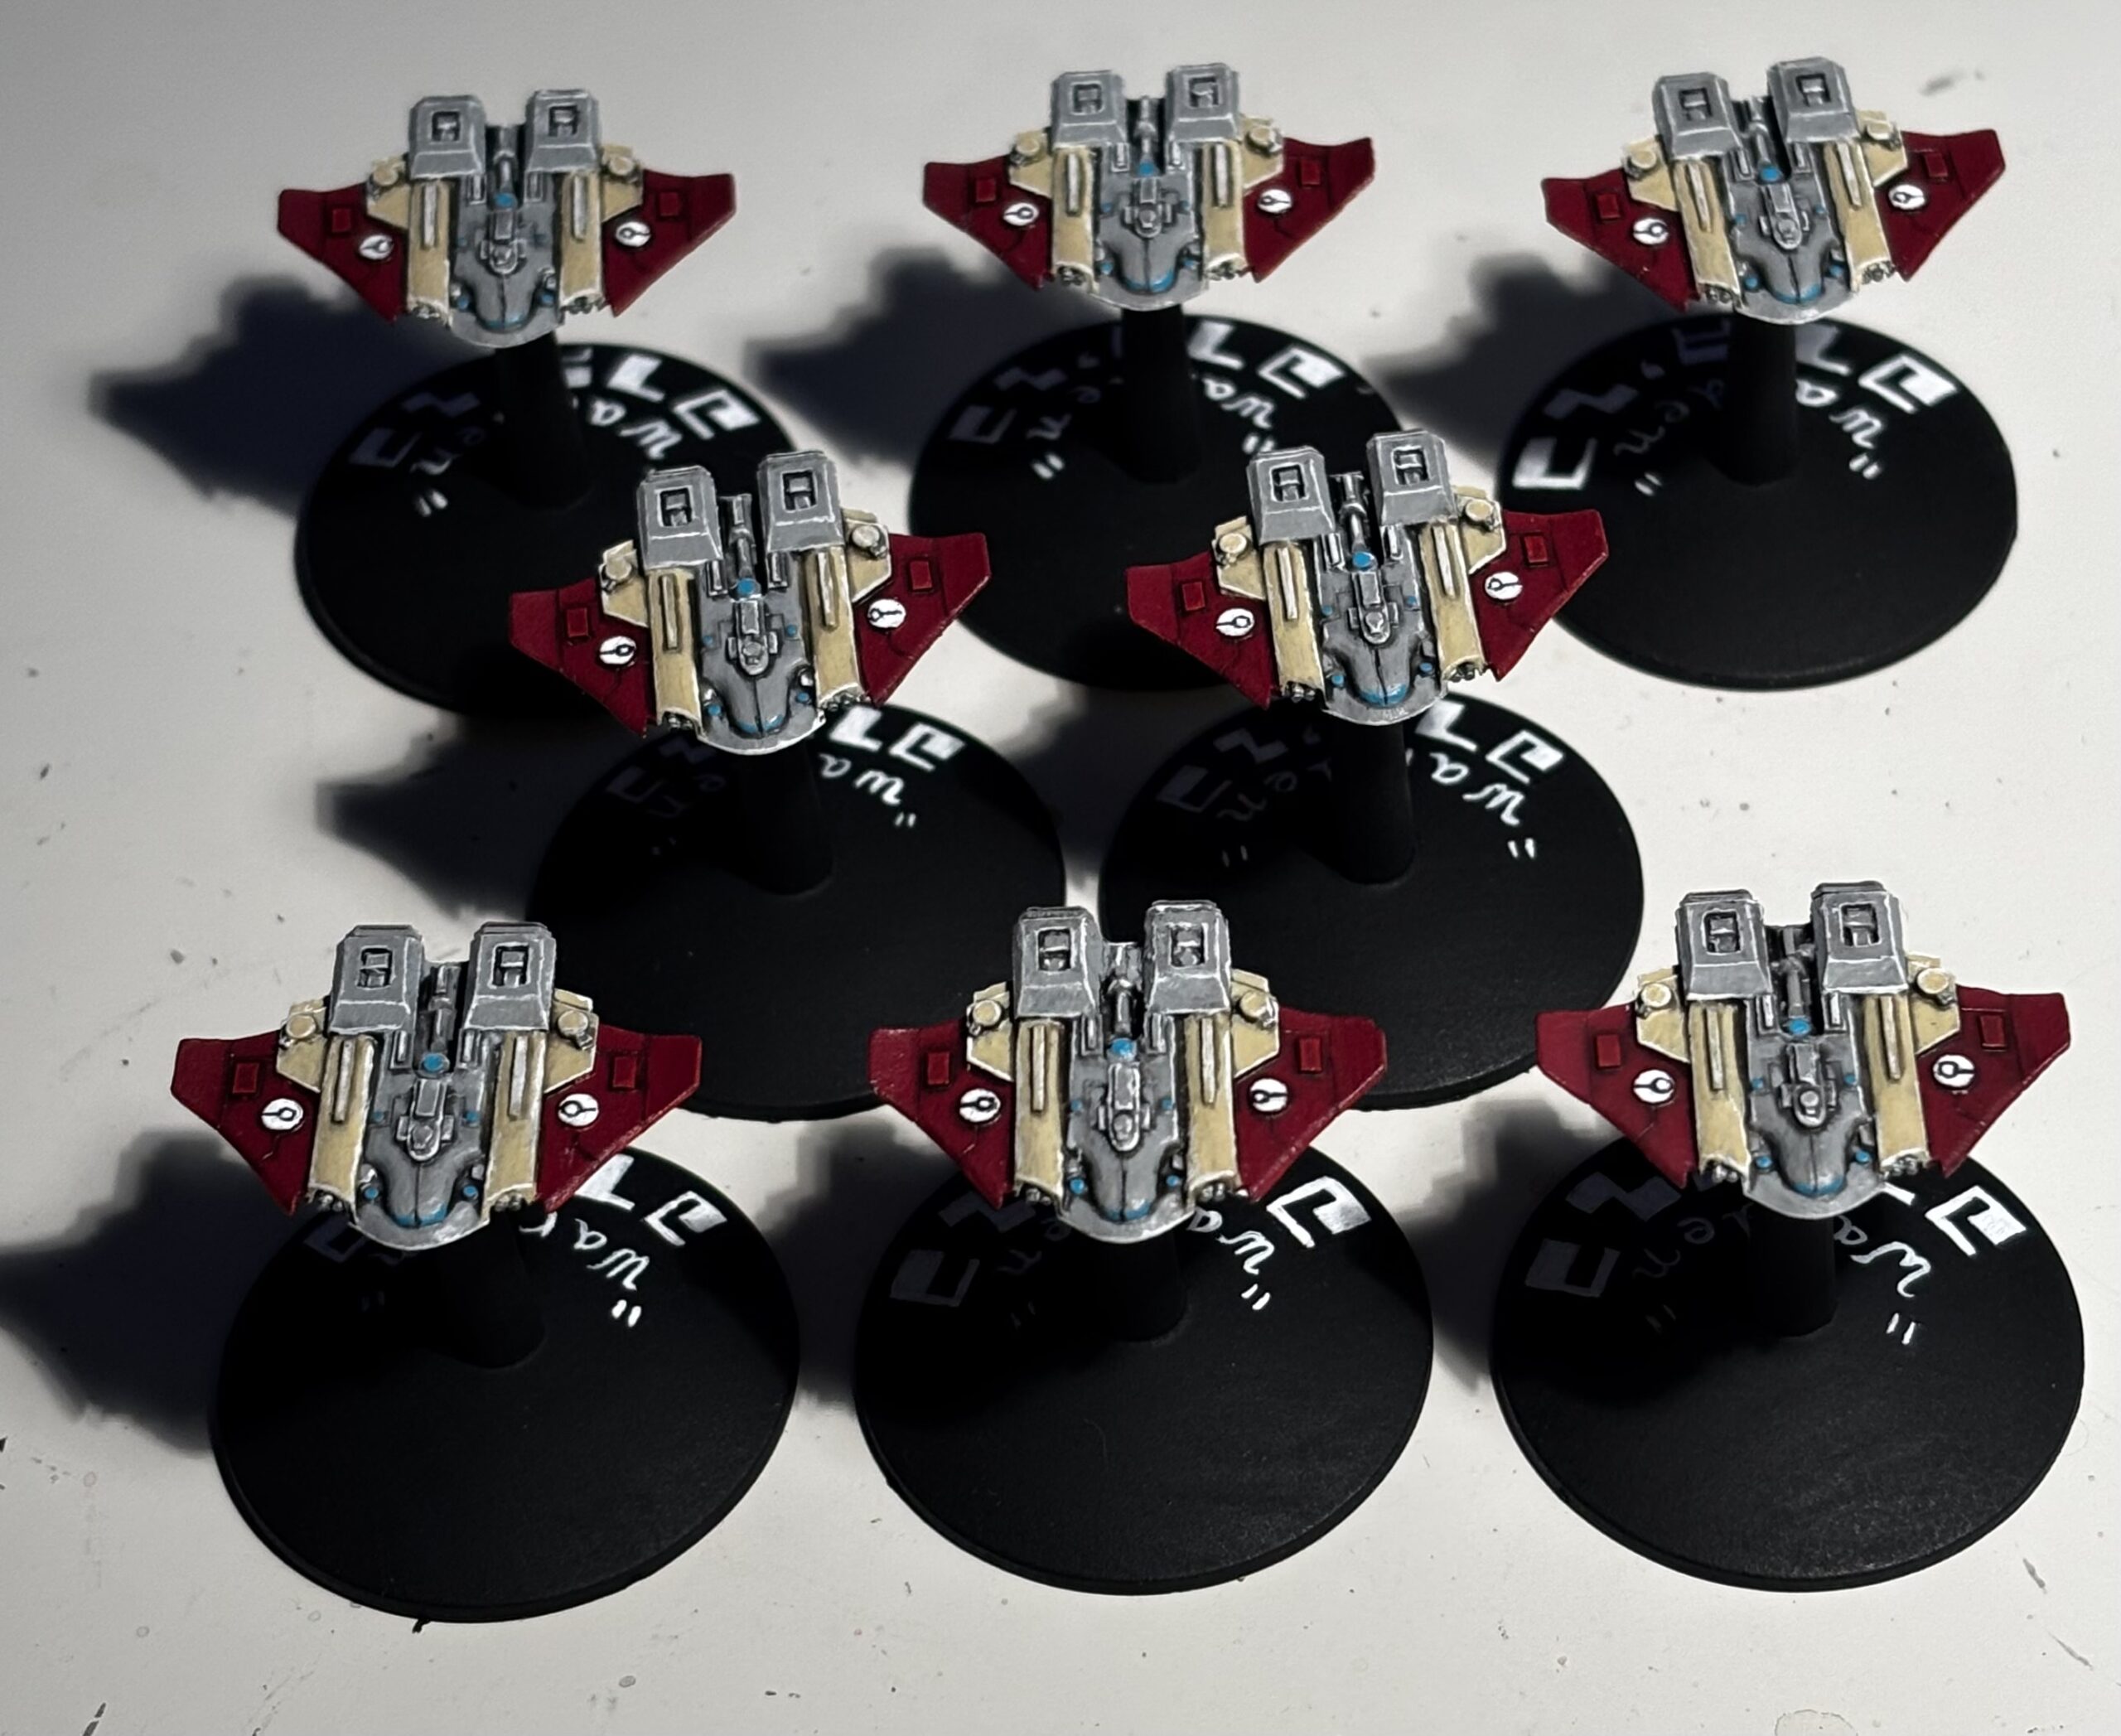
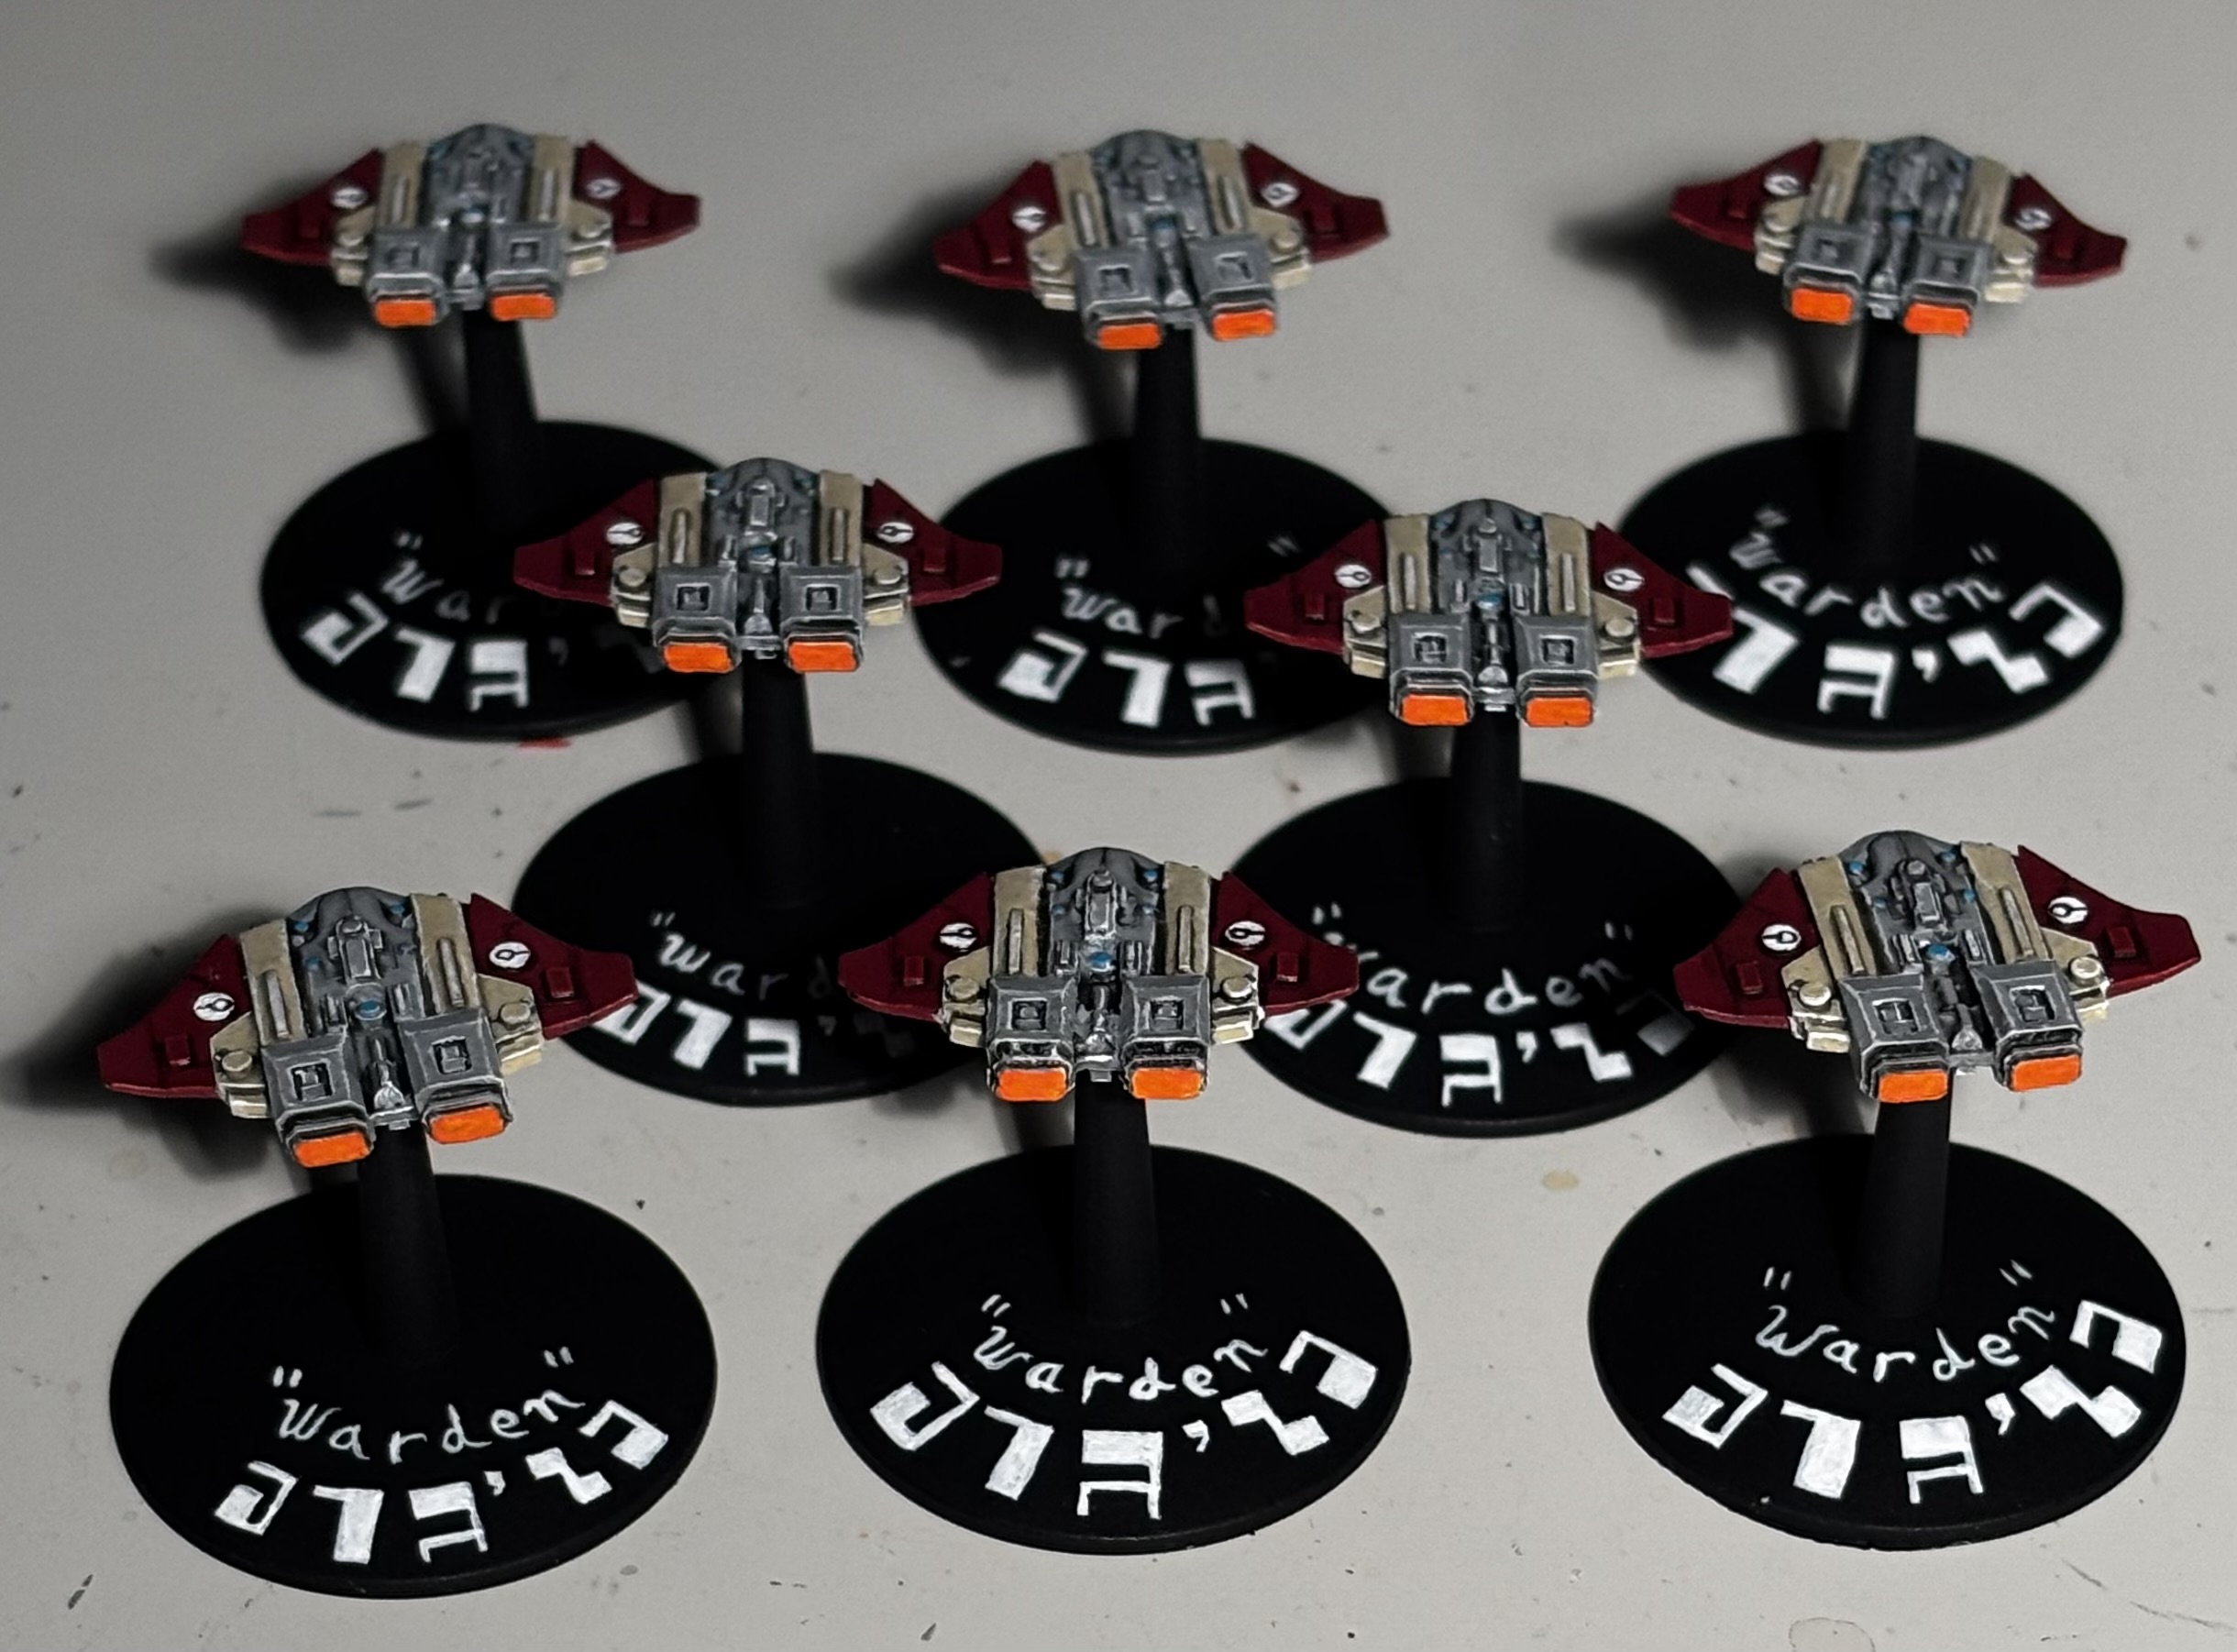
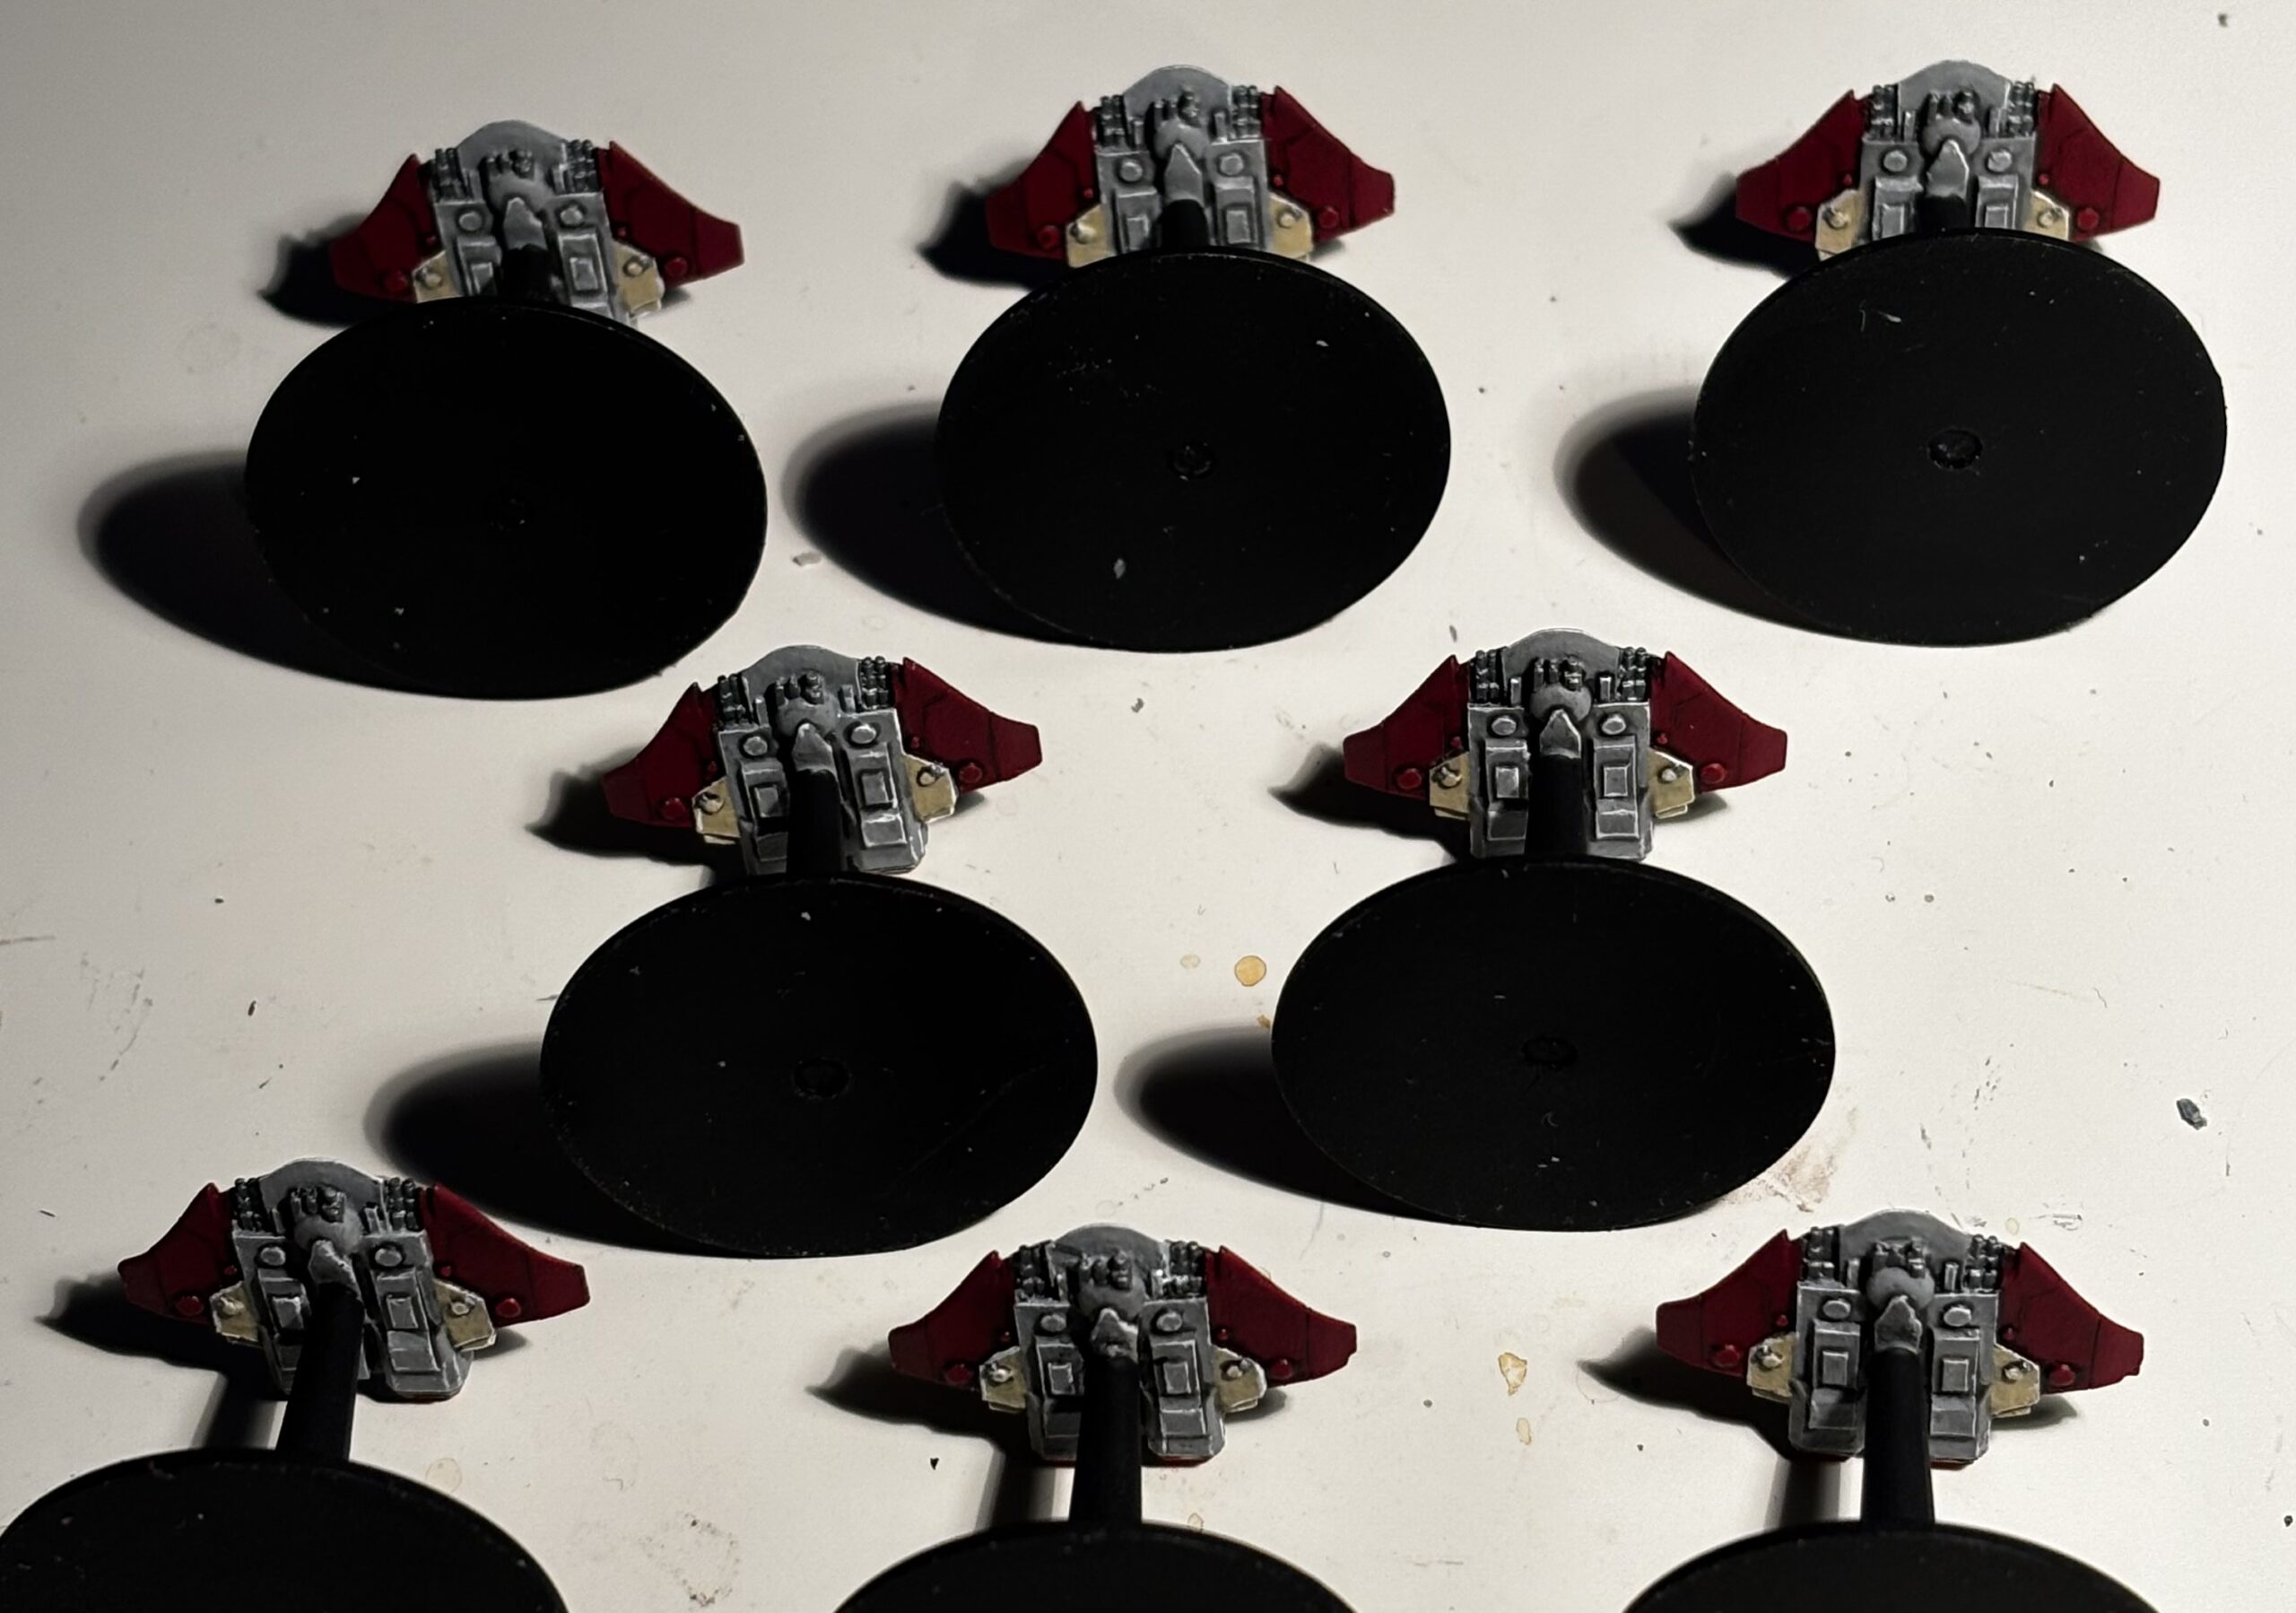
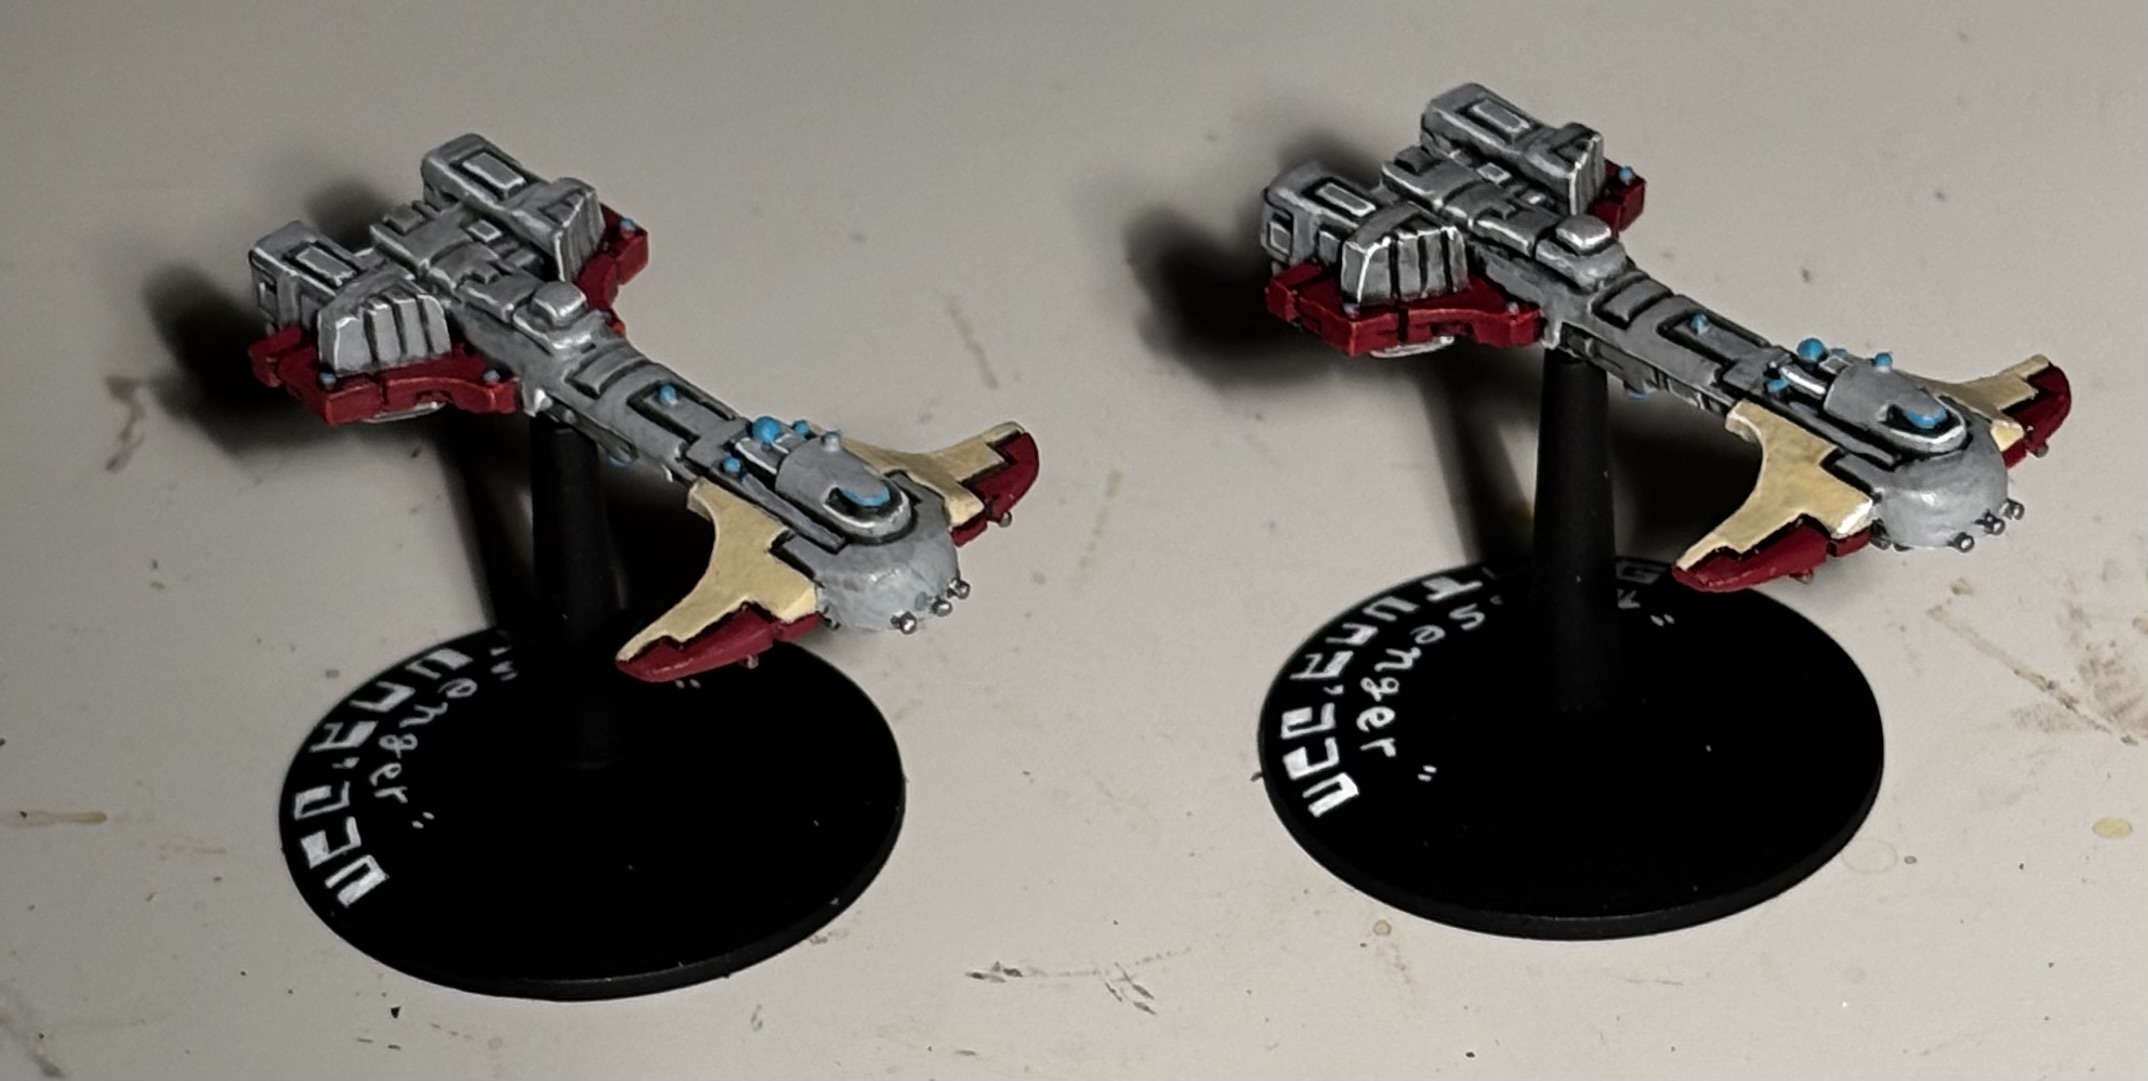
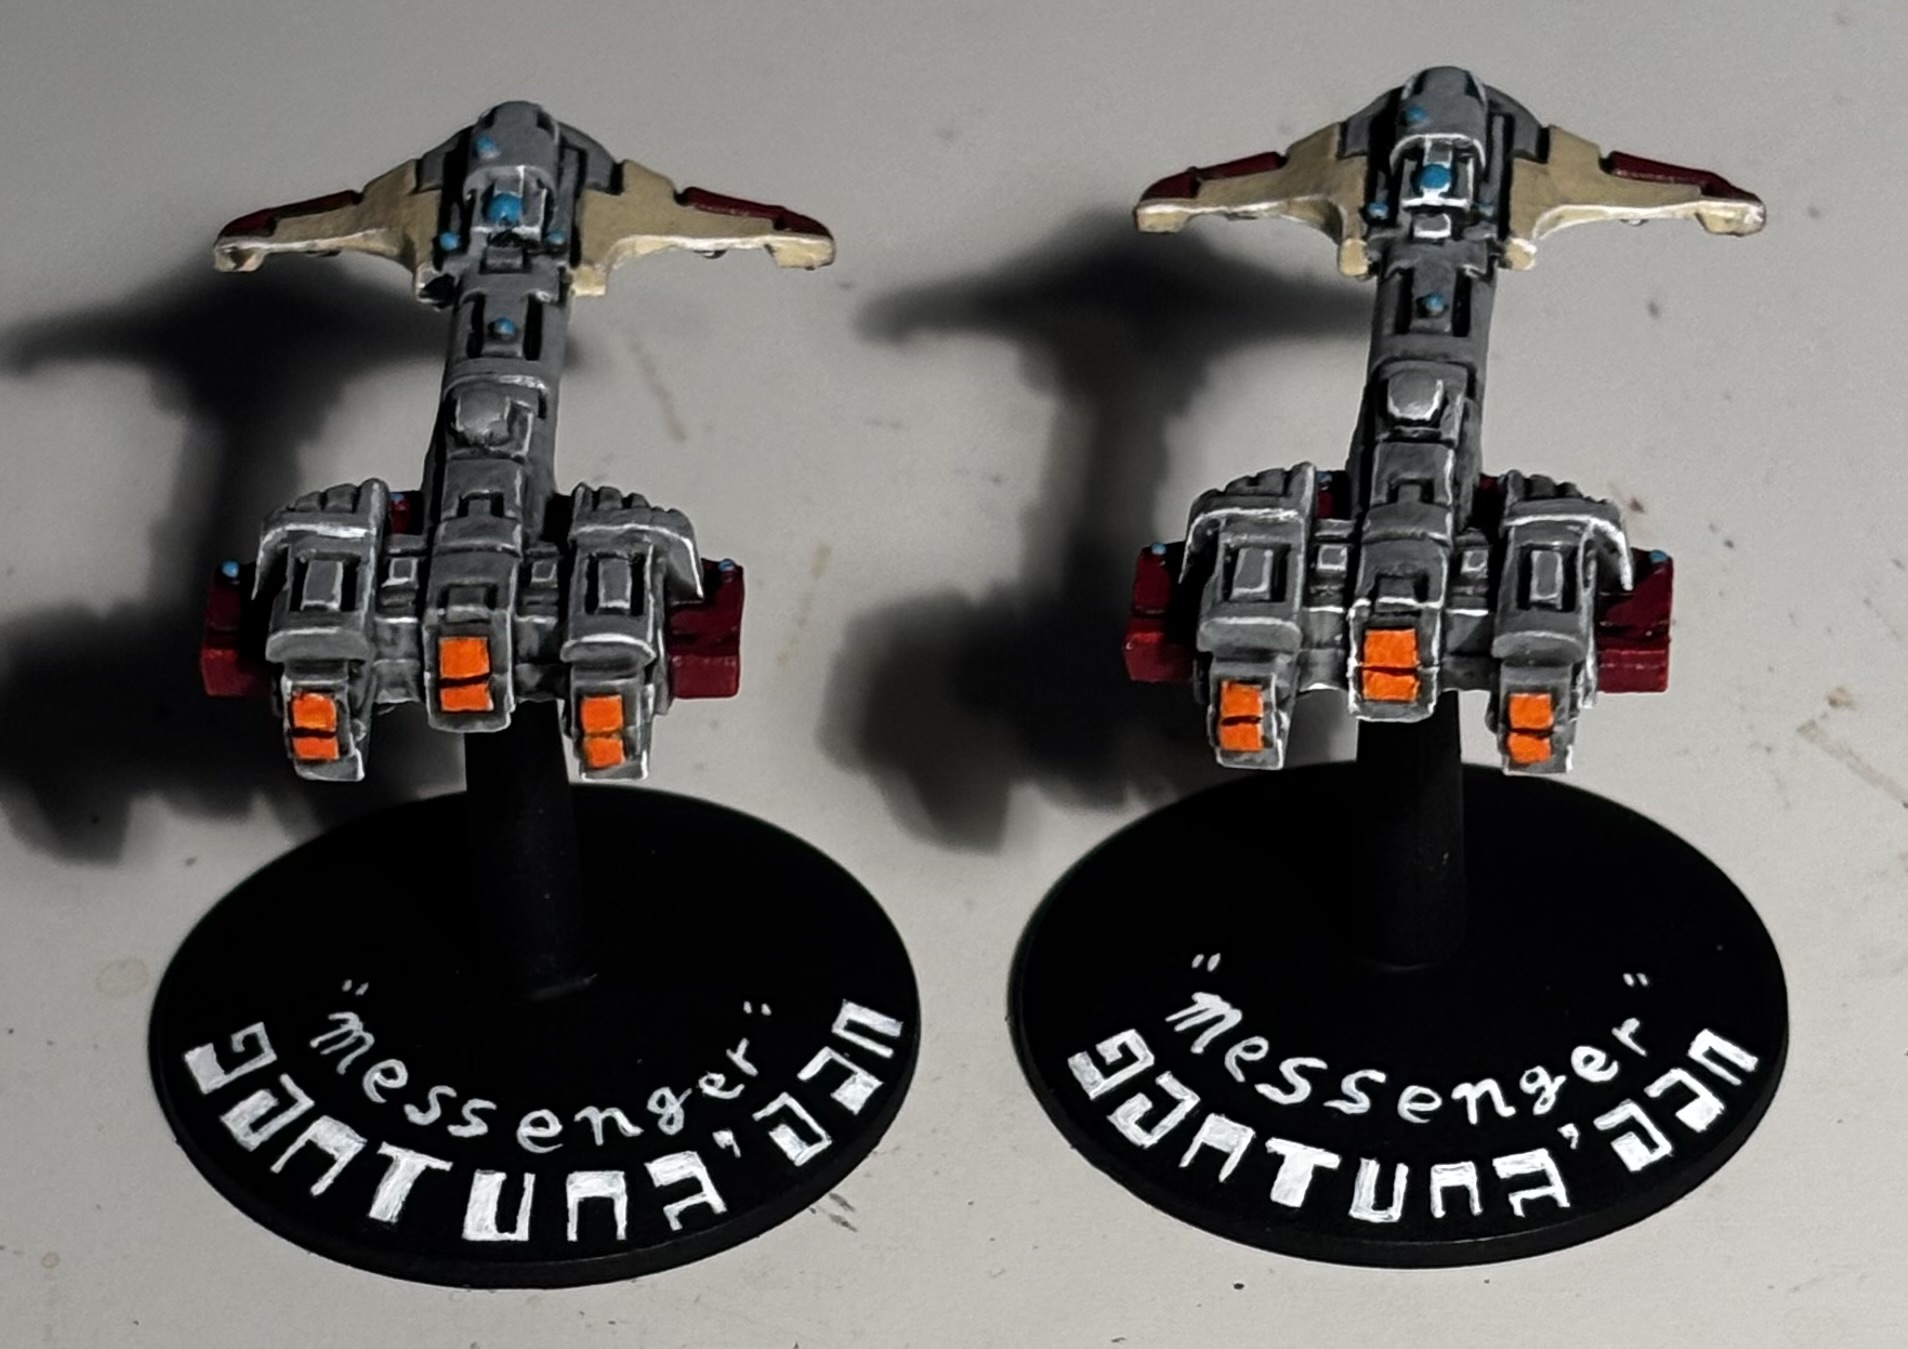
Q4 Finish It! – Tau Wardens and Messenger Escorts
For the Q4 challenge, the purpose is to finish an unfinished project. Long (LONG LONG LONG) time fans may remember when I first began painting my Tau Kor’or’vesh fleet. It all began with a forum post made by an unknown user named Tyberius:
As you can see above, this wonderful person made this (and many other) sheets for Battlefleet Gothic Ordnance. There is another version with blue instead of red but I liked this one better.
This led me to my color scheme for the Tau: Maroon/red, gray, and bone.
Sadly, my ambition got the better of me. My scheme was incredibly complicated, requiring black pin washes and edge highlighting over the entire model. Plus, I got it in my head to label each ship with a unique name in both T’au AND Engilsh! Hand lettered! The detail was exhausting. I gave up after completing the capitol ships and the Castellans. The Wardens, Messengers, and all other support models fell by the wayside.
Until now. Behold! The first installment of the Q4 Finish It challenge!
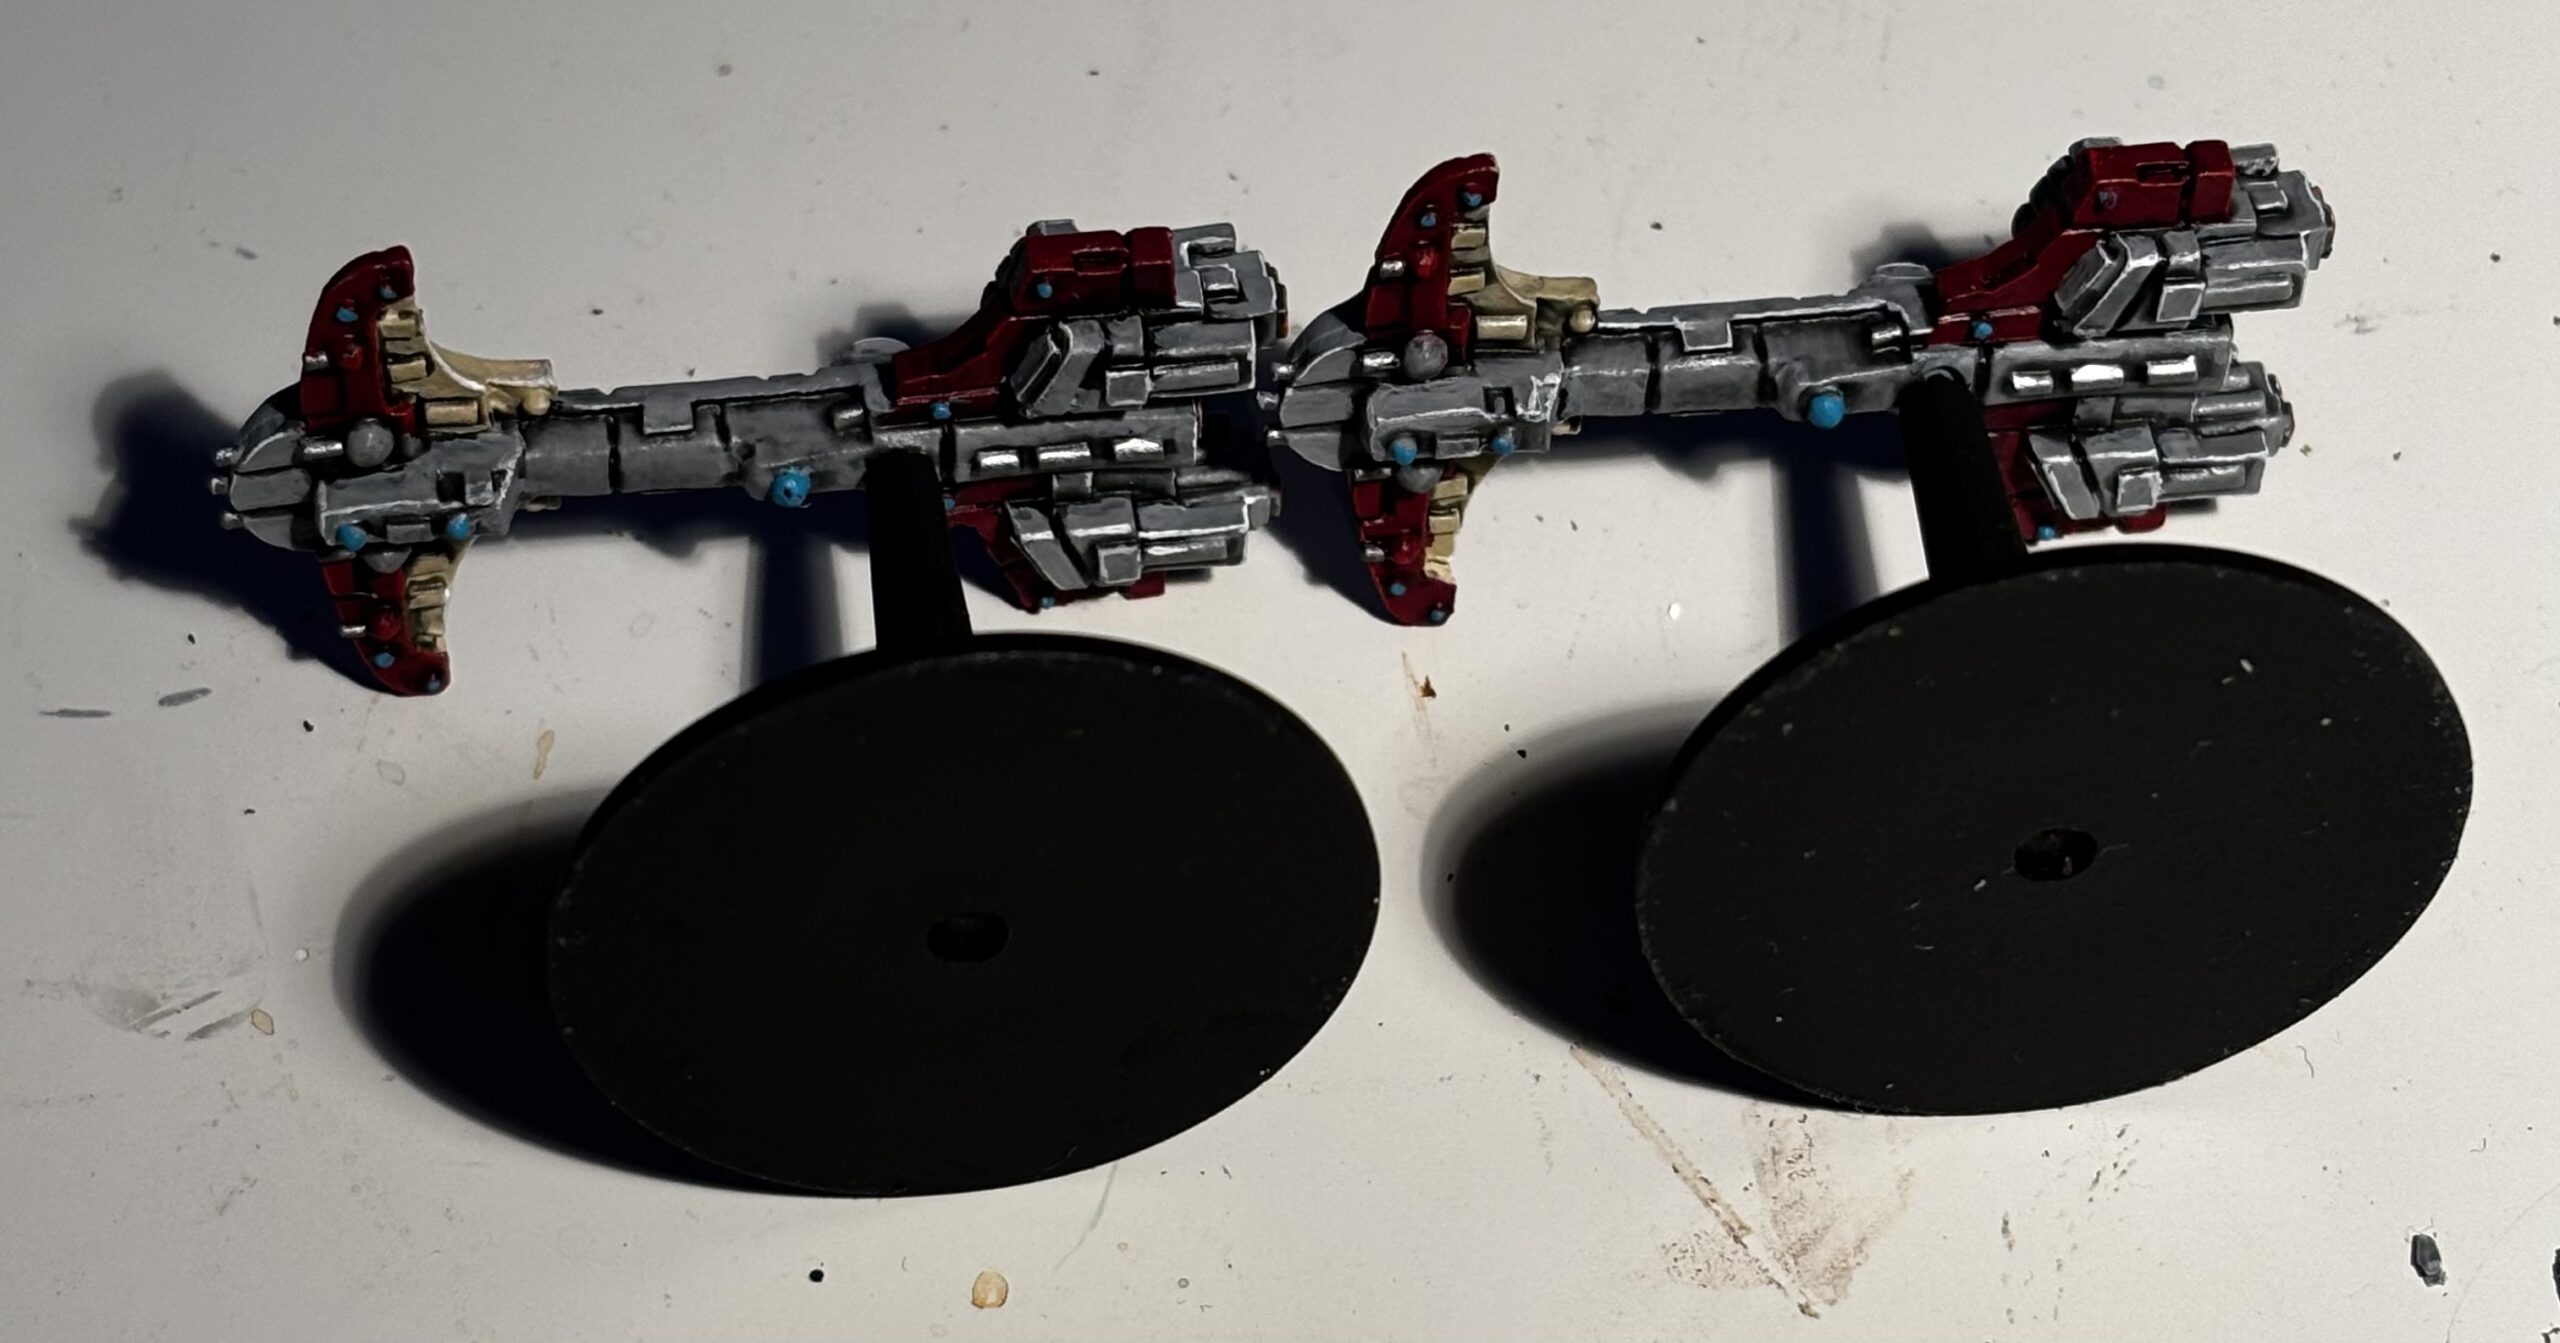
This concludes the portion of the fleet with this color scheme. The transports and orbitals will be painted the standard Tau Ochre with a brown pin wash and a simple highlight. Additionally, there will be four Nicassar Dhows, whose paint scheme I have not decided on yet. I am considering the fine line of paints from Turbo Dork, whose glittery sheen is stunning!
Next: Orktober begins with Ork Nobs! Following that, I’ll pick up on the Tau with ten Emissary class transports!
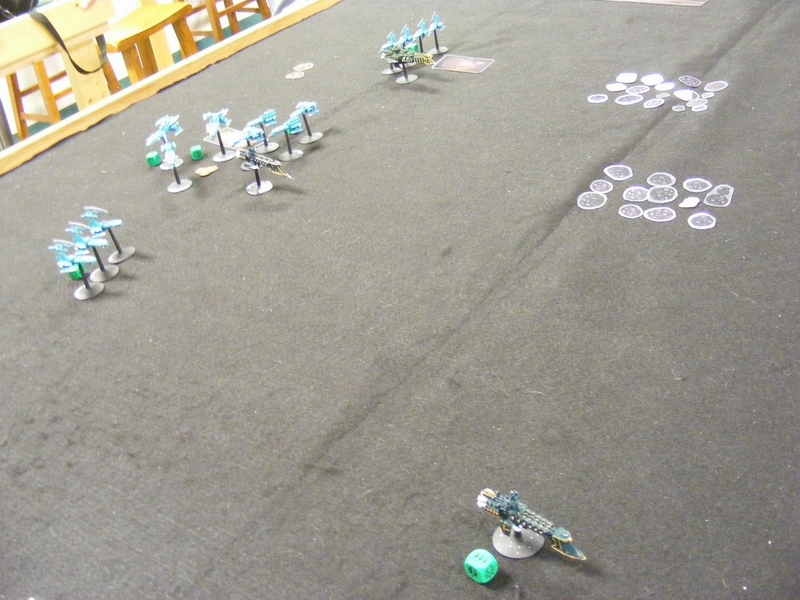
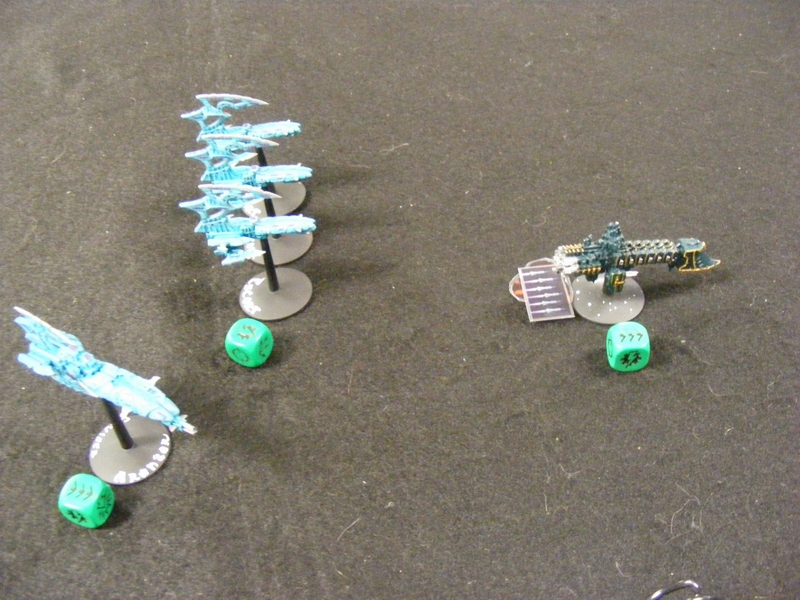
Tyranid BFG Fleet: A Beginning
Recently at the finale to the Highland Gaming Club I walked away with a paper ream box of Tyranid bits. Sadly, these did not include a lot for things worthy of making a ship. However, subsequent bitz orders to fill in the gaps and some creative kitbashing have yielded a very promising beginning:

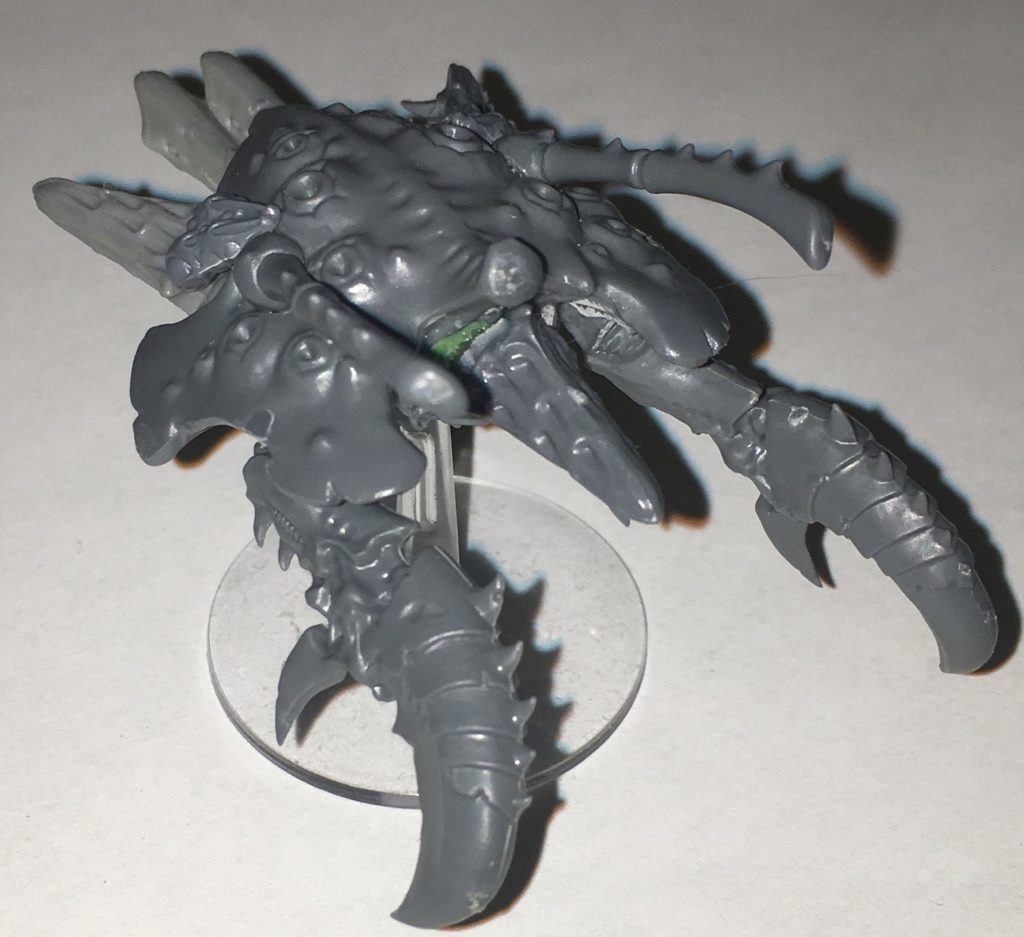
First, a cruiser with two sets of Massive Claws! This is both threatening and dirt cheap. If it can survive to close (a risky proposition) it can make four attacks and if any two hit, it’s lunch time!
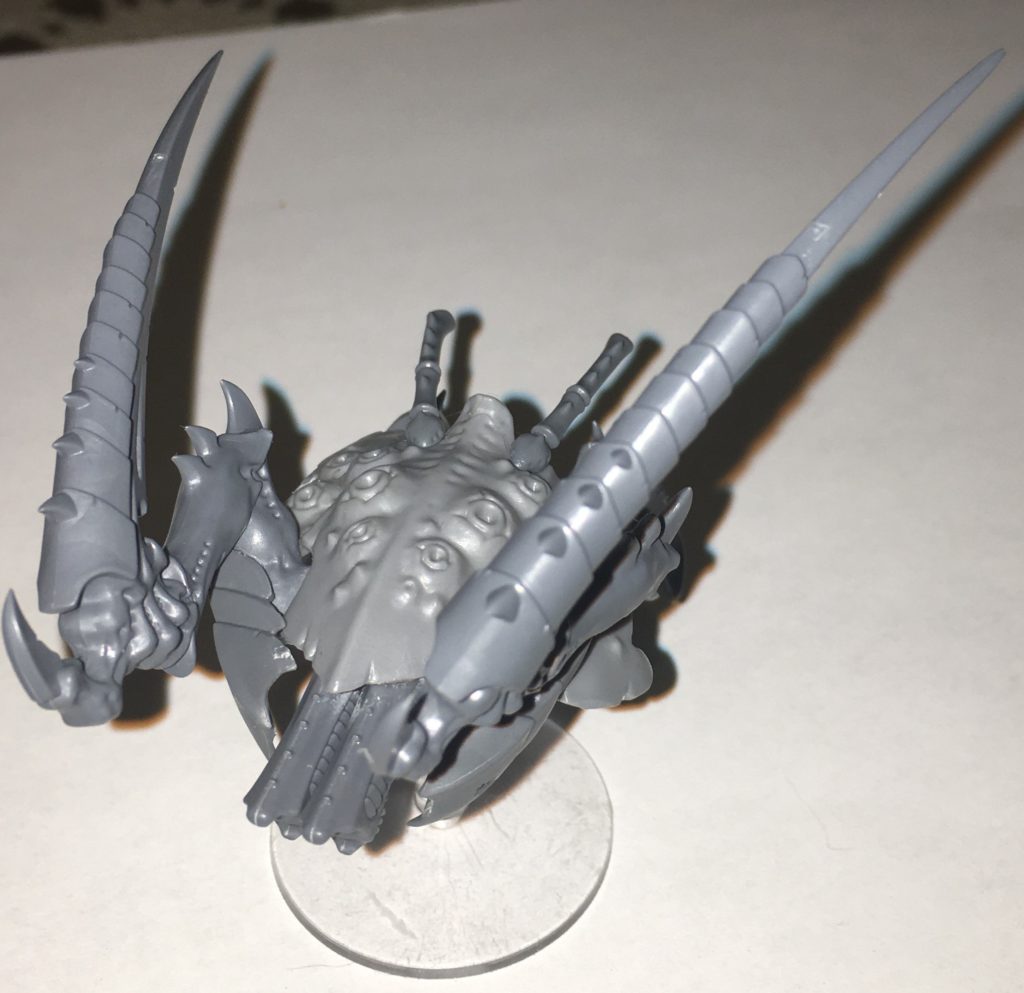
Here’s the same ship from the back.

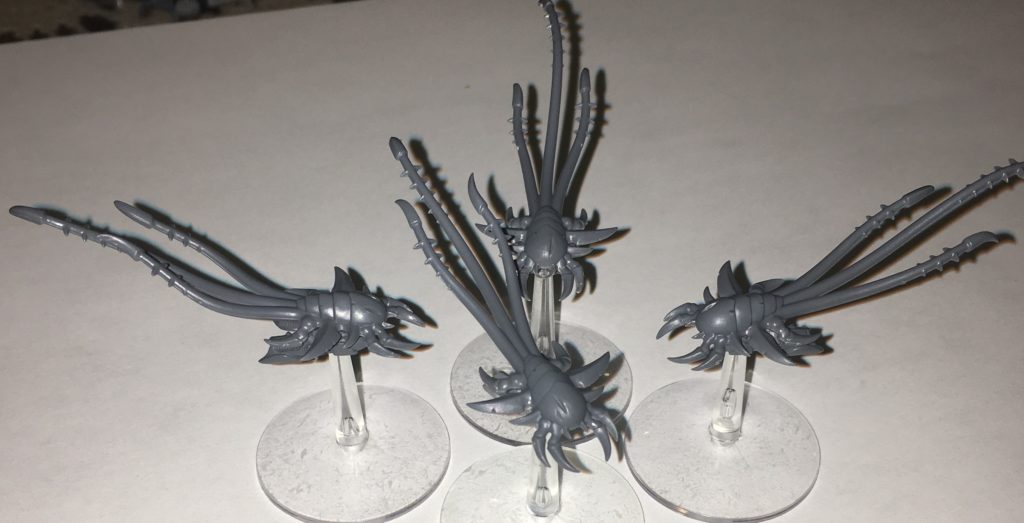
Another cruiser, this one doubling down on Bio Plasma Spines. Short range, but terrifying to high armor foes.

This cruiser is all about the Pyro-acid, making it a nightmare for Eldar. It has some torpedoes to add a bit of ordnance to the fleet.

Here is the same cruiser from below.
The final cruiser also doubles down on Pyro Acid, but trades torpedoes for one set of Massive Claws, making it more of an all-rounder.
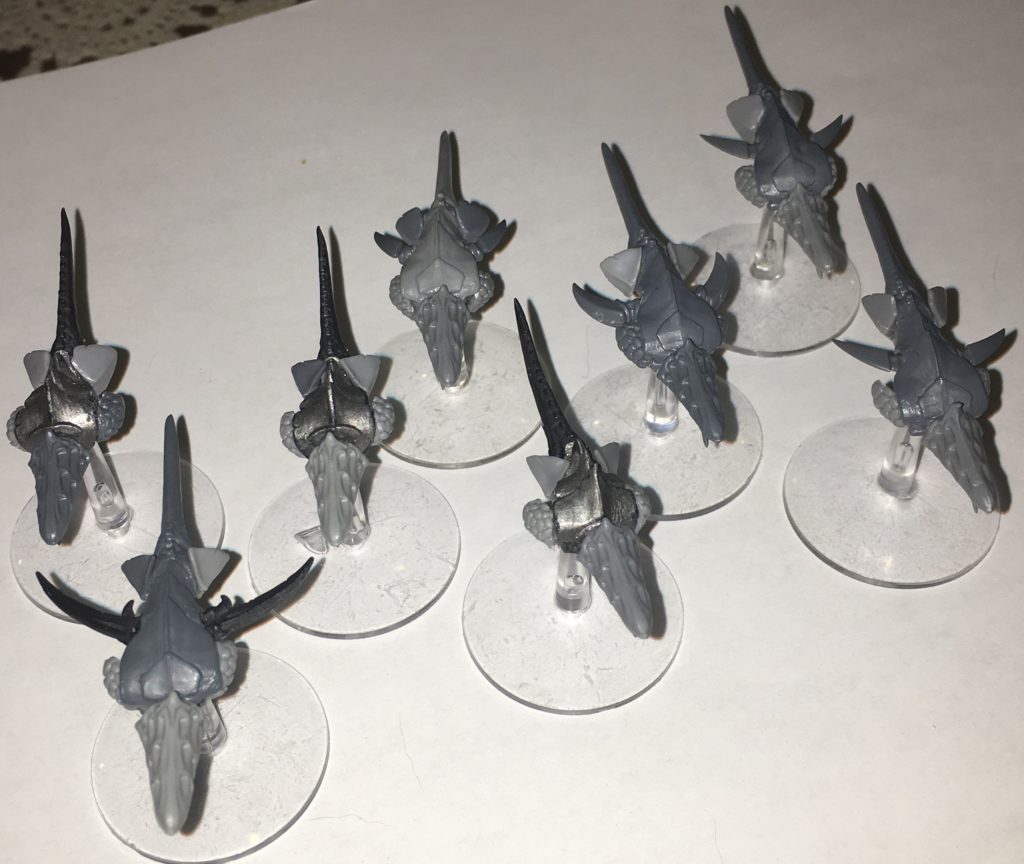
Here are some repurposed Gaunt bodies sporting pyro acid batteries to become Hive Drones. I tried to vary them a bit, as most other races have varied escorts.

My first creations, these kitbashed ships are a bit big for escorts, but make excellent Krakens with either Pyro Acid or Massive Claws.
One in ten Hive Drones can be upgraded to a Fire Ship. Insanely devastating, I could not help but make a few. Granted, I’ll need to field 27 Drones to field all three of these bad boys, but even one can be an unpleasant surprise to anyone who strays too close…
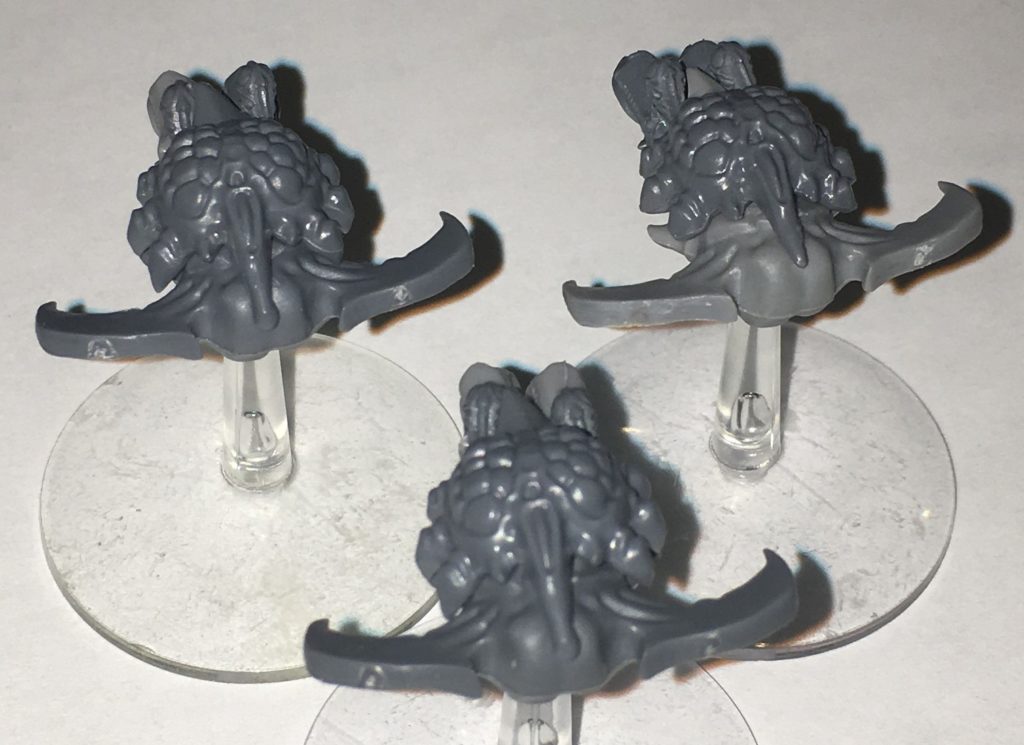
Finally, (at least for now) some Vanguard with Feeder Tentacles to put the smack down on heavier or faster foes.
Next, Primaris and more Nid BFG goodness!
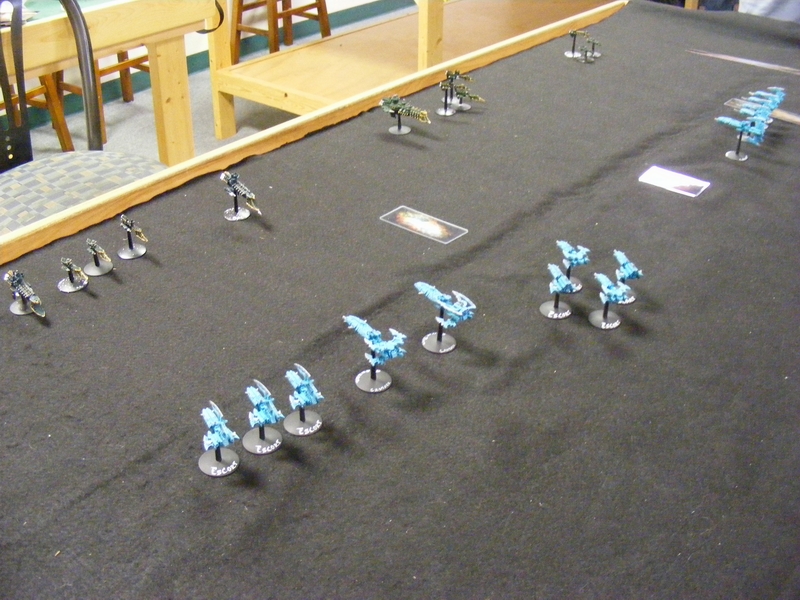
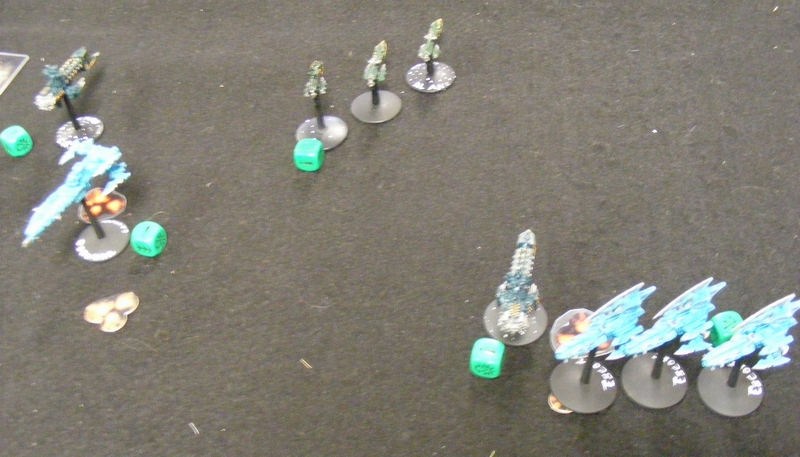
Reunion Gothic Match! 1000 The Raiders, Marines vs. Chaos, featuring Lexington!
Lexington’s back in town for the holidays! I got him a Boomdakka Snazzwagon for xmas and he got me a Protomen hoodie that is so warm it’s basically a coat.
Storytime!
Long ago, Lexington built an Ork Battlefleet Gothic fleet out of the old pewter Killa Kans and some other bitz. However, the fleet fell off a shelf and shattered into a million pieces. Like Humpty Dumpty, Lexington couldn’t put it back together. So, he asked to borrow one of my fleets. He chose Chaos to represent his other 40K force, while I played the good old Azure Flames. To keep the game small, we played a 1000pt The Raiders mission. Here’s what happened!
——————————————-
Bozeman – Azure Flames Space Marines, Crusade Fleet List (Attacker, 500pts)
- Strike Cruiser Honor, Extra Shield, Honor Guard
- Strike Cruiser Duty, Extra Shield, Honor Guard
- Strike Cruiser Sacrifice, Extra Shield
Lexington – Chaos, Abbadon’s 13th Black Crusade Fleet List (Defender, 1000pts
- Styx Heavy Cruiser Time of Sorrow
- Warmaster (Ld+2), Re-roll
- Devastation Cruiser Pride of Heresy
- Devastation Cruiser Hateful
- Infidel Raider x3, Talon Squadron
- Idolator Raider x2, The Defilers
——————————————-
Mission – The Raiders
The Attacker gets 1/2 of the points value agreed on. Defender deploys their entire fleet more than 30cm from any board edge, all facing the same board edge, and with each ship/squadron more than 20cm from any other. All Defender ships are at -1 Ld for D6 turns. (3 Turns this game) Attacker gets first turn and comes on from any board edge.
Battlezone – Inner Biosphere (bonus/penalty for Batteries doubled) (Note, one Solar Flare result was rolled during setup)
Setup

Turn 1 – Azure Flames
All three Strike Cruisers come on from the Starboard side of the Time of Sorrow. Torpedoes do 7 damage, and Thunderhawk Gunships cause a few weapons to be disabled. The Hateful also takes one damage from torpedoes.

Turn 1 – Chaos
The Time of Sorrow disengages. Both Escort squadrons go on Come to a New Heading to fire on the Space Marines. The Honor takes one damage from torpedoes. The Duty suffers four critical effects from assault boats.

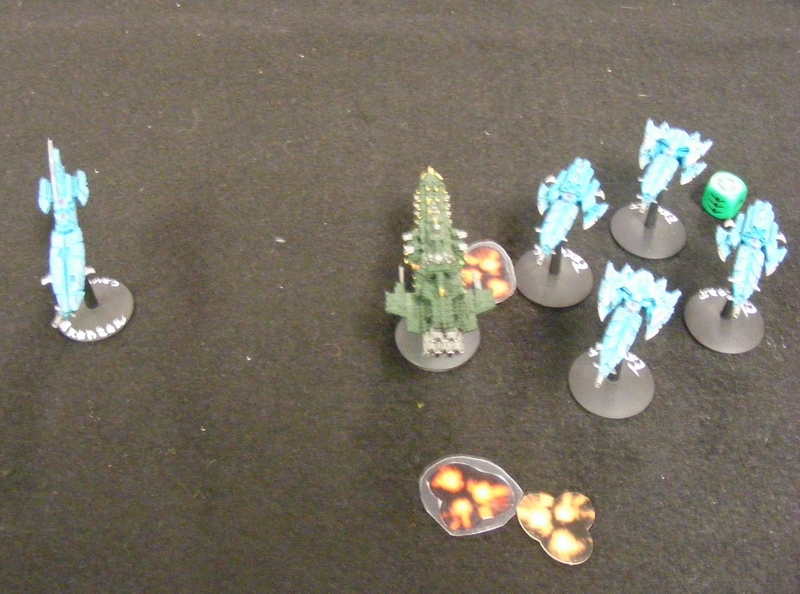
Turn 2 – Azure Flames
The Duty Braces for Impact but still takes a few more critical effects from assault boats. The Hateful is crippled by torpedoes, and both remaining capital ships suffer more critical effects.

Turn 2 – Chaos
Unable to reload, the Chaos ships fire at the Marines ineffectually.

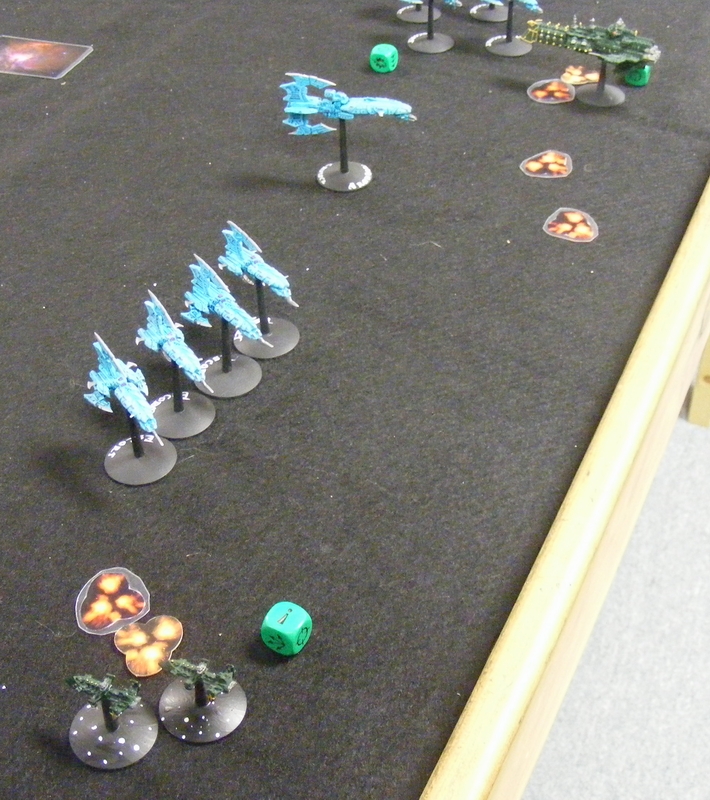
Turn 3 – Azure Flames
Solar Flare occurs! Duty, overburdened by critical effects, disengages. Honor and Sacrifice Reload Ordnance. Torpedoes do 3 damage to the Hateful, and a Thunderhawk scores an Engine Room Damaged effect, finishing the ship off and leaving it a drifting hulk. The Pride of Heresy is crippled by torpedo damage. Turn not pictured.
Turn 3 – Chaos
Pride of Heresy disengages. Escorts take down both shields of the Honor.

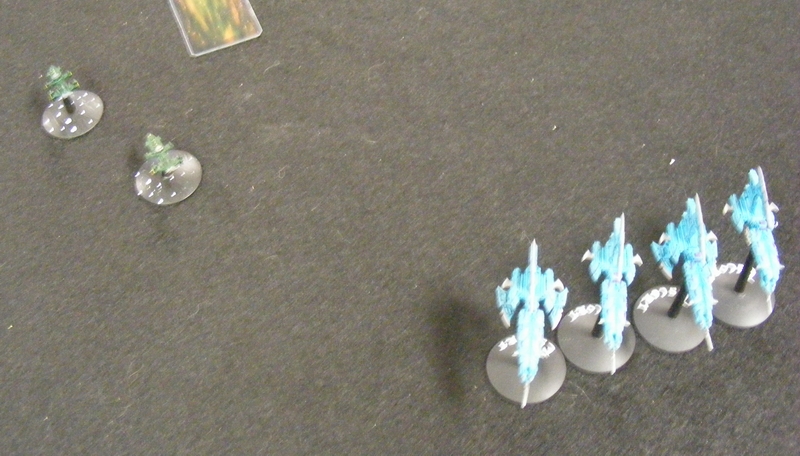
Turn 4 – Azure Flames
Both ships Reload. Talon Squadron of Idolators is destroyed by ordnance and fire. The Defilers Infidel squadron loses one member.

Turn 4 – Chaos
The Defilers disengage. Game over.
——————————————-
Final Score
Azure Flames: 519
Chaos: 17
——————————————-
Several factors heavily influenced this game. 1: Lexington left his Admiral’s ship dangerously close to the edge, allowing a turn 1 alpha strike. He should have buffered his sides with the escorts. 2: The leadership penalty led to some key missed reloads. 3: Anticipating only minor damage, Lexington refused to Brace for Impact several times. Knowing when to Brace is key in Gothic.
Next: more painting and batreps! Hope my computer doesn’t die again!
Battlefleet Gothic Azure Flames – Spear Squadron Gladius Frigates (plus new case!)


It feels good to get a brush back in my hands. I started with the Armourium Cherubs for Big Game VI, but in the course of unearthing some old bitz for the Guard models I lent Scott, I found six Forgeworld Gladius cruisers. Seeing as how my Space Marine fleet is severely lacking when fighting… certain opponents… I decided to give them a go.
So, the latest addition to my Space Marine fleet: Spear Squadron. Complimentary to Sword Squadron, I can now field two full squadrons of Gladius Frigates. For… reasons…
Certainly not specifically to fight the Eldar. That would be a ridiculous speculation and I resent the very idea.
But it would work.
What doesn’t work is my current case for the Azure Flames for Gothic. Currently, they live in the same overly complicated tackle box with my Epic Armageddon Azure Flames. (Yes I own a representation of the same army three times. It saves on paint.) However that case is so jam packed I keep Epic scale Rhinos in the top compartments with no padding. There’s not room for one more escort, let alone six.
That’s why family is a wonderful thing.
Last Xmas, my cousin’s husband confided in me that his business had a rather unique by-product. He sets up audio rigs for small churches. A lucrative endeavor as new churches spring up all the time. His deft hands compile the necessities of an audio system into a convenient roiling cabinet. What’s left over is an empty microphone case. He had more than 100 empty padded cases.
I took about 16. I used one as a transport for my Guard to Big Game VI. And now…

…it holds the fleet. Granted, there is no room for me to expand further, but I see no need (unless twelve Gladius Frigates are insufficient for the Eldar…) so I consider the collection complete. The case has a makeshift padded interior left over from various pluck foam and matress pad endeavors. The top is padded with further foam.

It’s not pretty, but given that I did it with waste foam, a free microphone case, and my wife’s glue gun, it was practically free! It also gave me a chance to use something I’ve had for a while:

A custom luggage tag, to mark it out! I plan to have several more of these cases for other armies for Gothic, Epic, Necromunda, Blood Bowl, and so on. So, a while ago, I designed luggage tags to mark out the cases. This is the first one I’ve had a chance to use.
Next: more batreps, more painting, and more fiction!
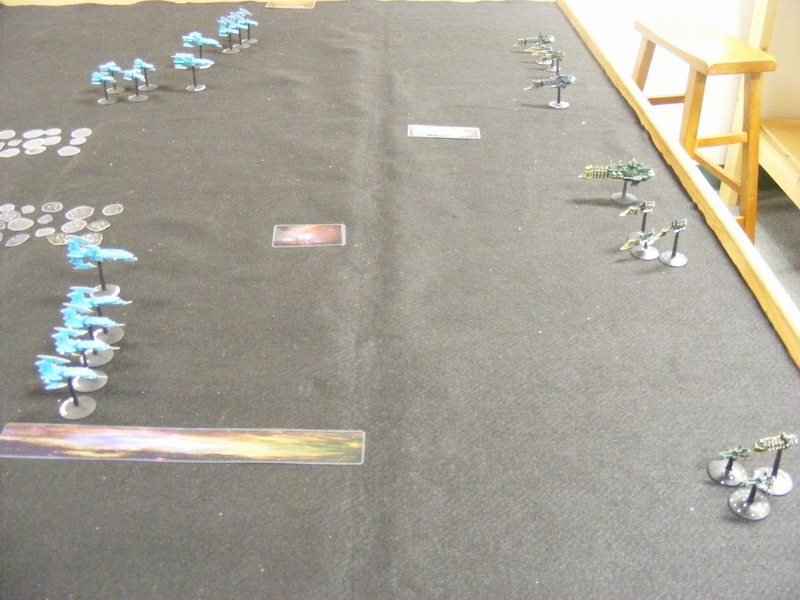
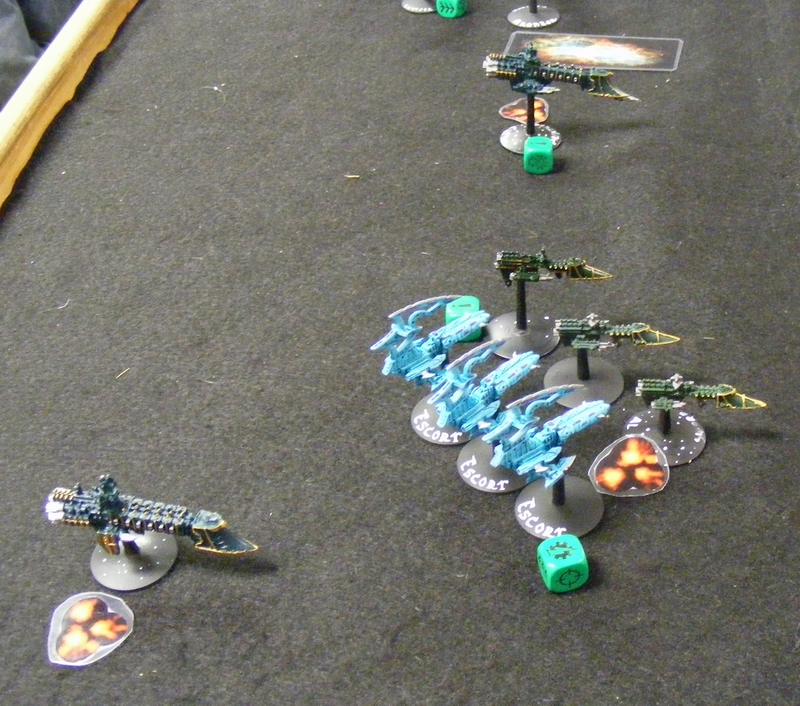
Battlefleet Gothic – 1500 Blockade Run – Dark Eldar vs. Imperial Navy
Stephen and I finally got our schedules to sync up and we got to play Battlefleet Gothic. I brought my Dark Eldar. Will they finally get a win, or will they continue their embarrassingly long losing streak?
(sorry about the picture quality, my camera was NOT behaving)
Blockade Run -1500 points
———————————————————————-
Bozeman – Dark Eldar – 1500 points (defender)
-Dread Archon (Ld+2), 1 Re-roll (aboard The Bliss of Pain)
-Torture class cruiser The Bliss of Pain, Launch Bays, Mimic Engines
-Torture class cruiser Osan’gar, Phantom Lance, Mimic Engines
-Torture class cruiser Aran’gar, Phantom Lance, Mimic Engines
-Corsair Escort x4 Red Teardrops, Phantom Lance, Mimic Engines
-Corsair Escort x3 Razorlace, Torpedoes, Mimic Engines
-Corsair Escort x4, The Chosen, Impaler Assault Modules, Mimic Engines
———————————————————————-
Stephen – Imperial Navy – 750 points (attacker)
-Admiral (Ld8) (aboard the Lance Dauntless)
-Lunar class cruiser
-Dauntless light cruiser, lance
-Dauntless light cruiser, torpedoes
-Sword class frigate x3
-Sword class frigate x3
-Cobra class destroyer x3
———————————————————————-
Setup
Due to my Mimic Engines, I took a free move before the game began.
———————————————————————-
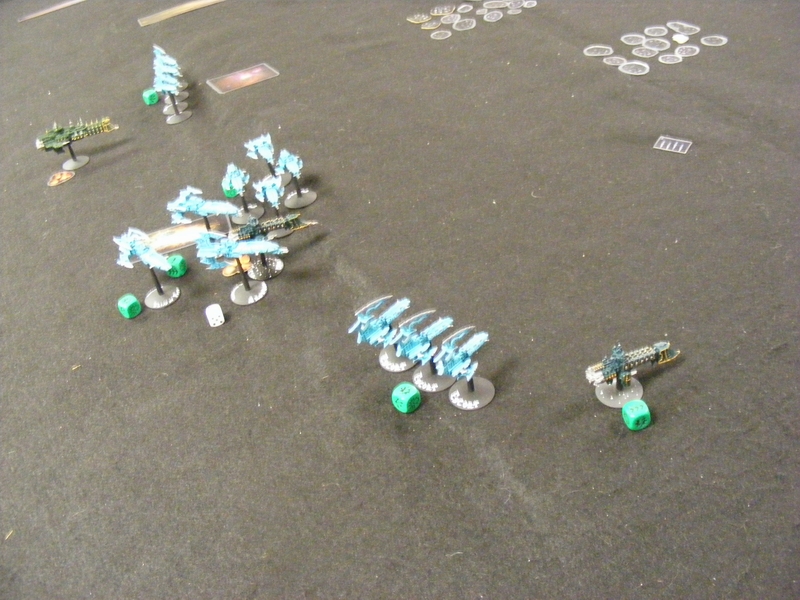
Turn 1 – Dark Eldar
Lucky me, I got first turn! Razorlace goes on Come to a New Heading and fire Leech Torpedoes at the Torpedo Dauntless, causing a Brace and two Leech effects. The Osan’gar and The Bliss of Pain do three damage to the Lance Dauntless. The Chosen take out one of the Cobras with batteries, while their Impalers and the Aran’gar destroy one of the Sword squadrons. The Red Teardrops cripple the Lunar.
Leech Torpedoes put the slowdown the Torpedo Dauntless as the Lance Dauntless takes fire from two cruisers, crippling it.
The Swords are wiped out, and the Lunar takes some severe damage, smashing its bridge!
Turn 1 – Imperial Navy
Surviving Sword squadron locks on, but does only one damage to the Osan’gar. Remaining fire is under the effect of Brace For Impact and so can’t really do much. Torpedo Dauntless rolls spectacularly and fixes both Leech results!
Leech Torpedoes put the slowdown on the Dauntless as the Swords try Lock On to damage the Osan’gar. Good brace save protect it mostly.
Brace for impact plus being crippled equals not a lot of firepower.
The Cobras make a break for it.
Turn 2 – Dark Eldar
Razorlace reloads and fires regular torpedoes which eat it in a blast marker. Most of the rest of the fleet finish off the Lunar as The Chosen remove the Cobras.
Torpedoes have little effect when they don’t get there due to stupid Blast Markers.
The Lunar is reduced to a blazing hulk.
Cobras are no more.
Turn 2 – Imperial Navy
Torpedo Dauntless goes on All Ahead Full to get away, as the rest of the fleet makes a break for it.
 RUN!
RUN!
Turn 3 – Dark Eldar
The Osan’gar boards the Lance Dauntless and takes it out. Fire from Razorlace removes the Swords.
Here comes trouble.
Turn 3 – Imperial Navy
Surviving Dauntless goes on All Ahead Full.
Will he get away?
Turn 4 – Dark Eldar
Spoiler: no. Stephen refuses Brace for Impact so he can try to get off the board next turn, but Razorlace and Osan’gar finish it off with a lucky critical hit to the engines.
———————————————————————-
Final Score:
Dark Eldar – 750 points
Imperial Navy – 0 points
———————————————————————-
I got very unlucky and 2/3 of my fleet was in the right 1/3 of the board. Stephen could have taken advantage of this and gone up his left side. I also got lucky and got 1st turn, turning my Mimic Engine move into a lethal Alpha Strike.
Next: more painting and a tournament!