DRILL OUT YOUR BOLTER BARRELS
Look at this. Is there anything that screams laziness more than the barrel of this Space Marine’s Boltgun?

No one wants to see that. That’s bush league. Don’t be like that. Here’s a handy guide on how to drill the barrels of Boltguns so they don’t look terrible.
- Get a good pin vise set with a 1/32″ and a 3/64″ drill bit. The standard Dremel 7 bit set comes with this and is usually less than $5.
- Put the smallest bit (1/32″) in the pin vise, and begin to drill the crossbore of the Bolter.
- PRO TIP: If you are at a bad angle, you’ll ruin the barrel. Instead of going through the whole Bolter at once, drill a bit on one side and switch. Keep switching after a couple turns until you break through.
- Continue as above until you see daylight through the Bolter. DO NOT STOP UNTIL YOU SEE DAYLIGHT. See below.

- Keep the same 1/32″ bit in, and drill a very small divot into the front of the barrel. Try to make it as centered as possible.

- Replace the 1/32″ bit with the 3/64″ bit. Drill out the barrel all the way to the cavity you created in the crossbore.

- Sometimes, the crossbore gets a little extra plastic from the barrel drill, as seen below. Put the 1/32″ bit back in and use it to carefully clean the crossbore.

- If any of your barrels were damaged, fix them with putty or replace the Bolter if you can.
- Now your Bolters don’t look like garbage!
Next: A huge update to the Azure Flames, including two Tactical Squads, and some special surprises courtesy of Games Workshop’s 20th anniversary of the Space Marines! You won’t want to miss this!
On the subject of cases.
Recently, I bought an Eldar fleet off of Ebay, and it has been gathering dust. After all, I can’t play it because I can’t take it anywhere. So, I made a case. Here’s some pictures:
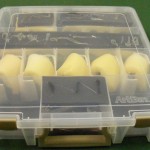
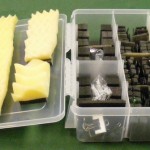
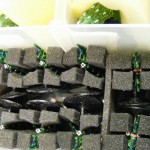
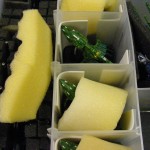

This is an art supply case, augmented with used pluck foam (thankfully saved!) mattress foam, foam sheets, and hot glue. You can see the results above. While I was making this, I thought about cases in general. After all, every model gamer needs to solve this problem. So, here’s my take on how to tackle this problem.
1.Capacity
In order to be effective, a case has to hold all the minis you need to transport. This can either be in one case (see my Space Marine case that I posted several years ago) or in many easy to carry cases.
You should also be mindful of how your collection will grow. If your case holds all your current minis, that’s perfect until you buy one more. Above, you will see my Eldar case has several areas that are unused, for when I can get lucky enough to find more Craftworld Eldar on ebay. If you want your collection to grow, you’ll need a case bigger than what you need right now.
2. Protection and Durability
Cases are useless unless they get your minis from point A to point B intact. One of my previous Space Marine cases was a large blue storage tub, outfitted with foam and cardboard tiers. I didn’t really design it to hold up the tiers, and so it rested on the minis directly. As a result, several antennae, flags, bolters, and other extended appendages or items got broken on a regular basis. The Battlefoam case I got later protects minis much better, and breakage rarely occurs.
3. Cost
Even though I love my Battlefoam case, it was expensive as hell, even with a Gen Con discount. Frugal gamers have several options, based on what kind of minis you need to transport. Battlefleet Gothic lends itself to art cases or toolboxes that can hold ships well. For Epic minis, a fishing tackle box holds lots of small stands and has room for larger minis. 40K or other similarly scaled games such as Warmachine can use a variety of cases. My friend Andy used to use foam filled pistol and rifle cases, which worked great but was inadvisable to take into a secure area…
4. Aesthetics
This to me is the least important, but still worth considering. My Battlefoam case looks great. The case shown above for my Eldar looks like garbage. However, both work just fine. You need to decide which is most important. For example, my 40K Orks are partially stored in an old, rusty metal toolbox. It’s impractical, dirty looking, heavy, and makes loud noises when you open it. In short: it’s perfect! I plan on spray painting part of it white, and then using a stencil to paint black checkmarks, then hand painting a few glyphs.
There’s a lot of options. Think about it and make the case that’s right for your collection.
Next: a battle report with Stephen and the debut of my Eldar fleet! Stay tuned!
Blood Bowl Custom End Zones by Lexington
A long time ago I met a wonderful man. He’s not important; what’s important is I met Lexington a little less than 15 years ago. He’s been my constant companion through model wargaming, and occasional rival. Friendval? (Editors note: think of something more clever later) Regardless, Lexington just gave me my Xmas present and if you think that it’s four months early, you’d be wrong. Marvel in their awesomeness:


BLOOD BOWL CUSTOM END ZONES! These end zones are designed for the 2nd edition Astrogranite board. I designed the basic concepts for the logos for the Konquata Monitors and the Grimfang Scrappaz, but Lexington brought them to life, and formatted them for the correct size of the end zone. (Blood Bowl fans take note: these end zones are two squares deep, unlike the ones on a modern Blood Bowl board)
These custom end zones were then printed in full color on a laser printer and laminated with 10 mil laminate. They were then cut to size. This breaks the seal and eventually they will need to be replaced, but it looks better without a margin. Incidentally, you can find the files here:
Konquata Monitors Custom End Zone by Lexington
Grimfang Scrappaz Custom End Zone by Lexington
Of course, these are useless to anyone but me. However, if you want to make your own, use these as templates. The final size of the Astrogranite 2nd edition end zone is 14.5″ wide by 1.75″ deep. These files are larger than that in order to give you bleed to cut off. Print them, laminate them, and trim carefully to size. Make your own!
Next: Grimfang Scrappaz support staff!
Blood Bowl Coach – Warboss Grimfang da Lotz


Warboss Grimfang da Lotz slouched in his scrap iron throne, in the bowels of Mount Grimfang’s deepest cavern. Bio-luminescent fungus barely gave off enough light to outline the silhouette of Nugget, Grimfang’s lucky snotling. None of the other ladz were around, so Grimfang didn’t feel the need to hold in his disappointment.
“Nugget, wot we gonna do today?” he sighed. Nugget, hearing his name, perked up.
“Dat’s right, we’s gonna fight Stunties. Jus’ like yeserday an’ da day before an’ da day before dat.” Grimfang sighed. “Ceptin’ da Stunties barely ever fight anymore. We ain’t seen a proppa battle fer a long time.”
Nugget pounced on an errant squig, ignoring Grimfang.
“Ever since dat Stunty tol’ us dat dere’s no more war cuz of dat new fing, wot wuz it again, Nugget?”
“Ang ang ang ang ang.” Nugget replied as he chewed the squig.
“Yer, Blood Bowl, dat’s wot it was. Somefing about runnin’ up an’ down a field, muckin’ about. Don’t sound like a proppa WAAAAGH, do it?”
Nugget toddled over and offered Grimfang the remains of the squig. Grimfang rubbed Nugget’s head because it was lucky, everyone knew that.
“On da uvver ‘and, it sounds like the only way to get a proppa scrap anymore.” Grimfangs voice rose, with renewed optimism. “Yer, plus since everybody’s playin’, ya get to fight lots of fings, not just Stunties. You’s right, Nugget! Dat sounds like da best idea!”
Nugget collapsed under the noogie barrage he was receiving.
“GURSHAK!” Grimfang bellowed. “GET YER WURFLESS ‘IDE IN ‘ERE!” Moments later, Gurshak Ripgrot, one of Grimfang’s biggest Nobs arrived.
“Yer… wot is it, boss?” Gurshak stammered, making sure not to make direct eye contact.
“Get all da ladz workin! Ain’t no time fer a nap! Get all da loot, an’ all da stuff wot da Stunties lef’ fer minin’ silver.”
Gurshak smiled. “We gettin’ ready fer a fight?”
“BETTER!” Grimfang yelled. “WE GETTIN’ READY FER A SCRAP!”
———————————————————————————
Warboss Grimfang da Lotz is the latest Warboss in a long line of Orcs to hold the title. The original Warboss Grimfang conquered the Mount Silverspire silver mine from Dwarfs, long ago. The Orcs renamed the mountain after Warboss Grimfang. However, constant fighting with Dwarfs (and among themselves) led to a high turnover rate on Warbosses. Each new Warboss renames themselves Grimfang, so that they are seen as the rightful ruler of Mount Grimfang. Orks can only count to five, so each Warboss after the fifth is Grimfang da Lotz.
However, with the introduction of Blood Bowl, there’s just no fighting anymore. At least, not enough to satisfy the current Grimfang da Lotz. So, he has led his ladz out of the mountains, and onto the Blood Bowl pitch. Calling themselves the Grimfang Scrappaz, they are ready to smash any team in their way!
————————————————————————————-
Warboss Grimfang da Lotz is a Games Day exclusive Warboss, in pewter. I added a putty baseball cap, just like my other coach, Lord Kroak. Grimfang’s colors are blue and silver, like the Scrappaz. All jewelry is painted Mithril Silver to represent the wealth of the Grimfang silver mine.
Next: Cheerleaders and Assistant Coaches!
Sculpting Tuorial: Goblin Cheerleader Pom-Pom
Sat down to do some work on some models that have been neglected for a while, and I thought I’d do a short modelling tutorial on how to create Cheerleader Pom-Poms. To a lesser extent, this same technique works on straight hair.
You need:
- A model with a closed fist for the pom-pom (or a bald headed mini if you’re doing hair)
- 2 part epoxy putty (green stuff, kneadatite, brown stuff, etc.)
- Sculpting needle tool
Step 1
Mix enough putty to cover the hand/head generously. Use your fingers to smooth it down to cover the fist. (don’t worry about fingerprints, you will remove them in a bit)

Step 2
Wet the surface of your putty (lick it if you’re lazy) and use your needle tool to make a small circular dent at the top center.

Step 3
Place the tip of the needle tool in the hole at the top and carefully drag it down the side all the way to create a trench. Push the needle into the bottom of the trench to make it so that the trench has no rounded end. (Refrain from making penis jokes if you can. I couldn’t.)

Step 4
Repeat step 3 about 30 to 45 degrees away from your first trench.

Step 5
Starting from just below where the two trenches meet, make another small trench that does not go all the way to the bottom. Make more trenches that are staggered in between these all the way to the bottom to fill the area with small trenches.

Step 6
Repeat steps 4-5 to fill the entire area.


Now you can sculpt Pom-Poms, and to a lesser extent hair! Be sure to keep your putty workable area wet to prevent your sculpting tool from sticking. Happy Sculpting!

Custom Tournament Display Board
Here’s the super secret project I’ve been working on:

As an optional part of the upcoming tournament, you can enter the painting competition. One of the things that gives you extra points in the competition is a custom display board for your army.
Here’s a shot of the display board in use, before it was painted:

The Assault Marines in the front will be replaced with the new ones that I am working on now. I’ll give you a pic when the Assault Marines are finished. As a bonus, the surface is removable, so I can make another surface and re-use the board for a different list!
Here’s what I used to make it:
- 22×17″ wall-mountable corkboard
- 28″ rolled cork
- Steel carpet tacks (black)
- Games Workshop black primer
- 2 1/3 pots Goblin Green (now Warboss Green) Citadel paint
- Citadel PVA glue (for water-resistance, you can use Elmer’s glue if you don’t care)
- Games Workshop flock
- Testors Dullcote Varnish
- Painter’s tape
- X-acto knife
- Water based ink pen (that can wash off of a sealed miniature easily, I used a V5 ballpoint in red)
Here’s how I did it:
- Measure the interior board part of the corkboard and cut a piece of the rolled cork to fit.
- Spray the rolled cork with water on both sides and weigh it down with heavy books protected by plastic bags. After a day, flip the cork over and do this again until the cork is flat.
- Place all of the minis that you want to display on the cork, arranged the way you want them, and trace them with a water based ink pen (that can wash off if you accidentally get it on your minis).
- Use an X-acto knife to CAREFULLY cut out the spaces where your minis will go. Take breaks often, and do it on a table. I did it on the floor and it tired out my arm from the weird angle that I was working at.
- Coat the edge of the corkboard with painter’s tape. Note: mine was a cheap corkboard and some of the finish came off. If you want to do this, I suggest a corkboard with a METAL frame.
- Use some scraps from the cork to hold some carpet tacks (I used 8, you can use however many you want)
- Spray the corkboard and cork piece and tacks with primer.
- Spray the corkboard with Dullcote varnish when it is dry.
- Paint the corkboard and tacks. (I used Goblin/Warboss green, you should use whatever matches your base.)
- Mix 50/50 PVA glue and water, apply it to the board and tacks and apply the flock. (use whatever basing method matches your army, obviously) Drybrush the flock if you need to, after it dries for several hours.
- Varnish the cork and tacks.
- Put the cork on the board and secure it with tacks. Your display board is now complete!
Next: Assault Marines and a TOURNAMENT! Stay tuned!
A Modest Cephalopod Proposal – Reaper Bones Unleash the Kraken!
For more than two years, I have been incredibly lucky. The most wonderful woman I have ever met has somehow come to love me as much as I love her. We both agreed that we’re going to get married at SOME point, but we’ve been distracted by the usual suspects. Poverty, illness, painting models, Lou Gossett, Jr., etc.
A bit more than a year ago, Reaper Miniatures began their second Bones Kickstarter, and like a sucker, I threw a small fortune at them. You know how it is. One of the add-ons offered was called “Unleash the Kraken!”
It was perfect. The love of my life has a POWERFUL ken for cephalopods. I ordered it and waited… a lot. Thanks China. But it arrived and I have been dutifully painting it.
Behold.
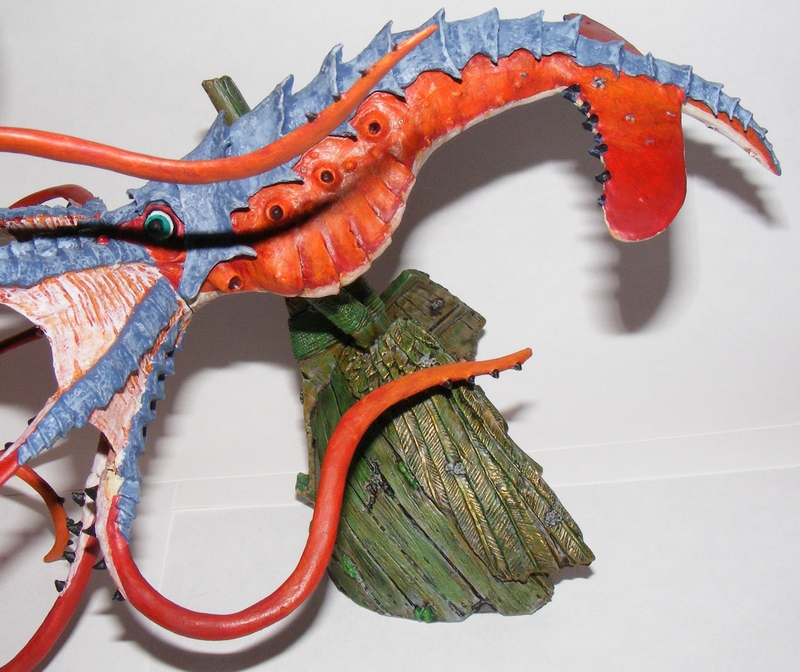
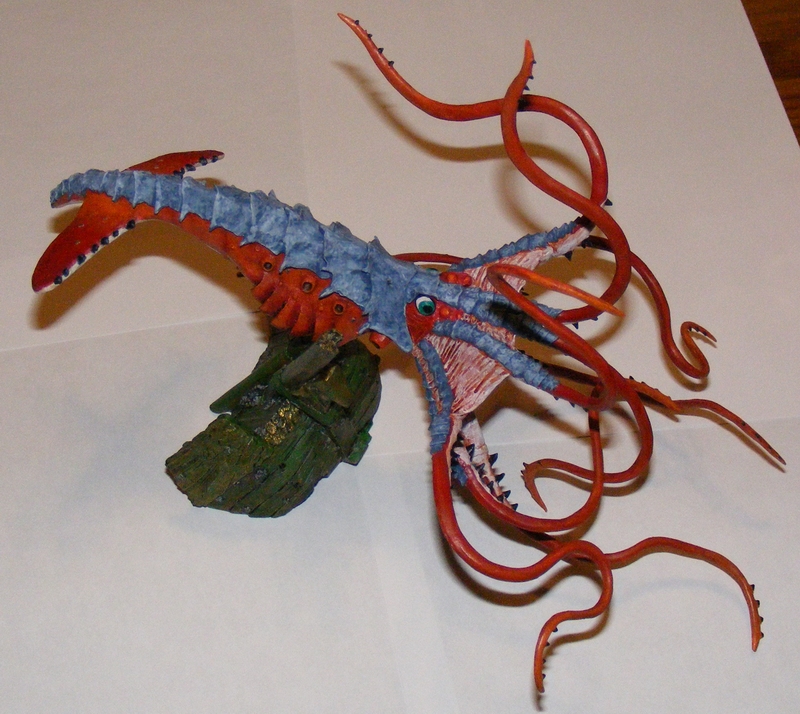
This masterpiece serves two purposes: a belated xmas present, and an official declaration to the world of my intent to marry her. She loved it.
Love is wonderful, but it’s not what this blog is about. Being the first Reaper Bones mini I’ve actually BOTHERED to paint, I’d be remiss without a thorough review of this product, and a complete breakdown of all the steps that led to this final, precious artifact.
———————————————————————————————-
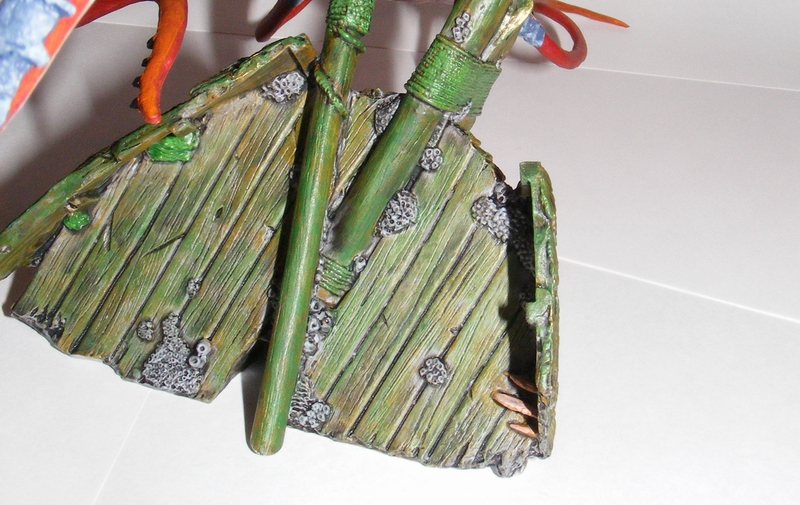
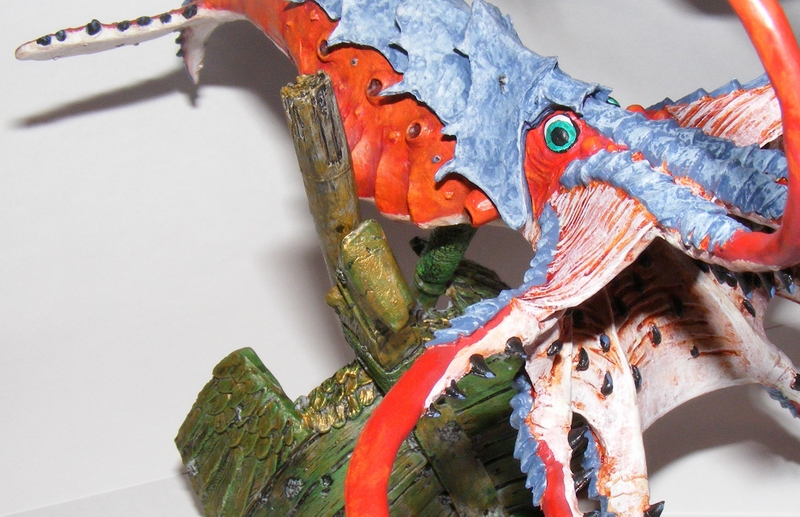
The Reaper Bones Miniature:
Beautifully sculpted, I followed the instructions on the Reaper Bones Preparation Guide. I washed the squid gently in soapy water, and dried each piece. The Beak, mouth/head, tentacles, body, ship, and mast holding up the squid are all seperate parts. Each part was carefully cleaned with a diamond file. The bottom of the body had some Reaper branding words that took a lot of elbow grease to scrape off.
———————————————————————————————-
Modeling:
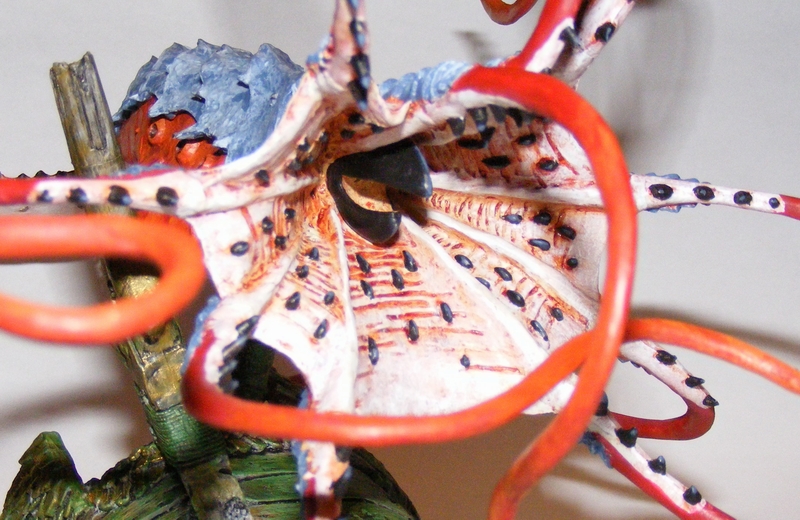
I did a pre-assembly of some parts. The support mast was glued to the ship using super glue. Gaps between the ship and mast needed a bit of green stuff, which I modeled into barnacles to cover it up. I painstakingly arranged the tentacles about the mouth/head, and used more green stuff to join them more perfectly. It was joined later, after some parts were painted.
———————————————————————————————-
Painting:
As per the Reaper instructions, I (for the first time) used no primer. At first. The green stuff demanded primer, so I used a Reaper black paint on primer. As for the rest, the paint did stick… mostly. I found that 95% of the surface area of the model held paint with one coat. Some very small areas refused a second but paid heed to a third. Paint took an INCREDIBLE amount of friction to remove with rubbing, just as good as if it had been primered.
The ship was my first test to see how the paint stood up. I started by coating the entire ship with black. I then heavily drybrushed it (almost a wet brush) with Fortress Gray. I inked then entire ship with Army Painter black ink wash, and then hit the whole ship with another lighter drybrush of Fortress Gray. I then built up color with a drybrush of Snakebite Leather. The next layer was Snot Green, but only in places that face “up” where sunlight could reach algae. Ropes were given a much thicker coat, as algae would gain a stronger foothold in a softer surface. The eagle bowsprit was given a very light drybrush of Vallejo brand gold, to simulate fading gilt. Barnacles were picked out with Fortress gray, and washed to darken the insides. The shelf corals were hit with a custom blend of paints to make them a salmon/coral pink.
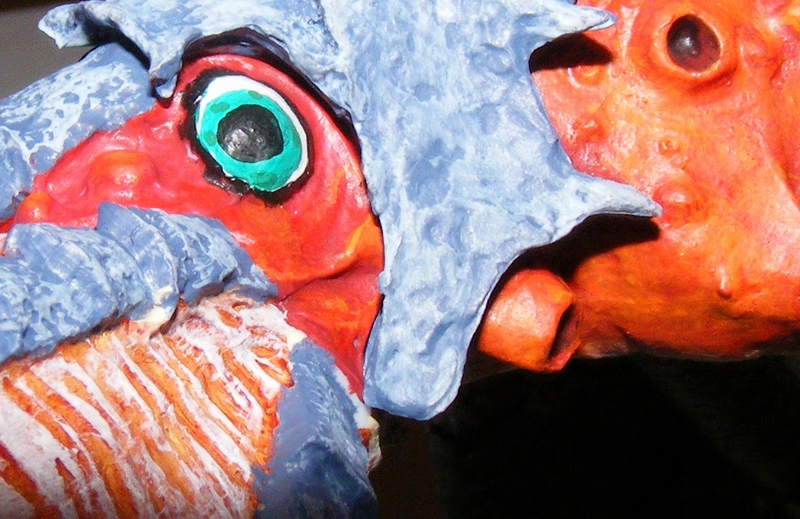
Next, I tackled the body. Colossal Squids tend to be orange, so I built up from Mechrite Red, to Blood Red, Firey Orange, and Blazing Orange. The belly was Bleached Bone washed with 50% Citadel Chestnut Ink and 50% water with one drop of dish soap (saved from at least a decade ago!). It was then drybrushed Bleached Bone and then lighter with White. Armor plates were Shadow Gray drybrushed Space Wolves Gray.
The head came next. The interior of the mouth was similar to the body. Teeth were black with a slight highlight of Shadow Gray. Face was similar to the upper body. The eyes were a challenge. I started black, and when I added white I left a circle of black around the edges for contrast. Vallejo brand teal for the eyes, and a mix of various paints to create a different teal for some eye freckles. I then did a circle of black for the pupil.
Tentacles were built up similar to the upper body, and spines are black with Shadow Gray.
The interior of the beak was bleached bone, with a small painted on orifice inside. Exterior is black with Shadow Gray highlights.
Finally, the Squid was assembled, touched up, and sealed with Testors matte varnish.
———————————————————————————————-
The final verdict: Thanks to Reaper’s master sculptors and the skills I have honed over 14 years, this is my finest work. There can be no better proposal, at least not with my skills.
…and by the way, she said yes!
On my plate 9/26/14: Distracted Edition

Things are not going great, but it’s high time for me to stop letting life get in the way and do some hardcore hobby action! All three of my readers demand it! Well, truth be told, they’ve been a bit silent, but I can feel it in their hearts. My hobby bones are rumbling.
Bones rumble, don’t they?
Battlefleet Gothic Tau – As my Tau player dropped out during our campaign I sort of lost interest in painting this fleet. However it’s about 1/3 done and I want to finish it so it should be my primary goal. Other projects should jump in. Status: 3 more capital ships, a large selection of escorts, and some defences left to do. I also have to pick a scheme for the Nicassar. Perhaps earth tones? Or go super extravagant with gold?
Azure Flames – I need to finish my Grav Sternguard. Next, a 5 man non-jump-pack assault squad with 2 flamers. Finally, I need to make some new sergeants with power swords. I have been getting MURDERED in challenges with Power Fists. I also need Centurions, a Hunter/Stalker, and a Stormraven.
Orks – MORE LADZ! I also need to buy some Fighta-bommaz and perhaps some new Big Gunz.
Battlefleet Gothic Eldar – I purchased a pre-painted Eldar fleet, but it had no light cruisers. I won one of each light cruiser in an auction and I need to strip them and try to match the paint scheme of my new fleet.
Battlefleet Gothic Necrons – I need a paint scheme and I need to get painting. They are the last thing for Gothic. Until I buy a new fleet NO BAD BOZEMAN!
Blood Bowl Orcs – I need to make four Cheerleader goblins, and then paint them as well as my four Assistant Coach goblins and the team coach, Warboss Grimfang da Lotz.
Epic Orks – Gotta finish that 3000pt teaching list.
Epic Eldar – Gotta make a 3000 pt teaching list and build it and paint it as the Yme-Loc craftworld (gray and orange with white details)
Epic Lost and the Damned – 3000pt teaching list and paint it.
Necromunda – Paint my Escher gang, Razor and the Scumettes.
Epic Space Marines – Finish painting a whole chapter so I can say “I have painted a whole chapter of Space Marines.”
Space Hulk – Wait for an ebay auction for the new mission book and rulebook, and the new tiles. Also “acquire” the expansions. *looks innocent*
Nicassar Dhows, Caravan, and Rig
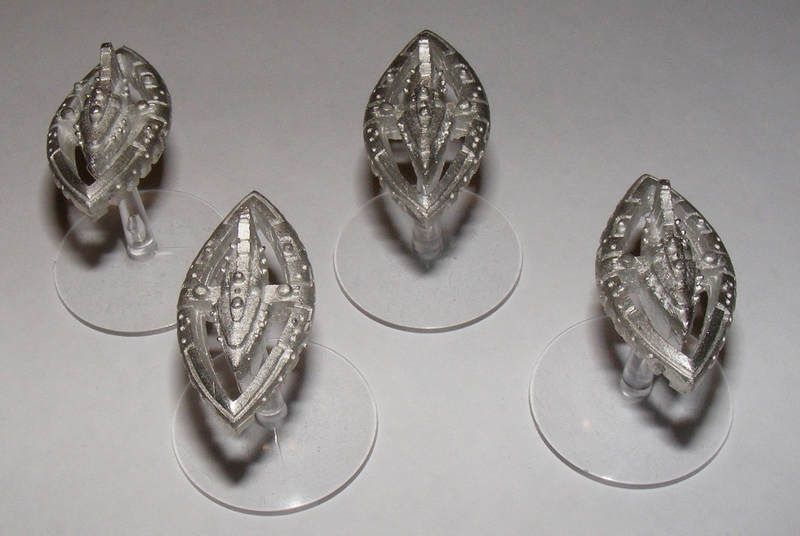
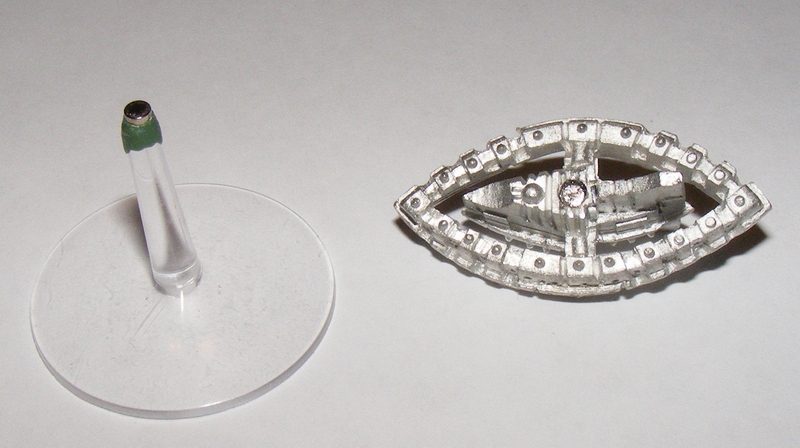
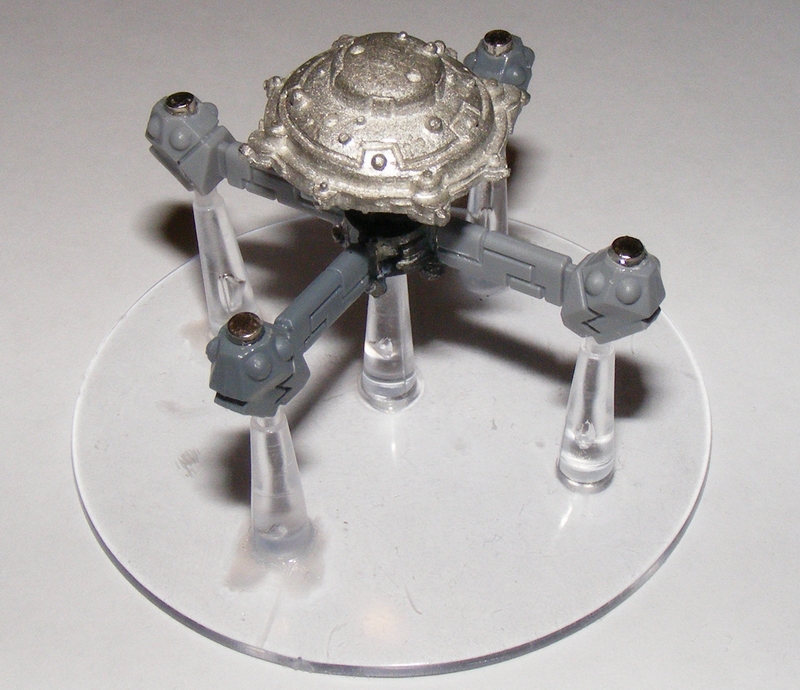
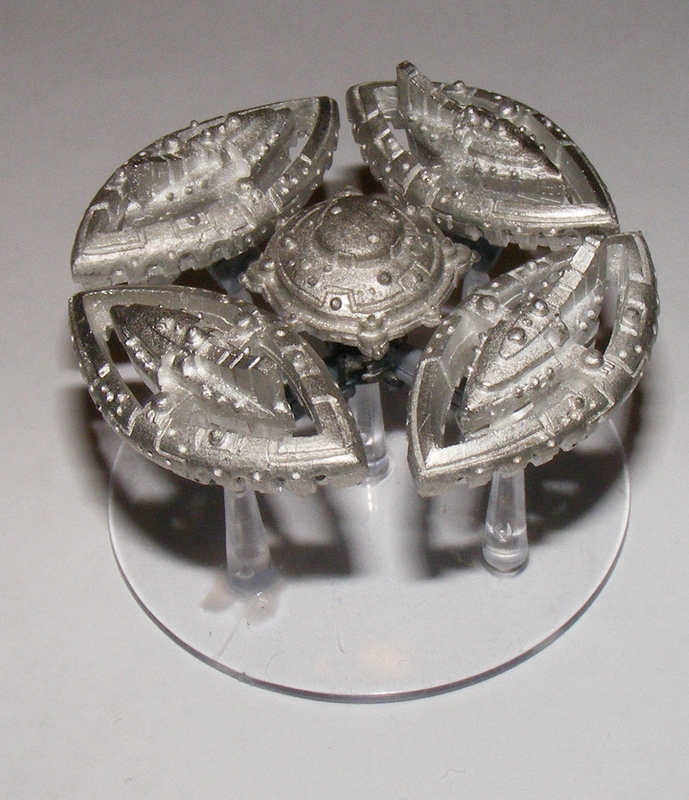
In my Battlefleet Gothic campaign, I got a new player hooked by letting him use my Tau Kor’or’vesh fleet. You don’t see it in the Image Gallery for Gothic because it’s not painted yet. The collection is small; a battleship, six crusiers, and assorted escorts. It’s just under 2000 points, which is the size you’d need for a roster in a campaign. I also had four Nicassar Dhows and a Tau Orbital unbuilt.
Thank goodness for the 2012 update. It included the option for the Nicassar Caravan, which is an orbital rig with four Dhows to tow it around. Even better: during a campaign you can choose for the Caravan to either be the Caravan OR four Dhows and an immobile unarmed defense. With these options, the Tau fleet comes in at 1990 points, perfect to start a campaign!
…it just took me until now to complete them. The Dhows are magnetized to remove them from their flying bases if necessary. The core bits of the Tau orbital were used, and I bits ordered four of the Tau battlesuit sensors. I modified them into the docking pylons for the Rig. With the four Dhows, the Rig becomes the Caravan.
Next: look for more Gothic and hopefully my first forays into 7th ed 40K!
Pour out a 40 for pewter: The Great Smelting
 If you hadn’t heard, here’s the latest scoop. Games Workshop is shipping all of their pewter miniatures off to be smelted. The price of pewter is pretty high, and they need revenue. You know what else would have gotten revenue? LETTING US TAKE A CRACK AT IT! Seriously! I’d have paid double the price you’d have gotten for scrap PLUS SHIPPING!
So many soldiers, lost before their time. The Emperor is weeping.
Well, not for the daemons, but look no one’s having a good day in the 40K universe today.
Edit: There are still metal minis on the site, so it looks like they didn’t melt them all. Still, pewter was a great medium for models. I have 50 pewter Terminators and various other pewter marines, orks, guardsmen, and in a non-gw related note, all-pewter Cygnar. I’ll miss pewter.