Battle Report 1500 Marines vs. Guard @ AFK!
Another awesome Battle Report thanks to the great folks down at AFK Games in Holt! This game pitted my Azure Flames against Nathan’s Imperial Guard @1500 points. Here’s the lists:
Bozeman – Azure Flames (Salamanders) Space Marines
-Leonidas, captain of the 1st company (counts as Vulkan He’Stan)
-Tactical Squad x10, Veteran Sergeant with a Combi Flamer and a Power Fist, Flamer, Multi-Melta in a Drop Pod
-Tactical Squad x10, Veteran Sergeant with a Combi Flamer and a Power Fist, Flamer, Multi-Melta in a Rhino with extra armour
-Scouts x5 with bolters in a Land Speeder Storm with a Multi-Melta
-Ironclad Dreadnought with the meltagun replaced with a heavy flamer, in a Drop Pod
-Stormtalon gunship with Skyhammer missiles
-Land Speeders x3, with Multi Meltas and Heavy Flamers
-Bike Squad x8 plus Attack Bike, Veteran Sergeant with a Power Fist, 2x Meltaguns, Multi-Melta on Attack Bike
-Whirlwind
————————————————–
Nathan – Imperial Guard (list below may be incomplete)
-Lord Commisar with Power Sword
-Command Squad, Power Fist on commander, Plasma gun, Vox Caster, Medic in a Chimera
-Imperial Guard Platoon Command with 2x Grenade launchers and a Power Maul
—–Squad 1 with vox and a Missile Launcher, with a regular Commisar attached who has a Power Sword.
—–Squad 2 with vox and a Plasma Gun
—–Squad 3 with vox
-Armoured Fist squad in a Chimera with a Plasma Gun
-Heavy Weapons squad with 3 Lascannons
-Heavy Weapons Squad with a Lascannon, Autocannon, and Missile Launcher
-Valkyrie Gunship with Lascannon, two Heavy Bolters, and missiles
-Stormtroopers x10 with 3 Plasma Guns
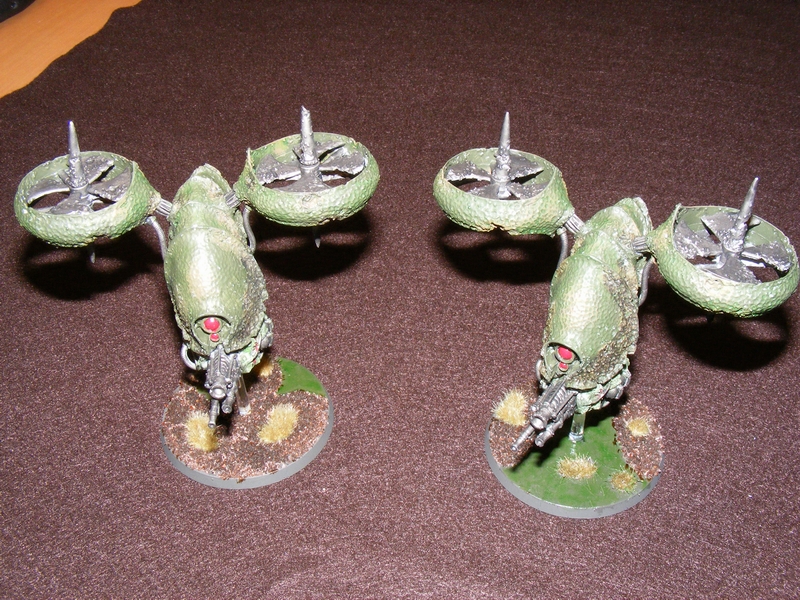
-Sentinels x3 with armoured cabs, 3x Hunter-killer missiles, 1x Plasma Cannon, 1x Autocannon, 1x Lascannon
-Bane Wolf with Multi Melta
-Leman Russ Punisher with 3 Heavy Bolters
————————————————————
Setup: Dawn of War (long table edges)
Mission: Big Guns Never Tire (D3+2 Objectives, we had 4. Heavy Support can hold objectives, Heavy Support kills worth VPs)
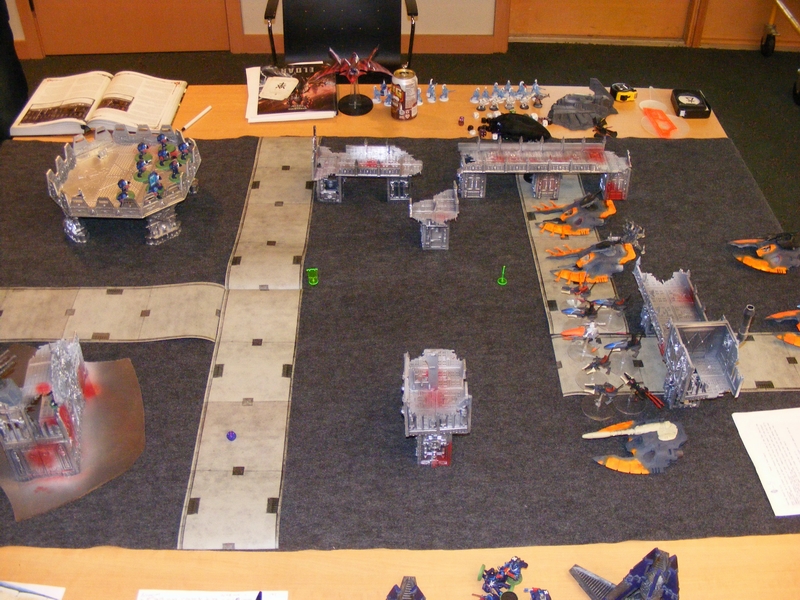
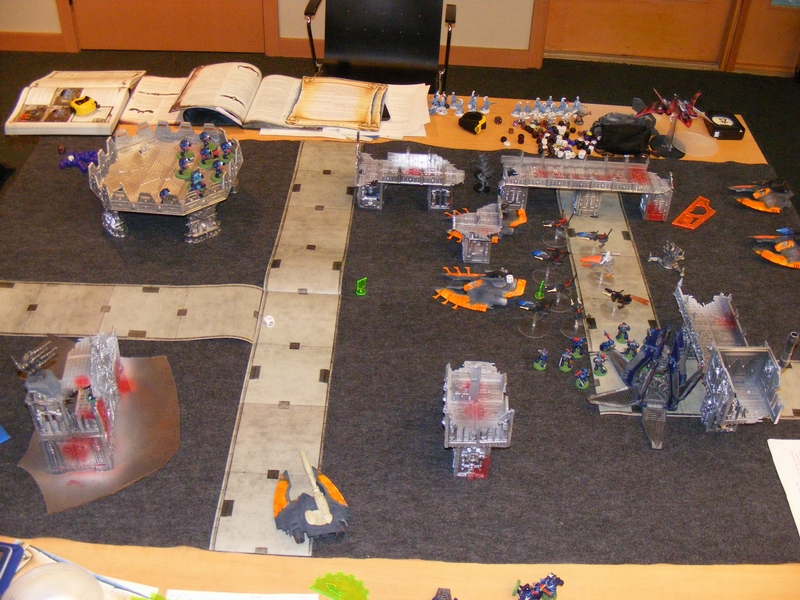
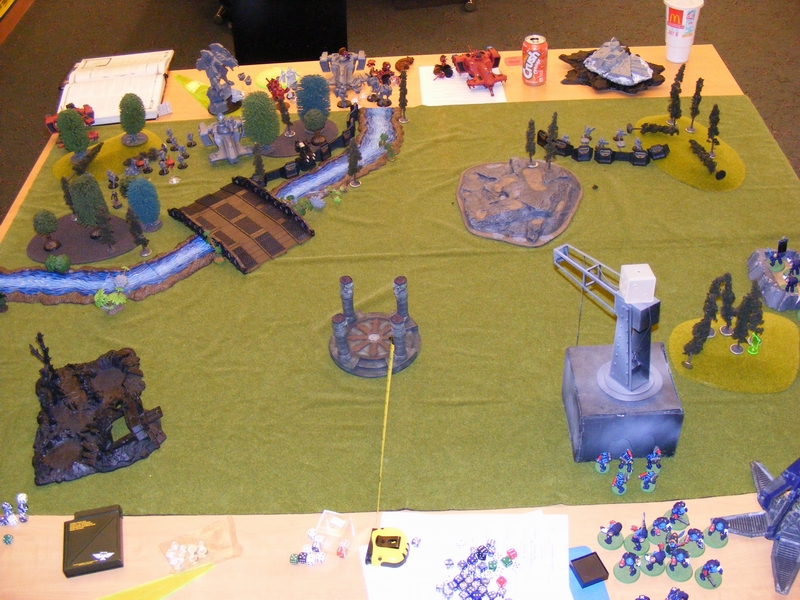
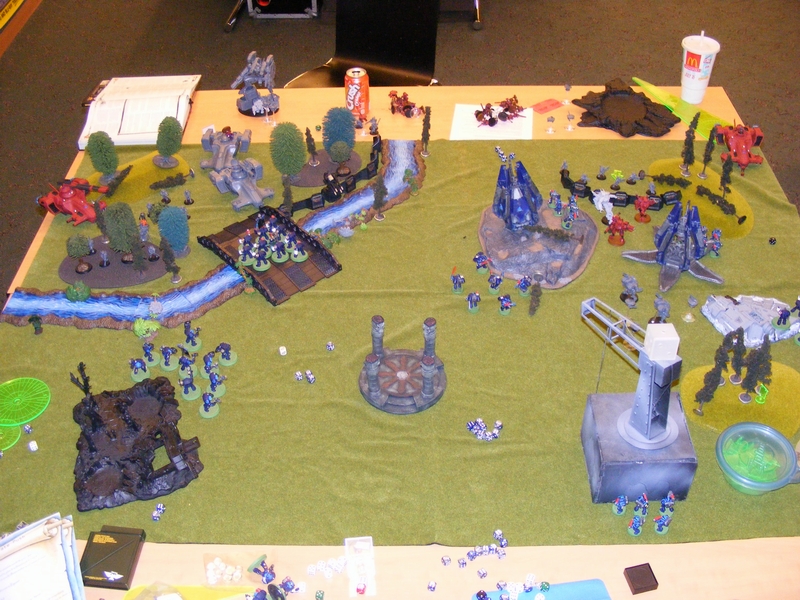
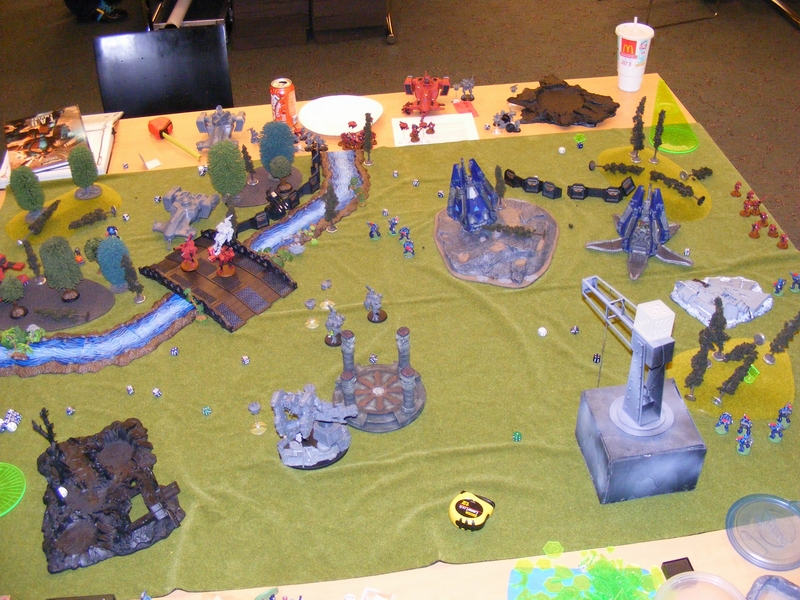
The Board Setup: We found a board already set up for us! It looked like a dense city and both of us liked it. Here it is:
 Lots of ruins, razorwire, walls, etc. Nathan selected the edge closest to the camera in the picture above. We had 4 objectives, here’s where they were. 3 are white bases, i is a lamp post.


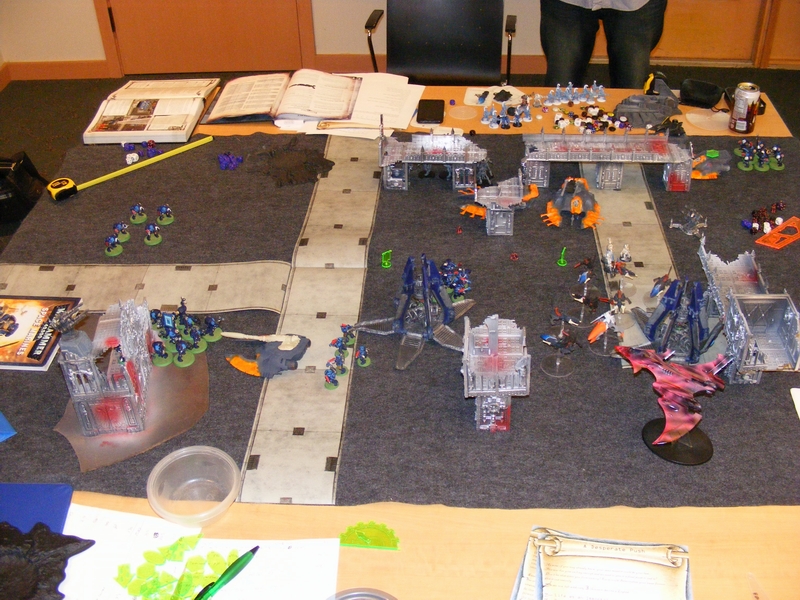
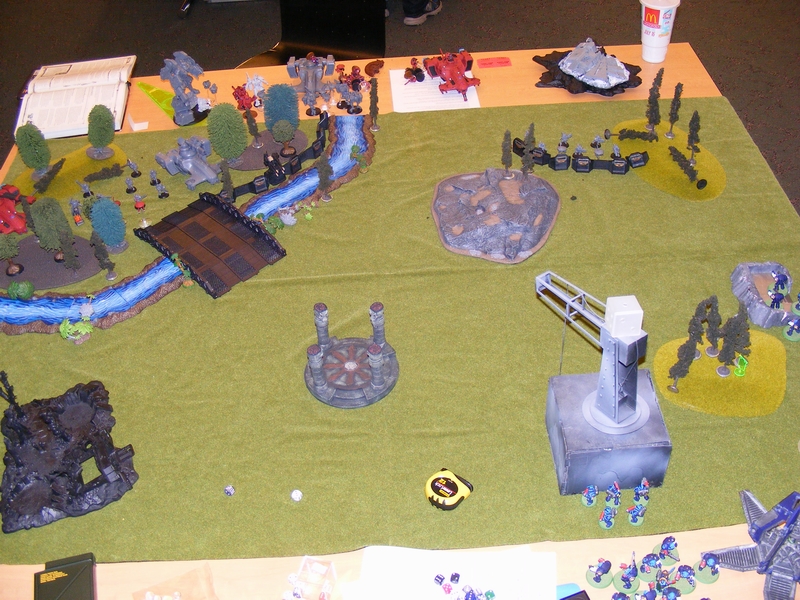
Here’s Nathan’s Setup. The Veterans aboard the Valkyrie and the Sentinels are in reserve.


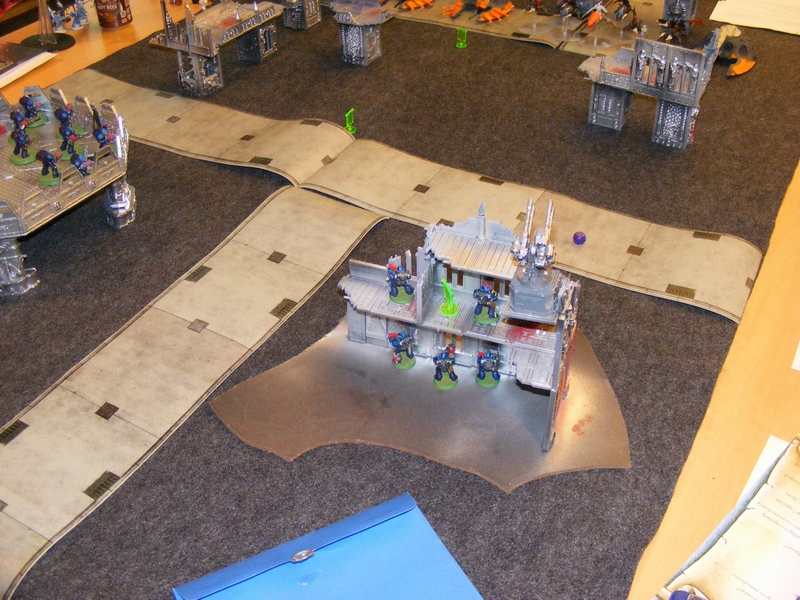
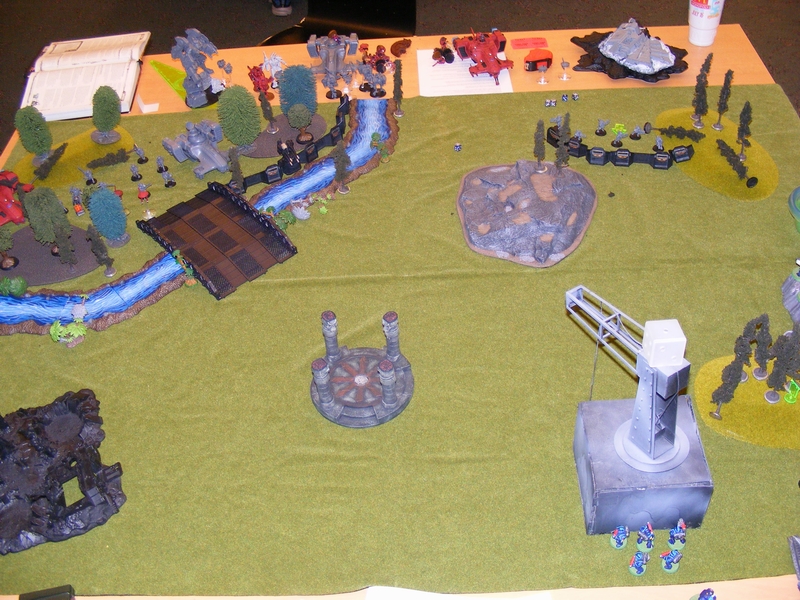
Here’s my setup. The Scouts in the Storm, the Stormtalon, and the two Drop Pods are in reserve.


Initative not siezed. No Night Fight.
Turn 1 – Imperial Guard.
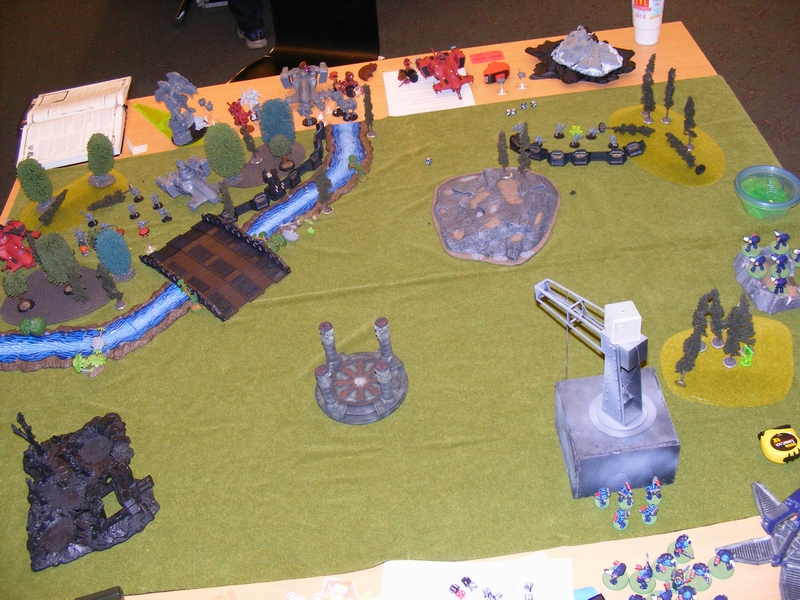
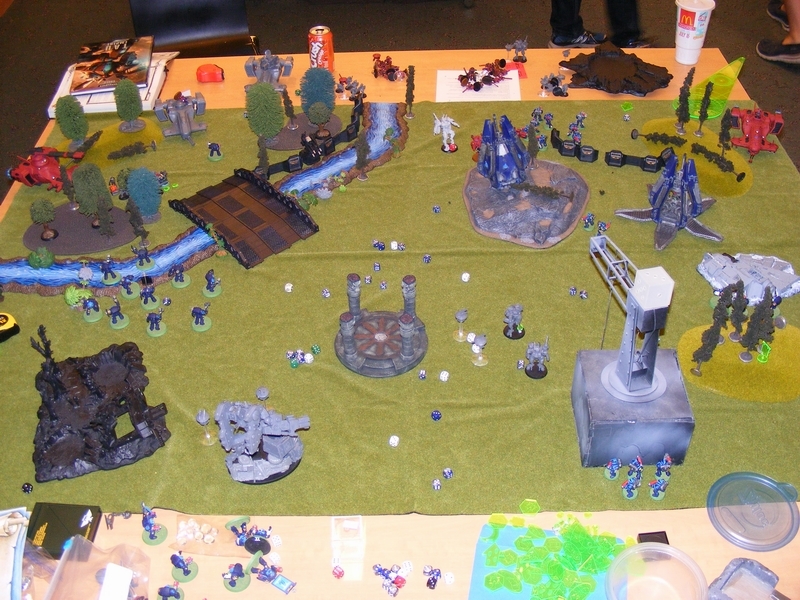
Nathan’s squad of just Guardsmen use the Go! Go! Go! order to clear the defensive wall hurdle. Bane Wolf goes All Out. Squad with missile launcher fires at the one visible Land Speeder on Bring It Down orders, but the penetrating result is jink saved. Other guardsmen not in buildings advance. Lord Commisar with HQ goes up Nathan’s left side towards the speeders, while the Armoured Fist Squad goes up the right side.

GO! GO! GO!

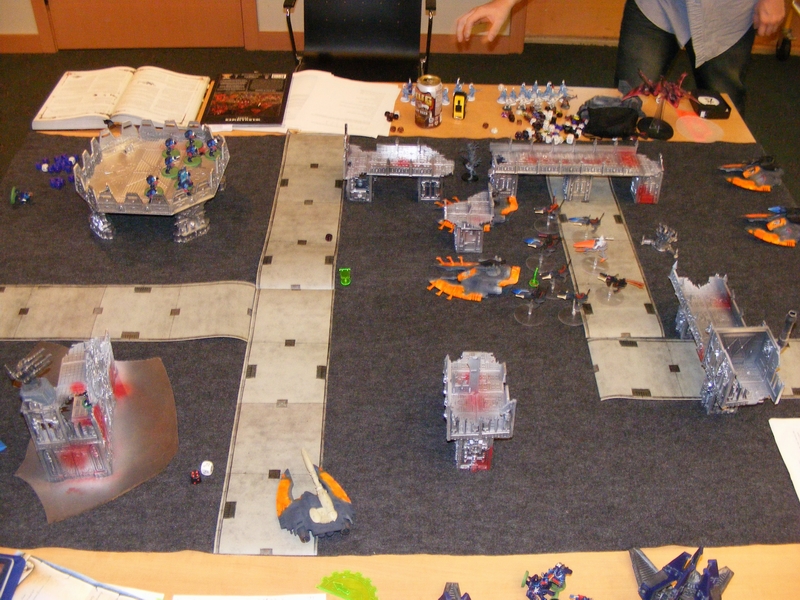
The Guard move towards the Objectives.
Turn 1 – Azure Flames
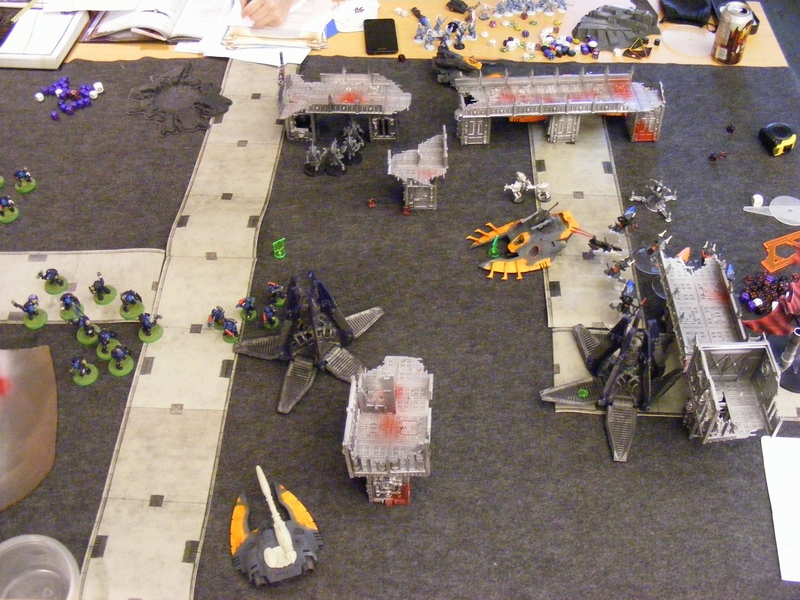
Ironclad Drop Pod lands next to the tall building with the missile launcher squad and kills all but the commisar and missile with heavy flamer fire. Multi-Meltas from the Land Speeders blow up the Lord Commisar’s Chimera, and subsequent Bolter fire from the bike combat squad whittles down the survivors. Other bike combat squad blows up the Armoured Fist Chimera with a Multi-Melta. Tactical combat squad runs to secure the objective near the bronze statue. Leonidas and the other combat squad run through the building to get closer to the objective in the warehouse. Whirlwind Castellan missile scatters off with no effect.
 Armoured fist Chimera is toast!
 So is the Lord Commisar’s Chimera!
 Hello! Do you want to know about… FIRE?
Imperial Guard – Turn 2
Lascannon squad picks off a Meltagun from the bikes. Sentinel Squadron does not come in from reserve, but the Valkyrie with the veterans aboard does. It zooms right at the Land Speeders and has a terrible turn of rolls, doing nothing. Heavy weapons squad in the building blows up the Drop Pod, and it kills a guardsman in the blast. The Leman Russ Punisher shoots Leonidas’ combat squad, and Leonidas takes two wounds before the punishing hail of fire ceases. Devil Dog turns on the Ironclad but misses with the Multi-Melta, and a Guard squad charges the Ironclad, loses, and is run down.
 One bike sniped!
 Leonidas takes one (or two) for the team.
 Where did my friends go?
Turn 2 – Azure Flames.
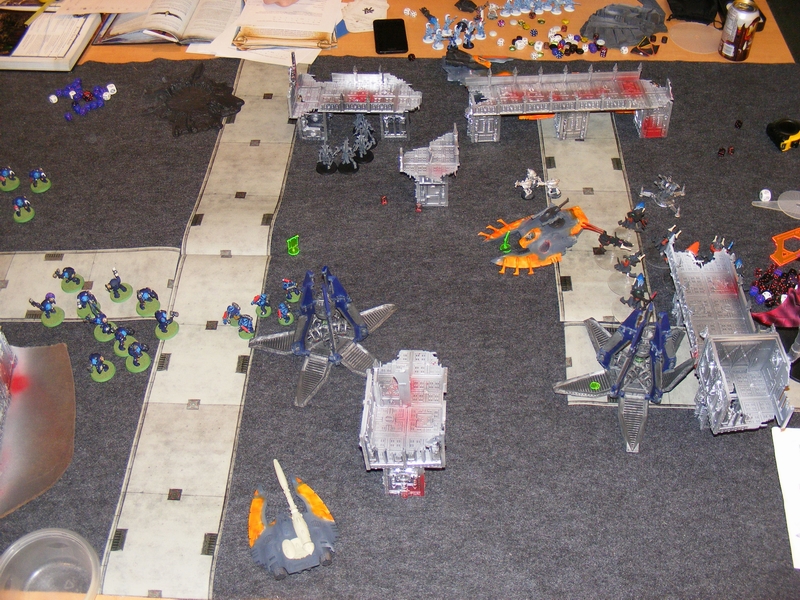
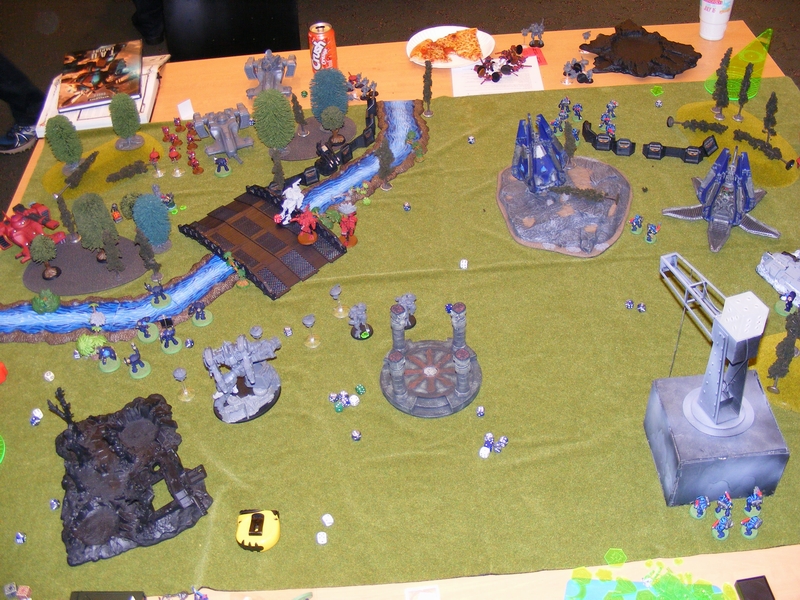
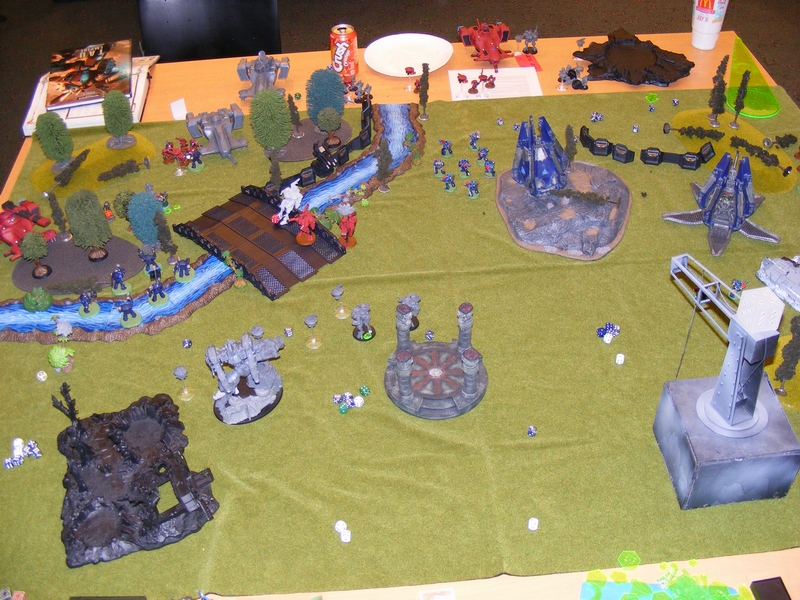
Stormtalon, Scouts, and Tactical squad all arrive from reserve. The Tatical squad drops on Nathan’s right flank, splitting into two combat squads and flamering many guardsmen to death. The Bikes move up and finish the Armoured Fist squad. Leonidas and his squad continue to head toward the warehouse objective. The bikes shoot the HQ squad down to the commander, and then run him over using Hammer of Wrath attacks in assault. The Land Speeders kill two heavy weapons teams, and the third flees off the board. The Stormtalon shoots down the Valkyrie and it scatters off the table, killing the Veteran squad in the process. The Ironclad assaults and kills the Devil Dog. Land Speeder Storm comes in from Nathan’s left flank and hides behind a building.
 Shock and awe! The Drop Pod gets results!

One guardsman and one Commisar remain guarding the top of the building.
Turn 3 – Imperial Guard
The Sentinels arrive, and blast the Ironclad to no effect. The Leman Russ Punisher finishes off Leonidas and his squad. Two remnants of squads charge one of the Tactical combat squads from the drop pod. One is eliminated by snap shot fire. The other has only a sergeant with a Power Maul who challenges the Space Marine Sergeant with a Power Fist. The Guardsman gets an impressive 4 hits! However, in an equally unlikely roll, rolls no wounds. The Space Marine fists him to death.
 A hail mary assault goes poorly for the Guard…
 The Leman Russ Punisher lives up to its name!
After this, Nathan ceded.
——————————————————-
Final Thoughts:
-Whoopee! Aircraft are fun! I’m glad I have something to counter Chaos dragons and Vendetta spam in the future.
-Remember kids, a squad needs to do one job. Mono-task your heavy weapons and put them where they do the most good.
-I should have had Leonidas and the squad board the Rhino and go right up the middle, smoke launchers blazing. Perhaps they could have gotten into charge range and killed the Punisher.
-Nathan lost this on bad rolls. The Sentinels would have been welcome on turn 2. Sadly, they did not come in even after a Warlord trait let him re-roll. There were some other crucial rolls that were just bad luck, such as not killing any Land Speeders, not killing the Space Marine Sergeant in the challenge, and several Look Out Sir rolls that killed the Lord Commisar instead of a punkie guardsman behind him.
Finally, here’s Stephen (right, black shirt) with his Dark Angels loaning 1/2 to Cole (left, blue shirt) for Cole’s first game! Welcome to the hobby Cole!

Next: Grav Gun Veterans and possibly some Gothic or Epic
Final Stormtalon pics and amazing magnetic power!
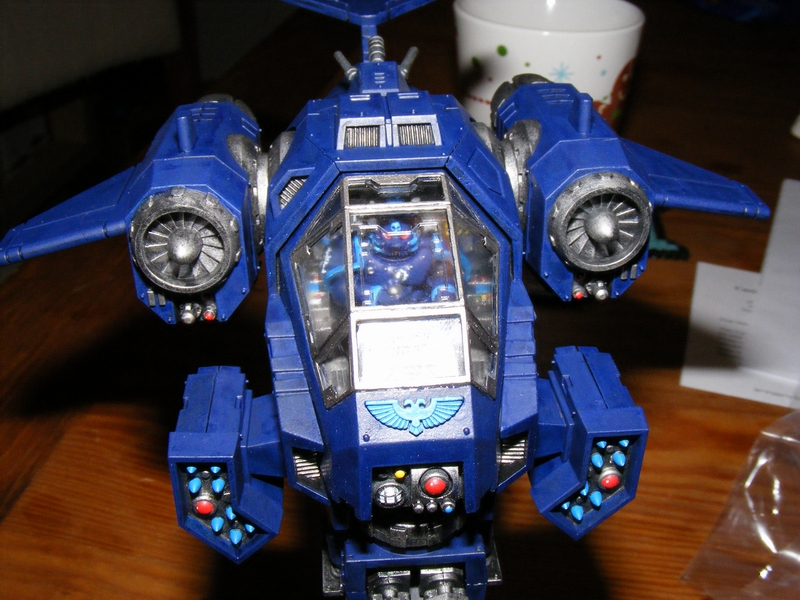
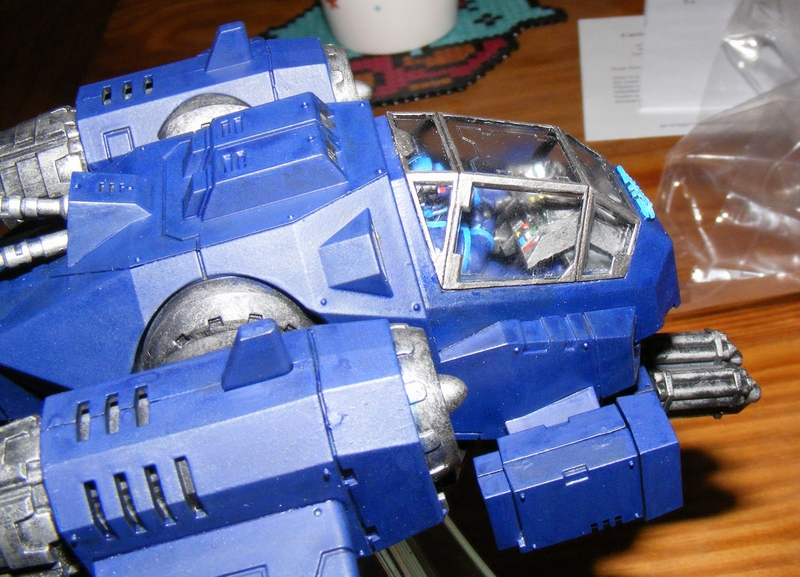
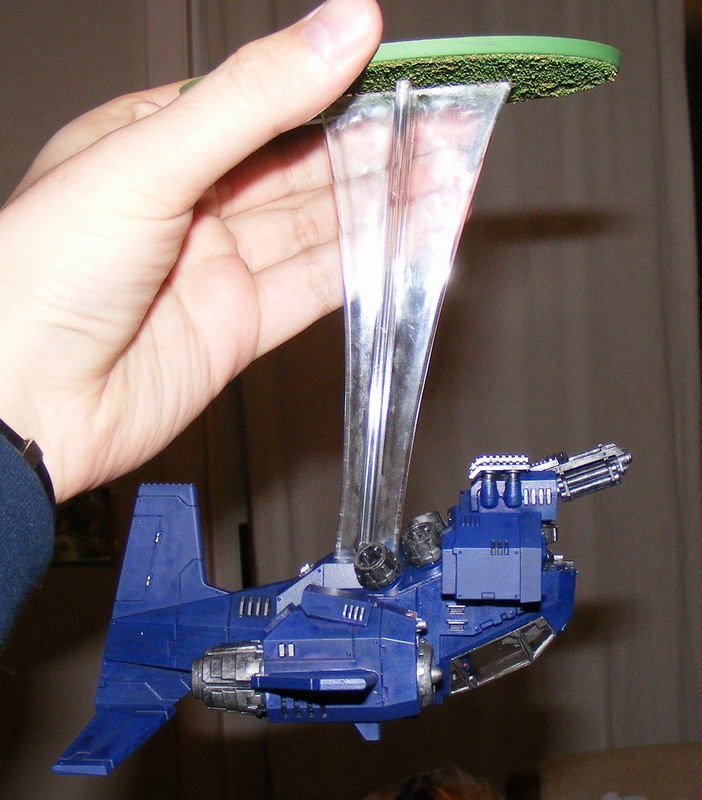
Here are the final pictures of the Stormtalon! As you can see above, the magnetized stand holds on when lifted, and is even strong enough to hold the aircraft upside down from the stand! These pics would have been earlier, but when testing the magnetic stand I did not have it aligned properly, and it fell right on the canopy, giving it a very unsightly crack. I ordered a replacement and it arrived today. Odd prices on ebay. The canopy bit was $5 but the whole cockpit was $5.39, so I got the whole thing.
Next, possibly a trip to White Lake! Coning soon, Grav Gun Sternguard!
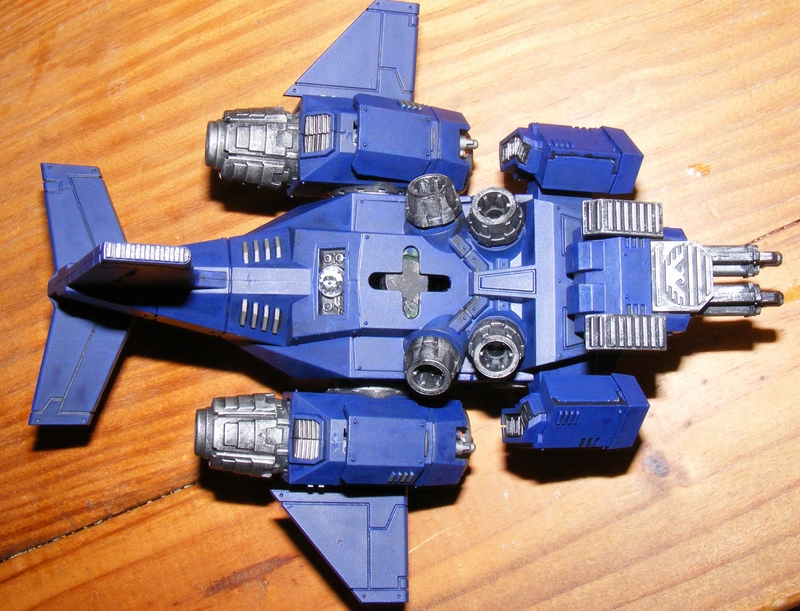
Finished Stormtalon Weapons
Good news: The Stormtalon is done! Bad news: I dropped it and cracked the canopy. In 5 days I’ll get another one and replace it. However, the weapons are all done, so here’s pics!
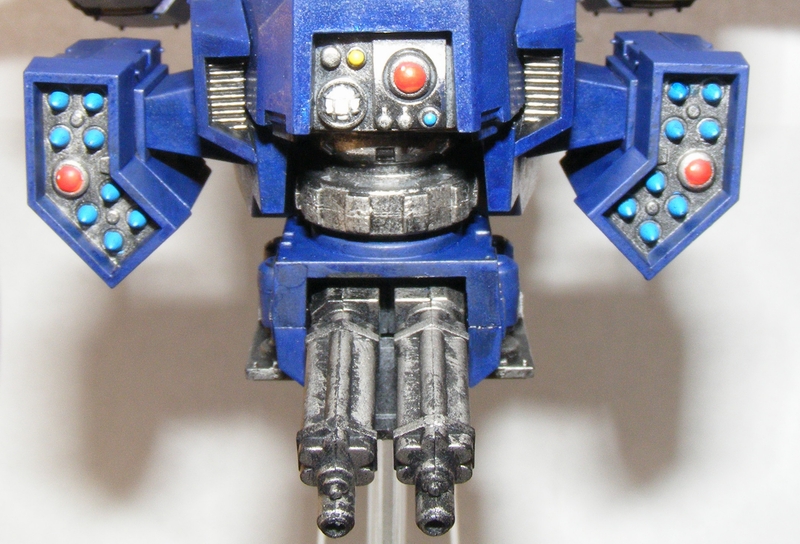
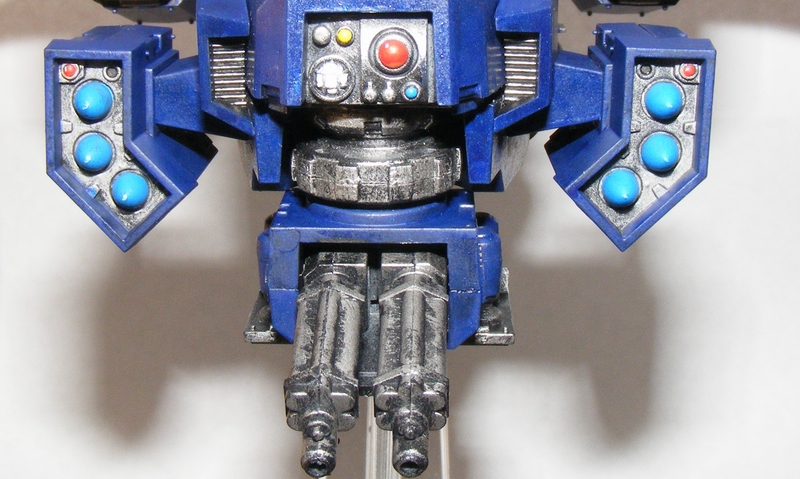
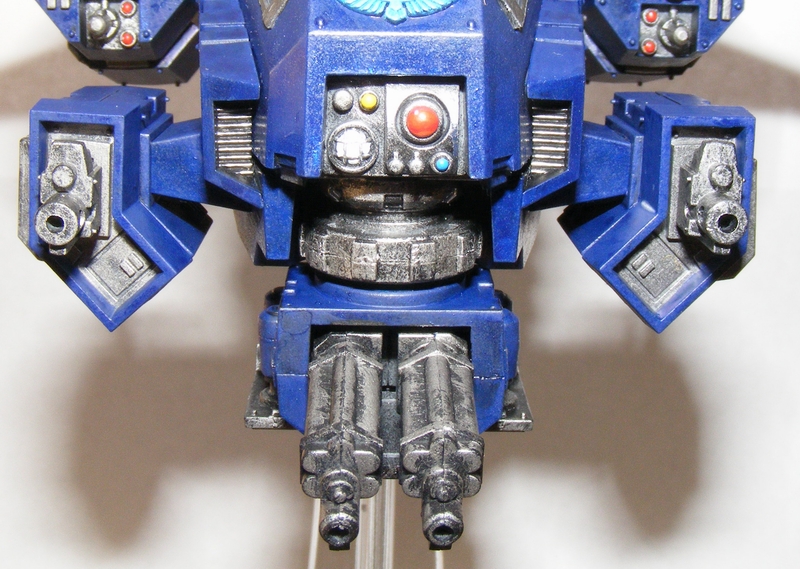
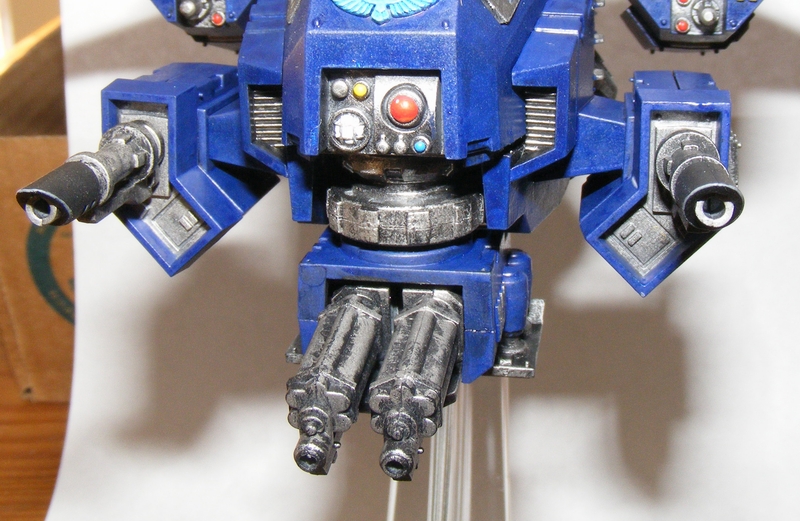
Even the useless Heavy Bolter gets some love. Next: Sternguard Veterans with Combi Gravs and a new canopy for the Stormtalon!
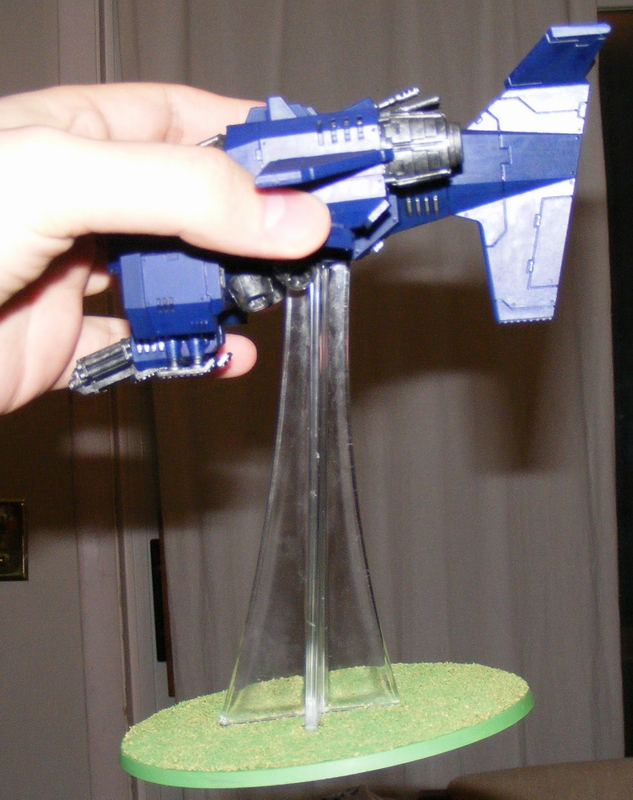
Fully Magnetized Stormtalon
I AM OZYMANDIAS, KING OF KINGS! LOOK UPON MY WORKS, YE MIGHTY, AND DESPAIR!
 These are the parts for the guns of my new Stormtalon Gunship. Magnetized. Fully Modular. Behold the madness below.
 To the left, the exterior casing meant for the Lascannon and Heavy Bolter. To the right, the interior casing, which will be permanently glued to the side of the Stormtalon. The magnets make them fit together.

 Above, the fully assembled Gun weapon pod, held together with magnets. Below, see a different shot of the Gun pod exterior, with a magnet puttied to be behind the hole where the Lascannon or Heavy Bolter can go.

 Above, magnets were added to the Lascannon and Heavy Bolter Bitz. Below, see that the magnets are strong enough to hold the gun pod aloft BY THE LASCANNON. This won’t work when attached to the final ship, obviously, but it will keep the gun in place during a game.

 Above, the interior of the gun pod again, with back views on the Lascannon and Heavy Bolter ammo feeds. Below, the magnet inside the pod is strong enough to hold the feeds on securely.

 Above, the pod interior with the Missile exterior attached. The missile exterior has two large magnets which join to smaller magnets in each of the missile pod types. Below, each type of missile pod, held together by magnets.
FINALLY, a masterpiece of magnetic engineering:

 Above, the flying stand, with a high-gauss magnet (stronger than normal rare earth magnets) and the interior of the Stormtalon with two very large magnets. Below, see that the flying stand is held aloft securely, making in-game movement a breeze.
I initially tried four smaller magnets in the flying stand, but if did not hold at all. The magnets were competing. This explains the damage to the top of the flying base, which will be hidden during a game.
Next: Painting the Stormtalon and then Combi-Grav Sternguard! The Updatening for 6th ed continues!
Tactical and Bike Grav Weapons!
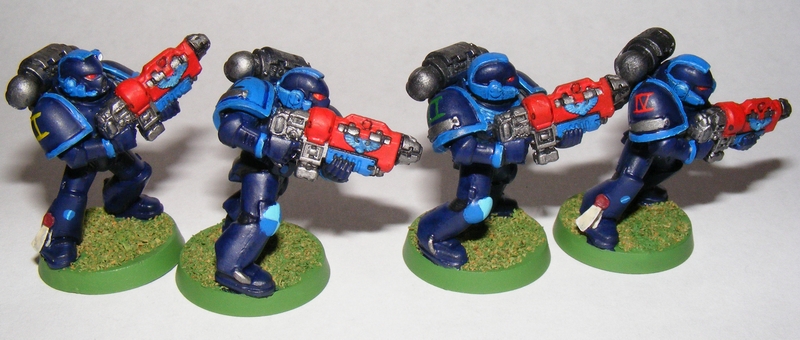

My first steps into updating the Azure Flames for 6th ed, tactical squads and bikes can now take Grav Guns.
Next: a Stormtalon, ten Sternguard with Combi-Gravs, and various sergeants with Grav Pistols and power weapons, including some Power Mauls that I desperately lack.
On My Plate: 1/5/14
 I have so many projects that I’m working on that I can’t really decide which to do, so hopefully laying them all out will let e get perspective.
-Battlefleet Gothic Necrons: Must come up with a paint scheme and paint. I’m thinking Gold with green power pathways that have “pulses” of energy in a lighter green.
-Battlefleet Gothic Tau Kor’Or’Vesh: Another scheme and paint. Perhaps Farsight Enclave? Maroon and grey look good together.
-Azure Flames Grav Project: I have four tactical marines and two magnetic biker arms to complete. After that, ten Sternguard veterans with Combi-Gravs. Yes, ten. Suck it superheavies and giant monstrous creatures.
-Blood Bowl: The Grimfang Scrappaz coach is partially done, as are assistant coaches. I need to do a few cheerleaders and then paint them all. I also need to do an Apothecary and Bloodweiser Babes…
-Epic: Finish painting Azure Flames, finish painting Ork 3000 point teaching list, finish Lost and the Damned Chaos Altar conversions, build and paint Eldar, and find two of the new version of the Revenant Titan for the Eldar. Last ones on ebay went for $150 for the pair.
-Necromunda: Hired Guns are a priority if there’s going to be a campaign at AFK, and I also have Razor and the Scumettes to paint…
-Saratogan 58th: Still need a viable 1500 point list and/or allied detachment to take with the Azure Flames. Note sure what I want.
-WAAAAGH! Smartyskull: Still need to paint half the stuff and find ways to improve the case situation, some stuff is getting dinged.
-Fantasy and Warmachine: On hold
Based on the above, I think I’m going to work on the Flames. They are my main army, and grav weapons are FUN.
Pre-Xmas Batrep with Lexington!
I had played a spectacular game with my old buddy Lexington before xmas. However, due to an ice storm, I didn’t get to post about it till now. Time for an old school Azure Flames vs. Orks battle report! (Lexington plays Orks but could not haul his collection from Minneapolis, so he borrowed WAAAAGH! Smartyskull!) Here’s out 1500 point breakdown:
Bozeman – Azure Flames
-Leonidas, captain of the 1st Company (counts as Vulkan He’Stan)
-Ironclad Dreadnought with a Heavy Flamer, Chainfist, and Ironclad Launchers, in a Drop Pod
-Tactical Squad x10, Veteran Sergeant, Master crafted Power Fist, Bolter-Flamer, Flamer, Multi-melta, in a Drop Pod
-Tactical Squad x10, Veteran Sergeant, Master crafted Power Fist, Bolter-Flamer, Flamer, Multi-melta, in a Rhino with Extra Armour
-Scout Squad x5, with bolters, sergeant has a Master Crafted Bolter (why not?)
-Land Speeder with Heavy Flamer and Multi-Melta
-Land Speeder with Heavy Flamer and Multi-Melta
-Land Speeder with Heavy Flamer and Multi-Melta
-Land Raider Crusader with Multi-Melta and Extra Armour
-Thunderfire Cannon, Techmarine Servo Arm is Master Crafted.
———————————————————————————-
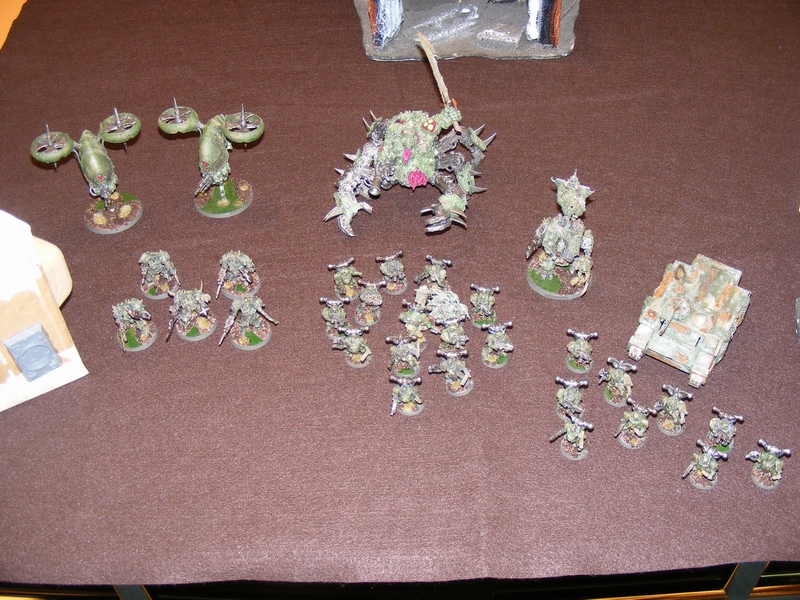
Lexington – WAAAAAGH! Smartyskull!
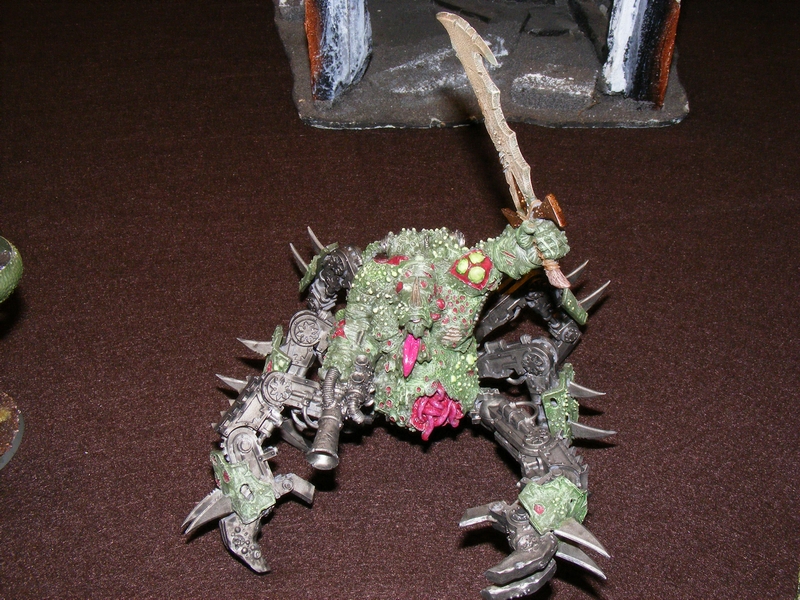
-Big Mek with Kustom Force Field, Burna, Attack Squig, Bosspole, and ‘eavy Armour
-Burna Boyz x11
-Battle Wagon with Deff Rolla, and 3x Big Shootas
-Nob Squad x8, Bikes, Painboy, Grot Orderly, Power Klaw x4, Big Choppa x 3, one bosspole and a WAAAAGH! banner.
-Ork Shoota Boyz x12, Nob, Power Klaw, ‘eavy Armour (Nob only), Bosspole, Big Shoota, Stikkboms, in a Trukk with a Red Paint Job, Armour Plates, and a Reinforced Ram
-Ork Shoota Boyz x12, Nob, Power Klaw, ‘eavy Armour (Nob only), Bosspole, Big Shoota, Stikkboms, in a Trukk with a Red Paint Job, Armour Plates, and a Reinforced Ram
-Ork Shoota Boyz x12, Nob, Power Klaw, ‘eavy Armour (Nob only), Bosspole, Big Shoota, Stikkboms, in a Trukk with a Red Paint Job, Armour Plates, and a Reinforced Ram
————————————————————————–
Setup: Hammer and Anvil (each player has a short table edge and can deploy up to 24″ away from it)
Mission: The Emperor’s Will (each player has one objective in their own table 1/2)
Here’s out board, courtesy of the fine folks at AFK games:
 In the above picture, Lexington placed his objective behind the three tiered gray hill on the left, while I placed mine in the dark gray ruins on the far right.
Lexington set up his whole force right on the 24″ line, ready to charge in. In the pic below, the Nob Bikers are farthest from the camera hidden by the hill.
 I set up a tactical squad in my objective building, the Thunderfire Cannon in the tan ruins. Leonidas joined the scouts and embarked in the Land Raider Crusader. The Land Speeders spread out to maximize options. The Tatsquad’s rhino is behind the building. Drop pods are, of course, in reserve.

Initiative not seized.
Turn 1 – Lexington
The Blue Trukk (the Red paint Job is underneath, remember?) backs up and secures the Ork objective, while the Battlewagon, red trukk, and yellow trukk go right (from Lexington’s POV) to avoid the Land Raider. The Nob Bikers swarm around the yellow building. They put out a lot of fire against a Land Speeder, doing 2 glancing hits which were jink saved.
 Reverse course! There’s a Land Raider over there!
 Always keep your eyes on the prize.
Turn 1 – Bozeman
The Ironclad Dreadnought arrives, fires, its Meltagun at the Battlewagon Rear Armour, but a Kustom Force Field save denies the penetrating result. The Thunderfire Cannon wrecks the Blue Trukk, and 10 orks survive. The Land Raider rolls forward and manages to explode the Red Trukk, killing all but 6 orks aboard, who are pinned. The Tactical Squad’s Rhino plugs the hole to the right of the yellow building, and two land speeders move up and put 3 wounds on the Nob Bikers, killing one.
 HEY GUYS. HOW’S IT GOING?
 Zoom!
Zoom!
Turn 2 – Lexington
The Nob Bikers, blocked by the rhino to the right, move left, and assault a Land Speeder, killing it. The Battlewagon advances and 12 flame templates from within put one glance on the other land speeder.
 Yum yum! Land Speeders iz good eatin!
Turn 2 – Bozeman
Tactical Squad in Drop Pod arrives, splits into two combat squads. One, with 4 bolters and a Multi-Melta gets a lucky snap shot on the rear of the Yellow Trukk, causing it to Kareen right into them and explode! No Marines die, and the surviving Orks pass their Pinning Test. The other combat squad drops 2 flamers on the orks from the blue trukk, which burns them all to death. The hurt land speeder, the Thunderfire Cannon, and the Tactical Squad kill all but 3 of the Nob Bikers, including the Painboy. Leonidas and the Scouts, along with the third Land Speeder which went around the red building, kill all the orks from the Red Trukk except the Nob, who breaks and flees.
 Pictured yellow trukk has just finished Kareen move, and explodes right next to the Tactical Marines!
 The Nob Bikers are in a hurt locker!
Turn 3 – Lexington
The remaining orks from the Yellow trukk assault the combat squad with the Multi-Melta. They kill all the bolters, leaving the Multi-Melta who passes a Ld 4 check and stays! Good man! The Nob Bikers assault the marines in the objective building. One Nob Biker dies and they kill a bunch of space marines, who make their check and stay put. Deff Rolla rolls poorly to attack the Rhino which is unaffected.
 Last man standing!
 Smash ’em up, ladz!
 Er… was it supposed to go “klunk?”
Turn 3 – Bozeman
5 man combat squad moves up to secure Ork objective. The Ironclad Dreadnought assaults the Orks from the Yellow Trukk to try to save the tactical Multi-Melta. The Nob and a few orks die, but they don’t flee! The Tactical Squad continue to fight the Nob Bikers, and with one wound apiece, draw combat. The only land speeder left risks landing in the building, and blows up the Battlewagon, killing all inside but the Big Mek, and 4 Burnas.
 The fight continues!
 TIME FOR HUGS.
 Kaboom! There goes the Battlewagon!
Turn 4 – Lexington
Big Mek and Burnas try to burn down the Land Speeder, to no avail. A few good rolls wins the Nob Biker/Tatsquad fight for the Space Marines. The lone Nob Biker flees and is cut down! The valiant Multi-Melta in the fight with the Yellow orks dies, but the Ironclad avenges him, killing all but one ork who flees!
 Uh oh…
 Building cleared!
At this point, Lexington conceded. Victory for the Space Marines!
—————————————————————————————–
Afterthoughts: Due to my personal lack of aircraft, neither side had any which provided an old-school essence for the modern 6th ed game. I designed both lists, and the Orks were designed to cluster up by the Battlewagon and rely on Kustom Force Field cover saves. This can be overcome with massed fire, as was seen above. The Nob Bikers were great, but are no longer the invincible 5th edition death star thanks to better wound allocation rules in 6th. I got lucky that Lexington kept the Power Klaws near the front of the Nob Bikers, so that those were the first ones removed. Had one Power Klaw gotten into the fight with the Tactical marines, they would not have survived. Vulkan He’Stan and the Salamander rules make a melta/flamer list INSANE. Re-rolling to wound turned the Blue ork squad into crispy critters, and melta re-rolls saved my butt more often than not. All in all, a fun game.
Next: Grav guns on Space Marines and Bikes, or perhaps Blood Bowl Ork auxilliary models such as Cheerleaders and Assistant Coaches!
40K time at AFK Games in Holt!
Played a game at AFK games in Holt. Time for a battle report! First time using the new codex too, so we’ll see if I miss running away. I played against Eric, an old friend from my college days who I reconnected with.
Bozeman – Azure Flames
Leonidas, captain of the 1st Company (counts as Vulkan He’Stan)
Tactical Squad x10, Veteran Sergeant, Master Crafted Power Fist, Bolter-Flamer, Flamer, Multi-Melta in a Drop Pod
Tactical Squad x10, Veteran Sergeant, Master Crafted Power Fist, Bolter-Flamer, Flamer, Missile Launcher with Flakk Missiles in a Rhino with Extra Armour
Scouts x5 with a Master Crafted Bolter on the sergeant in a Land Speeder Storm with a Multi Melta
Ironclad Dreadnought with the Meltagun replaced with a Heavy Flamer, Ironclad Launchers, in a Drop Pod
Land Speeders x3 with Multi-Meltas and Heavy Flamers
Devastator Squad x10, 4 Missile Launchers with Flakk Missiles, Master Crafted Bolter on the sergeant, in a Rhino with Extra Armour
—————————————————————
Eric – Imperial Guard
Command Squad x5 with a Power Sword on the commander and 4 grenade launchers in a Chimera
Veterans x10 in carapace armour with 3 plasma guns in a Chimera
Veterans x10 in carapace armour with 3 plasma guns in a Chimera
Vendetta Gunship with 3 TL Lascannons
Vendetta Gunship with 3 TL Lascannons
Leman Russ Battle Tank
Leman Russ Battle Tank
Leman Russ Battle Tank
Storm Troopers x10 with 2 Meltaguns, Grav Chutes, Power Sword on sergeant
Ratling Snipers x8
——————————————————-
Setup: Vanguard Strike (opposite corners)
Mission: The Scouring (6 random objectives, fast attack selections can hold objectives)
—Primary objectives (see below) were:
—-4 point objective in central red building
—-3 point objective in yellow building with aquilla doors on far side of board, to the left
—-3 point objective near bronze Space Marine statue
—-2 point objective in forest in the upper right
—-2 point objective in the open between the red building and the forest
—-1 point objective in the gray building near the camera
Imperial Guard Setup: Eric put 2 Leman Russes on the left side, A chimera full of veterans near the 3 point yellow building, the red Leman Russ next to the command chimera near the far short board edge, and then the last chimera closer to my edge. All others were in reserve. After I deployed, he put the Ratlings in the red building.
Azure Flames Setup: I put 1/2 of the tatsquad with the flakk missile in the 1 point objective building. I put the Devastator squad in the building next door. Leonidas joined the 2nd 1/2 of the tatsquad in their rhino. The Land Speeders hid behind the stone wall near the camera. All others in reserve.
INITATIVE STOLEN!!!!!!!!! (apologies that I forgot to take a picture of the setup before 1st turn)
-Turn 1: Azure Flames
The Ironclad Dreadnought in the Drop Pod dropped next to the 3 point building. Land Speeders moved forward and went flat out to tempt and distract the Leman Russes. The Rhino with the 1/2 tatsquad and Leonidas move up the right side. Missile Launchers fire at the tan Leman Russ and penetrate, giving a Crew Shaken result.

-Turn 1: Imperial Guard
The veterans pour out of their Chimera and recieve a Bring It Down! order, get some lucky shots at the rear of the Ironclad Dreadnought and destroy it. Tan Leman Russ attempts to ram one of the Land Speeders, but it makes its Jink save. Camo Leman Russ fires at a Land Speeder and destroys it. Red Leman Russ moves up and fires at the land speeders but misses. Snipers snipe the land speeders but do nothing. The other Chimera puts a glance on the rhino.

-Turn 2: Azure Flames
The Tactical squad arrives via drop pod and splits into 2 combat squads. Lucky Snap Fire from the Multi Melta kills the Veteran’s Chimera. Leonidas’ Heavy Flamer and the Sergeant’s bolter-flamer turn the veterans into crispy critters without the need for any of the bolters. Land Speeders melta the Camo Leman Russ to bits. Devastators immobilize the tan Leman Russ. Not shown in the picture, the Scouts in the Land Speeder Storm arrive and goes flat out. Drop Pods use Storm Bolters to kill a veteran or two.

-Turn 2: Imperial Guard
Both Vendettas arrive. The unpainted one blows up the Land Speeder Storm and two scouts die in the explosion. They do not break. The Red Vendetta puts a Crew Stunned result on one of the Land Speeders. Snipers shoot at the Tactical marines, cause no casualties. The commander and his grenade launcher pals pop out, and kills a space marine. The Leman Russ tries to destroy more land speeders, but they make their jink saves.

-Turn 3: Azure Flames
The three remaining scouts assault the tan Leman Russ, and their Krak Grenades destroy it. Flakk Missiles from the Devastators put 2 glances on the red Vendetta. The flakk missile from the tactical squad misses. One half of the tactical squad advances on the 2 point forest. Vulkan and the tactical squad burn the Plasma veterans and the commander, leaving only one grenade launcher, who does not break. The unhurt land speeder bakes the red Leman Russ.

-Turn 3: Imperial Guard
The Storm Troopers fail to arrive from reserves for a 2nd turn. Unpainted Vendetta kills one of the missile launcher devastators. Snipers, tanks, and the Red Vendetta finish off the tactical squad with Leonidas, and the other squad with the multi melta, except for one tactical marine with a flamer.

-Turn 4: Azure Flames
The Land Speeders turn around and use their Heavy Flamers to annihilate the Ratling Snipers. The 4 pictured there actually died, Eric just forgot to remove them. The Devastators and tatsquad with flakk missiles put 1 penetrate with crew stunned on then unpainted vendetta, which will cause it to fly off the board next turn. The remaining flamer marine runs toward the objective. The scouts secure the space marine statue. 5 bolter tactical marines embark in the rhino which drives them to the forest objective.

-Turn 4: Imperial Guard
Last chimera kills one Land speeder. Red Vendetta goes into hover mode, kills last tactical marine holding 3 point objective. Storm Troopers fail to come in. Unpainted vendetta flies off board.

-Turn 5: Azure Flames
Land speeder kills the red vendetta because it is in hover mode.

-Turn 5: Imperial Guard
Last chimera fails to kill the land speeder. Unpainted vendetta comes in hovering, shoots land speeder and misses, which is unlikely. Stormtroopers arrive, blast the Drop Pod and do nothing.

-Turn 6: Azure Flames
Tactical Bolters vacate the rhino, and it tank shocks the storm troopers. The Storm Troopers fail their morale check and flee. The Land Speeder kills the unpainted Vendetta.

-Turn 6: Imperial Guard
Turn not pictured. Chimera kills the land speeder. Game ends.
Final score:
-Azure Flames: 8
-Imperial Guard: 2
————————————————————————
Analysis: WOW Vulkan makes a customized army very cool. I won that game because my Melta weapons re-rolled misses. I still need some aircraft, but flakk missiles make a suitable option. I had forgotten how cool Imperial Guard orders were, and though Eric only used one, it made a huge difference. It was a good game. The Land Speeders soaked up a huge amount of fire.
————————————————————————-
Other players were hanging out. Four players were having a four-way game. N.W.P. in the upper left played Guard, Granodd in the lower left played Necrons, Jacob in the lower right played Nids and Mr. Smith in the upper right played Space Marines. It was a huge game.

Hornblower and Bill played a game. Hornblower’s Eldar are immaculate and Bill’s Slaaneshi Chaos Daemons are fantastic.


That’s all for now. Several super-secret projects in the mix! Also, look out for another battle report coming soon from White Lake!
Highland Hijinx: the end of the Immortal campaign!


Highland’s last game session was an absolute blowout. First, Stephen had some new minis painted, including some kickass Forge World stuff. Those are the first pics in the gallery. Then, to end the Immortal campaign, we had a tournament style playoff. My first game was against Eldar. With Antonius’ new super teleporting Wargear, I made a Drop army. I took it against some Eldar first, who whooped me hard. I still won due to a time limit making the game finish early as I was sitting on two objectives. Then, against Dominik’s Tau I fought a solid fight. Dominik did not keep his eyes on the prize and I won that game too. Hey kids! Objectives matter.
Lastly, everyone earned (or purchased) raffle tickets for some stuff and gift certificates. Benefits go towards making some new terrain for the club. I didn’t win but I threw in $20 and even donated some old terrain from the Big Game including our “Orbital Defense Plasma Cannons” which were fancy looking cheap waterguns cut off, glued to a foam ball and spraypainted.
Next, look forward to Paint Night in Fowlerville!
Fowlerville Battle Report: Azure Flames vs. Ultramarines 1500
This past Thursday I visited the fine folks at Game Links in Fowlerville MI. They have a pretty quality store with some pretty friendly players, including one gentleman who I used to play Warmachine with back in the day. They have a vibrant community of Magic the Gathering and Pathfinder. They had a fledgling 40K community, but they got off the ground several months before 6th ed hit, and many of the younger players did not want to drop $70 on a new book.
Further complicating things, 40K is supposed to be every OTHER Thursday, and I came on an off day. Luckily, one of the regular 40K players by the name of James had his Ultramarines ready to go, so we threw down a 1500pt game. Here’s the details:
Bozeman – Azure Flames
-Chapter Master Liam Perseus, Terminator Armour, Lightning Claw, Storm Shield, Aux Grenade Launcher
-Terminator Assault Squad X 5, THSS
-Land Raider Redeemer, Extra Armour, Multi-Melta
-Tactical Squad X 10, Powerfist, Meltagun, Missile Launcher in a Drop Pod
-Tactical Squad X 10, Powerfist, Meltagun, Missile Launcher in a Rhino, Extra Armour
-Ironclad Dreadnought, Chainfist in a Drop Pod
-Land Speeders X 3, Multi-Meltas
——————-
James, Ultramarines
-Chaplain, Terminator Armour
-Librarian, Storm Bolter (Psychic powers: Haemorhage, Flame Breath)
-Tactical Squad X 10, Power Axe, Plasma Pistol, Flamer, Heavy Bolter in a Rhino
-Scout X 10, Sergeant Telion, Heavy Bolter, Sniper Rifles X 8
-Terminator Assault Squad X 5, THSS X 2, LC X 3
-Land Raider Crusader, Storm Bolter, Multi-Melta, Extra Armour
-Sternguard X 10, Pair of LC, Combi-Melta X5, in a Drop Pod
————–
Deploy: Hammer and Anvil (short board edges) Mission: Crusade (5 objectives). We forgot to use Mysterious Objectives. Oh well.
I won setup and chose to go first. Seize Initiative failed. Here’s the setup before turn 1:
 Turn 1 Azure Flames
Land Speeders fly up 12″, do 1 glance to the Land Raider. Tactical Squad deploys into the hill. Land Raider and Rhino move up and pop smoke. Drop pod drops behind the Land Raider, is very menacing yet ineffectual.
 Turn 1 Ultramarines
Land Raider moves up, shoots 1 Land Speeder to death. Rhino moves, pops smoke. Sternguard drop in, do 3 casualties to the Tatsquad which breaks. Snipers fire at Land Speeders who make INCREDIBLE jink saves. and ignore all 3 glancing results. I forgot to photgraph this turn until I dropped in my drop pod at the beginning of Turn 2, so pretend that tatsquad is not there.

Turn 2 Azure Flames
Tatsquad runs off the table, gaining First Blood to the Ultramarines! Tatsquad in Drop Pod comes in behind the Scouts and shoots all but three to death, including an amazing run of Look Out Sir rolls by Telion. Land Raider move up, disgorges Terminators, who WASTE the Sternguard in close combat, including the Librarian who was killed by Chapter Master Perseus in a Challenge. Sternguard sergeant is only survivor, breaks. Land Speeders put one more glance on the Land Raider. Ironclad fails to charge.
 Turn 2 Ultramarines
Terminators with Chaplain jump out and charge the Ironclad, knocking off its Chainfist but losing 2 LC Termies. Tatsquad jumps out of Rhino, moves 6, and gets a great Charge roll to charge the Azure Flames Tatsquad. Incredibly poor rolling makes this fight a tie. Land Raider moves, limiting its firepower and only puts one more glance on the Land Speeders.
 Turn 3 Azure Flames
Chapter Master and Termies embark into Land Raider, speed away. Dreadnought fight continues, one LC Terminator dies. Land Speeders melta the Land Raider to death. Tatsquad fight continues, Ultramarines lose but are caught and do not run away due to ATSKNF.
 Turn 3 Ultramarines
Tatsquad fight continues, Azure Flames lose but hold. Dreadnought is destroyed but kills one THSS Terminator, leaving only one and the Chaplain. Scouts kill 2nd Land Speeder with a glance. No picture of this turn.
Turn 4 Azure Flames
Land Raider moves 6, disgorges Termies who get a HUGE 7″ charge against the Scouts in the building (considering charging into terrain). They eat the scouts, overrun one whole inch. Tatsquad fight a draw again.
 Turn 4 Ultramarines
Chaplain and last Terminator run toward the Tatsquad fight. Rhino TANK SHOCKS Terminators who move out of the way. Azure Flames are killed down to the Sergeant who breaks, is caught, and stays due to ATSKNF.
 Turn 5 Azure Flames
Terminators charge the Tatsquad fight, kill all Ultramarines including Power Axe Sergeant by Chapter Mater in a Challenge. Massed fire kills the Ultramarine THSS Terminator and then a lucky Melta shot from the Land Speeder kills the Chaplain outright. Split Multi-Melta from the Land Raider kills the Rhino. End of game.
 Closing thoughts:
-Librarians need an Invulnerable Save. This is why I run a Librarian with a Storm Shield.
-James had some pretty bad rolls in key times. I heard that in baseball you lose 1/3 of your games, you win 1/3, but it’s what you do with the other 1/3 that count. This was a game won and lost on a few bad dice rolls. James should have been able to kill the Land Speeders and the Tactical Squad. Their improbable survival kept me in the game.
-I’m still getting used to 6th ed Disembark rules. I think it’s a little weird but it works better than the old 3rd ed where you had to get all models out and THEN move. It saves a bit of time, especially if you “fudge” the guys in the back.
-Challenges are neat, but can be treacherous. I think James made the right move not challenging my Tatsquad sergeant in the Tatsquad fight. We would have probably killed each other, and then the fight would have taken longer. But, challenges SAVED some of my Terminators in the Sternguard and Tatsquad fights by removing pesky power weapons at Initiative 5.
-James drove away from my Ironclad. Though I love the tactic of dropping this guy on the enemy, I need to drop in FRONT of them so they either have to deal with me or go around me. Going behind is an invitation to get ignored.
-I still need to get Aircraft.
——————–
Next: a battle report from Highland!