Pre-Xmas Batrep with Lexington!
I had played a spectacular game with my old buddy Lexington before xmas. However, due to an ice storm, I didn’t get to post about it till now. Time for an old school Azure Flames vs. Orks battle report! (Lexington plays Orks but could not haul his collection from Minneapolis, so he borrowed WAAAAGH! Smartyskull!) Here’s out 1500 point breakdown:
Bozeman – Azure Flames
-Leonidas, captain of the 1st Company (counts as Vulkan He’Stan)
-Ironclad Dreadnought with a Heavy Flamer, Chainfist, and Ironclad Launchers, in a Drop Pod
-Tactical Squad x10, Veteran Sergeant, Master crafted Power Fist, Bolter-Flamer, Flamer, Multi-melta, in a Drop Pod
-Tactical Squad x10, Veteran Sergeant, Master crafted Power Fist, Bolter-Flamer, Flamer, Multi-melta, in a Rhino with Extra Armour
-Scout Squad x5, with bolters, sergeant has a Master Crafted Bolter (why not?)
-Land Speeder with Heavy Flamer and Multi-Melta
-Land Speeder with Heavy Flamer and Multi-Melta
-Land Speeder with Heavy Flamer and Multi-Melta
-Land Raider Crusader with Multi-Melta and Extra Armour
-Thunderfire Cannon, Techmarine Servo Arm is Master Crafted.
———————————————————————————-
Lexington – WAAAAAGH! Smartyskull!
-Big Mek with Kustom Force Field, Burna, Attack Squig, Bosspole, and ‘eavy Armour
-Burna Boyz x11
-Battle Wagon with Deff Rolla, and 3x Big Shootas
-Nob Squad x8, Bikes, Painboy, Grot Orderly, Power Klaw x4, Big Choppa x 3, one bosspole and a WAAAAGH! banner.
-Ork Shoota Boyz x12, Nob, Power Klaw, ‘eavy Armour (Nob only), Bosspole, Big Shoota, Stikkboms, in a Trukk with a Red Paint Job, Armour Plates, and a Reinforced Ram
-Ork Shoota Boyz x12, Nob, Power Klaw, ‘eavy Armour (Nob only), Bosspole, Big Shoota, Stikkboms, in a Trukk with a Red Paint Job, Armour Plates, and a Reinforced Ram
-Ork Shoota Boyz x12, Nob, Power Klaw, ‘eavy Armour (Nob only), Bosspole, Big Shoota, Stikkboms, in a Trukk with a Red Paint Job, Armour Plates, and a Reinforced Ram
————————————————————————–
Setup: Hammer and Anvil (each player has a short table edge and can deploy up to 24″ away from it)
Mission: The Emperor’s Will (each player has one objective in their own table 1/2)
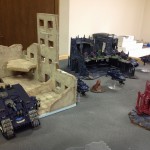
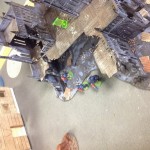
Here’s out board, courtesy of the fine folks at AFK games:
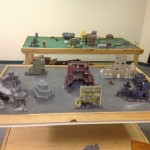 In the above picture, Lexington placed his objective behind the three tiered gray hill on the left, while I placed mine in the dark gray ruins on the far right.
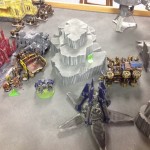
Lexington set up his whole force right on the 24″ line, ready to charge in. In the pic below, the Nob Bikers are farthest from the camera hidden by the hill.
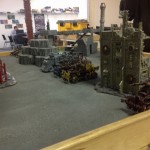 I set up a tactical squad in my objective building, the Thunderfire Cannon in the tan ruins. Leonidas joined the scouts and embarked in the Land Raider Crusader. The Land Speeders spread out to maximize options. The Tatsquad’s rhino is behind the building. Drop pods are, of course, in reserve.
Initiative not seized.
Turn 1 – Lexington
The Blue Trukk (the Red paint Job is underneath, remember?) backs up and secures the Ork objective, while the Battlewagon, red trukk, and yellow trukk go right (from Lexington’s POV) to avoid the Land Raider. The Nob Bikers swarm around the yellow building. They put out a lot of fire against a Land Speeder, doing 2 glancing hits which were jink saved.
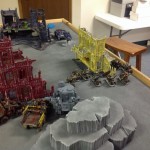 Reverse course! There’s a Land Raider over there!
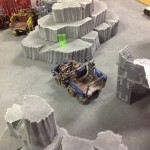 Always keep your eyes on the prize.
Turn 1 – Bozeman
The Ironclad Dreadnought arrives, fires, its Meltagun at the Battlewagon Rear Armour, but a Kustom Force Field save denies the penetrating result. The Thunderfire Cannon wrecks the Blue Trukk, and 10 orks survive. The Land Raider rolls forward and manages to explode the Red Trukk, killing all but 6 orks aboard, who are pinned. The Tactical Squad’s Rhino plugs the hole to the right of the yellow building, and two land speeders move up and put 3 wounds on the Nob Bikers, killing one.
Turn 2 – Lexington
The Nob Bikers, blocked by the rhino to the right, move left, and assault a Land Speeder, killing it. The Battlewagon advances and 12 flame templates from within put one glance on the other land speeder.
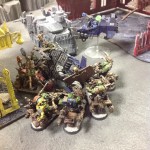 Yum yum! Land Speeders iz good eatin!
Turn 2 – Bozeman
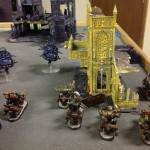
Tactical Squad in Drop Pod arrives, splits into two combat squads. One, with 4 bolters and a Multi-Melta gets a lucky snap shot on the rear of the Yellow Trukk, causing it to Kareen right into them and explode! No Marines die, and the surviving Orks pass their Pinning Test. The other combat squad drops 2 flamers on the orks from the blue trukk, which burns them all to death. The hurt land speeder, the Thunderfire Cannon, and the Tactical Squad kill all but 3 of the Nob Bikers, including the Painboy. Leonidas and the Scouts, along with the third Land Speeder which went around the red building, kill all the orks from the Red Trukk except the Nob, who breaks and flees.
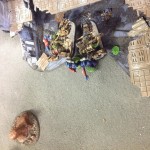
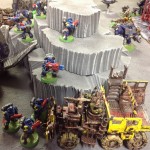 Pictured yellow trukk has just finished Kareen move, and explodes right next to the Tactical Marines!
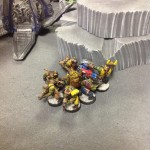
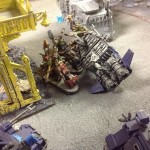 The Nob Bikers are in a hurt locker!
Turn 3 – Lexington
The remaining orks from the Yellow trukk assault the combat squad with the Multi-Melta. They kill all the bolters, leaving the Multi-Melta who passes a Ld 4 check and stays! Good man! The Nob Bikers assault the marines in the objective building. One Nob Biker dies and they kill a bunch of space marines, who make their check and stay put. Deff Rolla rolls poorly to attack the Rhino which is unaffected.
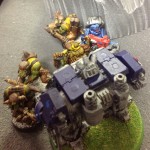
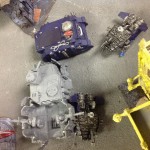 Er… was it supposed to go “klunk?”
Turn 3 – Bozeman
5 man combat squad moves up to secure Ork objective. The Ironclad Dreadnought assaults the Orks from the Yellow Trukk to try to save the tactical Multi-Melta. The Nob and a few orks die, but they don’t flee! The Tactical Squad continue to fight the Nob Bikers, and with one wound apiece, draw combat. The only land speeder left risks landing in the building, and blows up the Battlewagon, killing all inside but the Big Mek, and 4 Burnas.
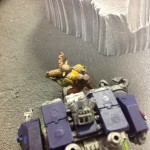
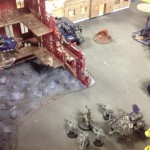 Kaboom! There goes the Battlewagon!
Turn 4 – Lexington
Big Mek and Burnas try to burn down the Land Speeder, to no avail. A few good rolls wins the Nob Biker/Tatsquad fight for the Space Marines. The lone Nob Biker flees and is cut down! The valiant Multi-Melta in the fight with the Yellow orks dies, but the Ironclad avenges him, killing all but one ork who flees!
At this point, Lexington conceded. Victory for the Space Marines!
—————————————————————————————–
Afterthoughts: Due to my personal lack of aircraft, neither side had any which provided an old-school essence for the modern 6th ed game. I designed both lists, and the Orks were designed to cluster up by the Battlewagon and rely on Kustom Force Field cover saves. This can be overcome with massed fire, as was seen above. The Nob Bikers were great, but are no longer the invincible 5th edition death star thanks to better wound allocation rules in 6th. I got lucky that Lexington kept the Power Klaws near the front of the Nob Bikers, so that those were the first ones removed. Had one Power Klaw gotten into the fight with the Tactical marines, they would not have survived. Vulkan He’Stan and the Salamander rules make a melta/flamer list INSANE. Re-rolling to wound turned the Blue ork squad into crispy critters, and melta re-rolls saved my butt more often than not. All in all, a fun game.
Next: Grav guns on Space Marines and Bikes, or perhaps Blood Bowl Ork auxilliary models such as Cheerleaders and Assistant Coaches!

Leave a Reply