Convoy – Chaos vs. Imperials
Stephen and I finally got to play the Convoy mission we’ve wanted to for more than a month. Life kept getting in the way. Convoy is the weirdest mission, because it’s all random.
Convoy – Mercurial Zone
————————————————————–
Defender: Stephen – Imperial Navy
-Dauntless Light Cruiser (torpedoes)
-Dauntless Light Cruiser (lances)
-Firestorm x3
-Cobra x2
-Transport x2
-Transport x2
-Transport x2
-Heavy Transport
————————————————————–
Attacker: Bozeman – Chaos 13th Black Crusade (7 rolls on the Convoy Attacker Chart)
-Slaughter class Cruiser Swiftboat of Truth, Chaos Lord +1Ld
-Slaughter class Cruiser Traitor’s Blade, Chaos Lord +1Ld
-Infidel x3, Rampagers
-Idolater x3, Oathbreakers
-Idolater x2, Followers of Darkness
-Deadfall Torpedo or Attack Craft Cluster x2
-Deadfall Torpedo or Attack Craft Cluster x1
————————————————————–
Setup:

————————————————————–
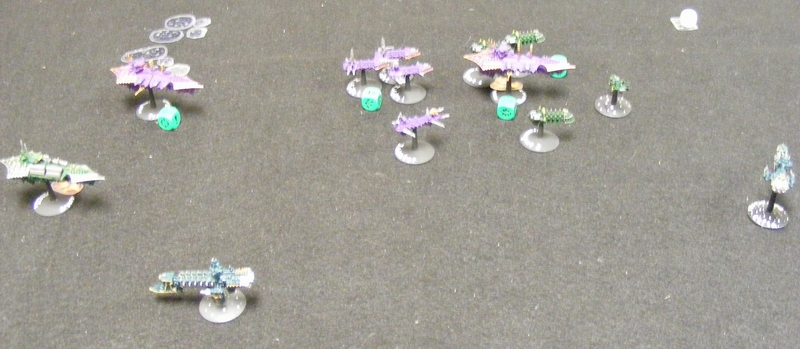
Turn 1 – Imperial Navy
At the beginning of the turn, we rolled for Solar Flares and it went off! There were no ships on the board, so nothing happened. Stephen moved his entire fleet on. Contact Marker #7 revealed itself as a Deadfall Torpedo wave of 8! It was shot and destroyed before it could endanger the fleet.

Turn 1 – Chaos
Marker 1 is revealed as the Traitor’s Blade which promptly fails to go on All Ahead Full, and merely advances toward the enemy.

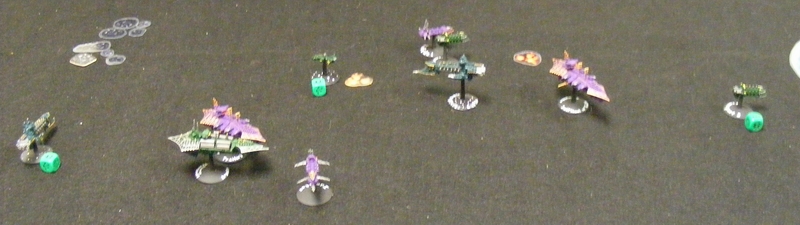
Turn 2 – Imperial Navy
All of the fleet except for the Cobras go on All Ahead Full. Contact markers near the fleet reveal as the Swiftboat of Truth and the Followers of Darkness. Cobras fire torpedoes as the Swiftboat of Truth, doing one damage.

Turn 2 – Chaos
Because the enemy was on special orders, two markers reveal as the Rampagers and Oathbreakers. The fleet closes in, and two Transports are destroyed. The Heavy Transport takes one damage from torpedoes from the Rampagers. A teleport attack from the Traitor’s Blade takes out the prow weapons of the Lance Dauntless.

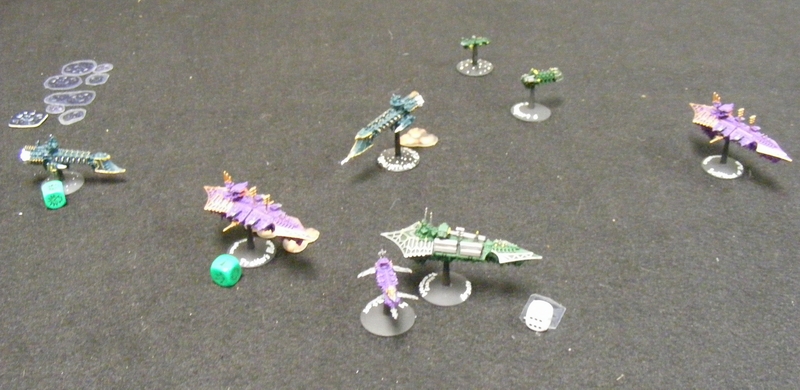
Turn 3 – Imperial Navy
Torpedo Dauntless unloads on the Oathbreakers, and poor brace saves mixed with good torpedo rolls kill all three! Transports all fire on the Followers of Darkness, but miss. The Lance Dauntless repairs its prow.

Turn 3 – Chaos
Most of the fleet fire on the Heavy Transport, crippling it. The Traitor’s Blade causes a Brace on one of the Transport squadrons. Final marker is revealed as two waves of two bombers.


Turn 4 – Imperial Navy
Due to a blast marker, the Rampagers have no shields and so Brace when fired upon by the Firestorm, which saves them. The rest of the fleet move to protect the transports.

Turn 4 – Chaos
The Swiftboat of Truth moves through asteroids, fails a Leadership check, takes 2 damage and then suffers a Hull Breach, crippling it! Semi-effective fire does one more damage to the Heavy Transport. Bombers approach the Transports.

Turn 5 – Imperial Navy
One of the Cobras suicides into the bombers, taking out a wave! The other wave hits a transport and fails dismally. The rest of the fleet continues to cover the transports.

Turn 5 – Chaos
Rampagers Reload, fire on some transports, but amazing brace saves protect them. The crippled Swiftboat of Truth goes on Lock On, but even with that does no damage. Lucky shots from the surviving Followers of Darkness kill a transport.
Turn 6 – Imperial Navy
Heavy Transport goes on All Ahead Full. Torpedo Dauntless Reloads and fires on the Traitor’s Blade, doing one damage. Remaining Cobra Reloads and kills one of the Rampagers. Lance fire from the Lance Dauntless does one damage to the Swiftboat of Truth, starting a fire!

Turn 6 – Chaos
Traitor’s Blade boards the Heavy Transport, turning it into a drifting hulk. Each surviving Rampager boards one of the Transports. One wins, but gets a Critical Hit in return and dies. The other ties! Swiftboat of Truth can’t hurt the fleeing transport.
Turn 7 – Imperial Navy
Lance Dauntless causes a Brace on the Traitor’s Blade. Transport manages to kill the last of the Rampagers! Torpedo Dauntless fires on the Traitor’s Blade, doing no damage. One transport flees past the planet.
Turn 7 – Chaos
Remaining ships kill the second to last transport. Turn not pictured. Game ceded.
————————————————————–
Convoy is rarely a balanced matchup. However, it’s what you do in a mismatch that shows what kind of decisions you can make. Splitting up can help. However, when the attacker has as much as I did, there’s not much you can do.
Next: hopefully painting and Highland!
Yeah, my only criticism of Gothic is that a game can turn one sided pretty quickly and it isn’t all that fun when it happens. This is due to the rigidity of the movement rules. Being in the wrong place early is a significant disadvantage. If there were less movement/turning penalties/restrictions, recovering from poor initial positioning could occur. However, that would also unbalance many imperial ships of the line, as broadsides is such an effective navel tactic. For the most part however, the game tries, and is largely successful, in balancing maneuverability,weapon strength, and armor. Unless you play Tau… then you’re ships are overpriced space pigs with Shitty guns. Which sucks, because it took so long to paint them that GW has stopped supporting the specialist game. 😛
Cheers!